Blog
Tutorials
Figma to React Native: The 2026 Dev Guide
Master the Figma to React Native workflow with modern AI tools. Turn your designs into production-ready apps faster with this practical 2026 step-by-step guide.

Nafis Amiri
Co-Founder of CatDoes

TL;DR: Converting a Figma design into a React Native app used to mean rebuilding every screen by hand. In 2026, AI design-to-code platforms read your Figma file and generate clean, component-based React Native code in hours instead of weeks. This guide covers how to prep your Figma file, choose between manual and automated conversion, use AI platforms end-to-end, and turn the generated code into a production-ready app.
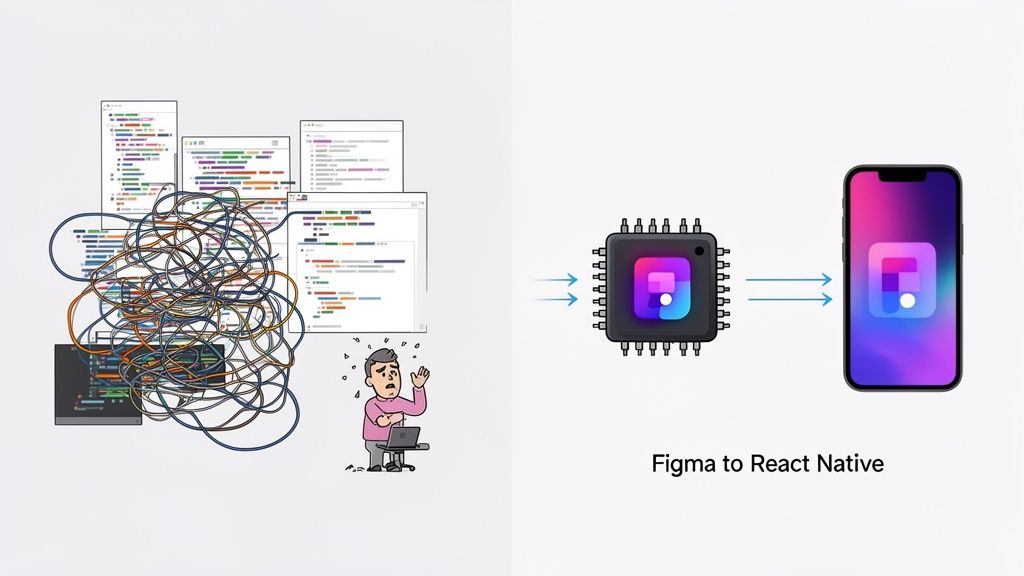
So you have a pixel-perfect Figma design and you need to turn it into a real, working React Native app. This has always been the critical, and often painful, handoff point in mobile development. It is the moment where a visual concept has to become functional code.
You can do this the old-fashioned way, with developers recreating every element by hand, or you can accelerate it dramatically with modern automated tools. This guide walks through both paths and shows you how to ship faster without sacrificing quality.
Table of Contents
The Evolving Figma to React Native Workflow
Preparing Figma Designs for a Flawless Handoff
Choosing Your Conversion Path
Using AI Platforms for End-to-End Development
Turning Generated Code Into a Production-Ready App
Common Questions About Figma to React Native
The Evolving Figma to React Native Workflow
The journey from a Figma prototype to a live app has changed more in the last couple of years than in the entire decade before. In February 2026, the old method of having developers manually translate every pixel and component feels painfully slow.
The pattern is familiar: designers hand off what they believe are final mockups, only for developers to come back days later with a list of questions about spacing, font weights, or missing component states. This back-and-forth creates a feedback loop that kills momentum and inflates budgets.
The Shift Towards Automation
Today's market demands speed and precision, which is why the conversation has shifted squarely to AI-driven automation. Modern tools now serve as a bridge between the design and development worlds, directly tackling the inefficiencies of the old manual workflow.
These tools are no longer a nice-to-have. They interpret design systems, convert layouts into clean code, and handle asset exports, freeing developers to focus on the hard parts like complex business logic and unique features.
The numbers tell the same story. The market for AI design-to-code tools is projected to grow from $4.91 billion in 2024 to $30.1 billion by 2032. That 513% increase points to an industry-wide consensus: manual conversion is no longer a viable default.
The core challenge has always been translating a designer's intent into functional code without losing fidelity. Automation solves this by creating a shared language between Figma and React Native, keeping consistency and accuracy from the start.
To see the difference clearly, here are the two approaches side by side.
Manual vs Automated Conversion at a Glance
Metric | Manual Conversion | Automated Conversion |
|---|---|---|
Speed | Slow, measured in weeks or months | Fast, measured in hours or days |
Accuracy | Prone to human error and inconsistencies | High fidelity to the original design |
Developer Focus | Recreating UI, tedious pixel-pushing | Building core logic and features |
Iteration | Slow and expensive to make changes | Quick and easy to update from design |
Cost | High development and QA overhead | Lower overall project cost |
The efficiency gains from automation are hard to ignore for any team that wants to ship quickly and reliably.
What Modern Workflows Look Like
So what does this new workflow actually look like in practice? It centers on platforms that can ingest a Figma file and generate high-quality, readable React Native code. The process usually starts with an AI analyzing the design's structure, components, and styling rules.
For example, a modern platform like CatDoes integrates design import, code generation, and live preview into a single, unified interface. This removes the gaps where errors and misinterpretations usually creep in.
Instead of a messy handoff, the entire team can move from a visual concept to a testable application in a fraction of the time. The rest of this guide walks through how to set up and master this modern workflow on your own projects.
Preparing Figma Designs for a Flawless Handoff
A clean Figma-to-React Native pipeline does not start with code. It starts in the design file. A well-organized Figma project is the single best predictor of a smooth handoff, serving as a clear blueprint for developers and AI tools alike.
You are not just creating static pictures. You are building a logical system that code can understand. This preparation phase is where you translate visual concepts into a structure that prevents ambiguity, reduces rework, and makes development run smoother.
This design-first discipline matters more than ever. Figma has become the undisputed standard, with a user base projected to hit 10 million by the end of 2025, up from 4 million in 2022. With nearly 95% of Fortune 500 companies on board, a development-ready Figma file is no longer a nice-to-have. It is a professional necessity.
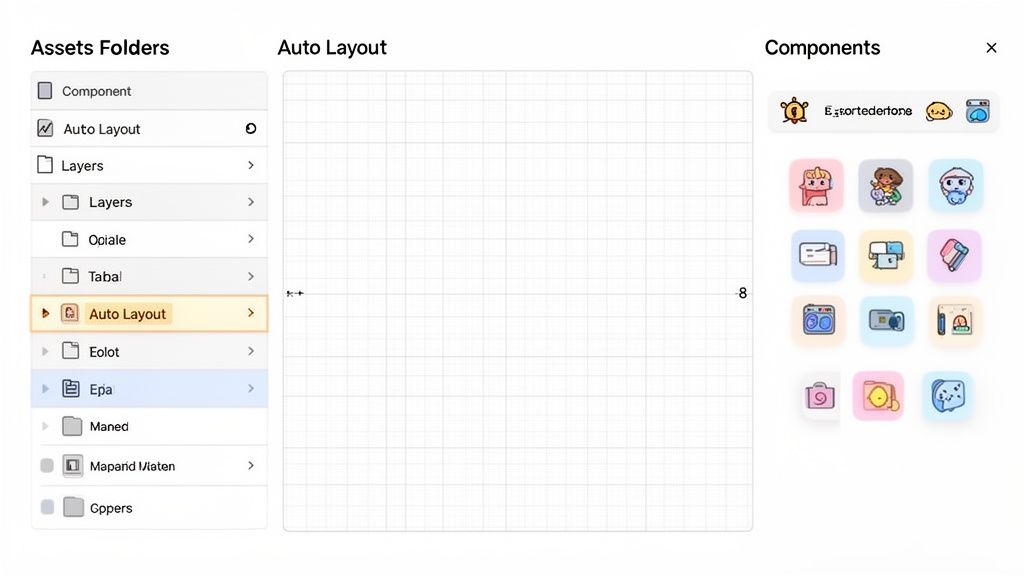
Embrace Auto Layout and Consistent Spacing
If you do only one thing, master Figma's Auto Layout. It is the design world's answer to React Native's Flexbox, defining exactly how elements respond to different screen sizes and content lengths. It forces you to think systematically.
Using Auto Layout for everything, from individual buttons to entire screens, translates directly into cleaner, more predictable CSS-in-JS. It removes the guesswork.
To back this up, you need a strict spacing system. The 8-point grid system is a strong standard where all spacing and sizing are multiples of 8 (8px, 16px, 24px, and so on). This creates visual harmony and makes implementing styling rules in React Native straightforward. We dig deeper into this in our guide on transforming design into code.
Build a Robust Component System
Your Figma file should be a library of reusable components, not a collection of one-off shapes and text layers. Every button, card, or input field needs to be a master component with variants for every state, such as default, pressed, or disabled.
This delivers two major wins:
Design Consistency: It keeps your UI uniform and polished across the entire app.
Code Efficiency: It maps directly to reusable React components, so developers are not writing redundant code.
A well-organized file speaks for itself. It has clearly defined components and styles, all neatly arranged and named. This level of organization is the foundation for a seamless handoff, making sure that what you designed is what gets built.
Choosing Your Conversion Path
Once your Figma file is prepped and ready, you hit the first major fork in the road. Do you build the app by hand, the old-fashioned way? Or do you lean on modern automated tools to get there faster? This is not just a technical choice. It is a strategic one about where you spend your time and money.
Going fully manual gives you total, pixel-perfect control. A developer can read between the lines of your design, hand-crafting every component, animation, and interaction. It is the right call for apps with highly bespoke UI or complex logic that automated tools cannot replicate. But that level of control comes at a steep cost: your time.
Manual Coding: The Traditional Route
When you opt for manual coding, a developer translates your Figma designs into React Native components line by line. They handle everything from styling elements with CSS-in-JS to structuring layouts with Flexbox. This is the classic handoff process.
The problem is that it is slow. A single, moderately complex screen can take an experienced developer around 40 hours to build by hand. Teams using modern tooling can often build that same screen in about 4 hours, a 90% drop in effort. A 2026 report on production code pipelines digs deep into this efficiency gap.
It comes down to your top priority. Is it absolute, granular control, no matter the cost? Or is it getting to market quickly and on budget? For most projects today, the needle has moved firmly toward speed.
Automated Tools: A Spectrum of Solutions
Automated tools are not a single category. There is a whole spectrum, from simple plugins to full AI platforms. Knowing the difference is key to picking the right one for your needs.
Simple Exporters: These are usually basic Figma plugins. You select a layer and it produces some rough JSX or styling code. They are handy for grabbing a gradient or a shadow style, but expect to do a lot of manual cleanup.
Component Generators: These tools are smarter. They look at your Figma components with their variants and props and generate matching reusable React Native components. This saves a huge amount of boilerplate.
AI-Powered Platforms: This is the most advanced tier. These platforms analyze entire screens or user flows, not just individual components. They generate the components, wire up navigation, set up state management, and even provision a backend, giving you a functional app skeleton in minutes.
These tools get smarter every year, turning the leap from design to code from a chore into a sprint. We cover this in more detail in our guide on the essentials of Figma to React conversion. The right automated tool can turn what used to be a major bottleneck into the fastest part of your workflow.
Using AI Platforms for End-to-End Development
Simple plugins and code generators are a big step up from writing everything by hand, but the real frontier in the Figma-to-React-Native pipeline is the rise of end-to-end AI platforms. These systems go well beyond turning visual styles into JSX. Their goal is to manage the entire app development lifecycle, from the moment you import a design to the day you submit it to the app stores.
Platforms like CatDoes treat your Figma file as the starting point, not the final deliverable. Instead of producing isolated components, they build a complete, functional React Native application structure. That means you get not just the UI but also the wiring that makes it work: navigation, state management, and even backend connections.
From Conversational Prompts to Functional Apps
The biggest innovation here is the shift to a conversational, agent-based interface. Instead of clicking through menus and configuring settings, you build your app by talking to an AI agent in plain English. You can ask it to implement business logic, set up a database, or handle user authentication.
For instance, you could hand it a Figma design for a login screen and say:
"Generate a React Native app from this design. When the user taps the 'Sign Up' button, validate the email and password fields. Then create a new user in the backend database and navigate to the dashboard screen."
This changes the developer's job. You go from being a code writer to an AI director. The agent handles the tedious boilerplate for state, API calls, and screen transitions, which frees you to focus on the big-picture architecture and the unique features that actually matter.
This flowchart shows how different the process is when you compare traditional manual development to an automated, AI-driven approach.
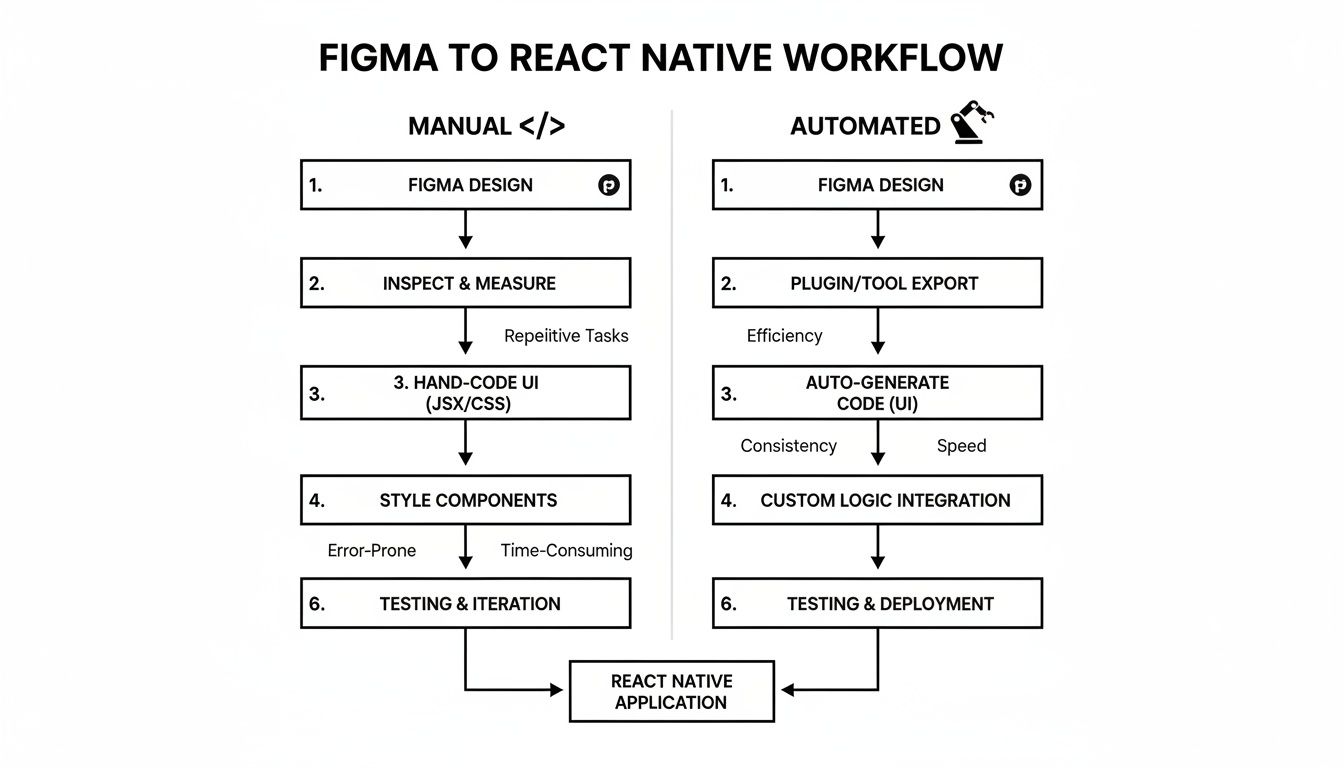
As you can see, automation collapses multiple manual steps into one unified process, cutting down on the back-and-forth and handoff friction that plagues most projects.
A Practical End-to-End Scenario
Here is what this looks like in the real world with an end-to-end platform.
First, you import your design and generate the app. You give the AI agent a link to your polished Figma file. The agent analyzes your design system, components, and layouts to generate the initial React Native Expo project.
Next, you instantly preview and test. The platform gives you a live, interactive preview of the app running in your browser. Better yet, it provides a QR code you can scan to run the app on your actual iPhone or Android device, which is crucial for getting a real-world feel.
From there, you implement the core logic. Using conversational commands, you tell the AI what to build next. This could be anything from setting up a managed backend with a database and user auth to wiring up buttons to navigate between screens.
Finally, when the app is ready, another specialized agent can handle the build and release process. It prepares the binaries for submission to the Apple App Store and Google Play Store, taking care of one of the most tedious parts of shipping a mobile app.
For any developer looking to build faster, learning to guide these systems is a powerful new skill. If you want to go deeper into this workflow, our guide on using an AI app builder is a great next step. This approach combines the precision of a great design with the speed of AI implementation, slashing the time it takes to get from an idea to a shipped product.
Turning Generated Code Into a Production-Ready App
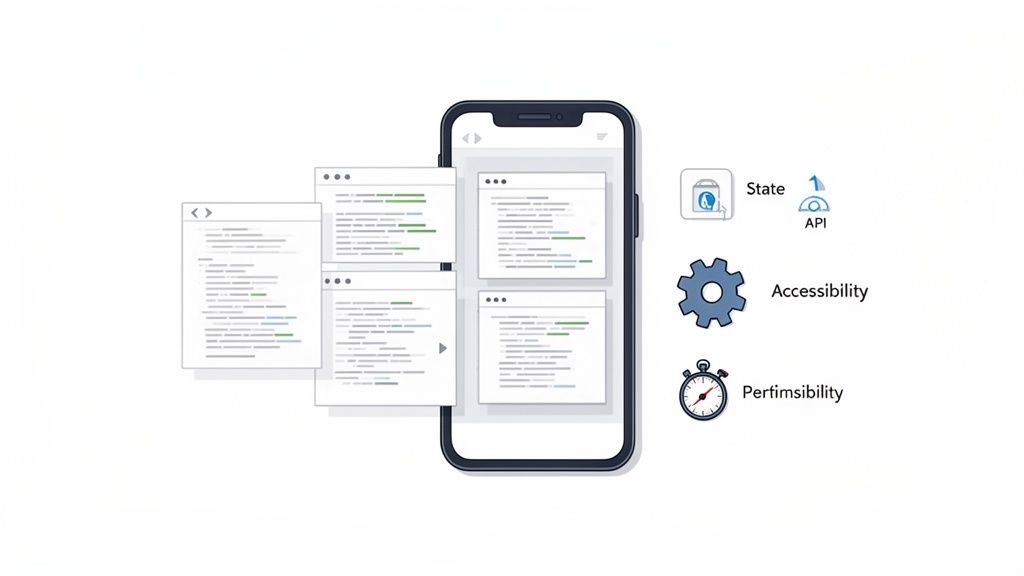
Getting code out of a design tool is a big win, but it is not a finished product. Think of that generated code as a solid scaffold. The structure is in place, but the logic and data are not. Your job is to turn that static frame into a working app that people can actually use.
This is where true development begins. You will add the logic, data, and interactivity that separate a picture of an app from the real thing. To speed things up, many developers lean on established frameworks and libraries.
Wiring Up Navigation and User Flow
Your app might have beautiful screens, but if users cannot move between them, they are stuck. The first task is to implement navigation. In the React Native world, that almost always means one thing: React Navigation.
It is the standard for a reason. It gives you the building blocks for every navigation pattern your users will expect.
Stack Navigator: The standard choice for linear flows. Think tapping an item in a list and drilling down to a detail screen.
Tab Navigator: Perfect for the main sections of your app, giving you that familiar tab bar at the bottom of the screen.
Drawer Navigator: The classic slide-out menu, ideal for settings, user profiles, or other secondary destinations.
You take the screens generated from Figma and connect them using these navigators, finally bringing the user flow you designed to life.
The goal is to make movement through the app feel invisible. Your navigation code should be a direct translation of the user journey you mapped out in Figma, so the final product feels just as intuitive as the prototype.
Managing Application State
As soon as a user taps a button, your app's state starts to change. For simple UI toggles, like showing or hiding a menu, a local useState hook is all you need. But for data that needs to be available everywhere, you need a proper state management solution.
Zustand is a strong choice here. It is lightweight, simple, and avoids a ton of boilerplate. You create a central store for your app's shared data, and any component can grab what it needs. It is well suited for handling things like:
User authentication status (is someone logged in?)
The items in a shopping cart
An app-wide dark mode setting
Using a tool like Zustand saves you from prop drilling, the painful process of passing data down through component after component just to get it where it needs to go.
Integrating APIs for Dynamic Content
Very few apps are static. They need to pull in real, live data from a backend, which means it is time to hook up your API calls. Whether you prefer the built-in fetch or a more powerful library like Axios, this is how you connect your UI to actual information.
That UserProfile component your tool generated is sitting there with placeholder text. Your next move is to write a function that hits an API endpoint like /api/user/123, grabs the response, and uses that data to populate the component. This is the moment your app stops being a mockup and starts feeling real.
Common Questions About Figma to React Native
Turning a polished Figma design into a working React Native app brings up a lot of questions. The process has changed dramatically in just a few years, so here are clear answers to the most common ones.
How Much Coding Skill Is Needed?
This comes down to the path you take. If you are going the manual route, you need to be a solid React Native developer. You will handle everything from component structure to state management yourself.
With modern tools, that barrier has dropped significantly. AI-native platforms like CatDoes change the game. Your primary skill is no longer writing code, but effectively directing an AI agent with clear, natural language instructions. A basic grasp of app structure is helpful, but you do not need to be a professional coder to get a functional app built.
Will the Generated Code Be High Quality?
In the early days of design-to-code, the output was often a tangled mess you could not use for anything serious. That is no longer the case. As of February 2026, the best platforms generate clean, readable, component-based React Native code that follows best practices.
The big shift is that modern tools understand the intent behind your design. They are not just tracing pixels. They translate your design system, Auto Layout, and component variants into structured, maintainable code.
Quality still depends on your input. A well-organized Figma file will always produce better code than a chaotic one.
Can I Use This for an Existing App?
Yes, but you will use a different strategy. You would not regenerate your entire existing application from scratch. Instead, you use these tools to build new features or screens at high speed.
For instance, you could design a new user profile section in Figma and have an AI tool generate the React Native components. Then you integrate those new, self-contained components into your existing codebase. This hybrid approach lets you get the speed benefits of automation without throwing away the work you have already done.
Ready to turn your Figma designs into a fully functional React Native app in a fraction of the time? With CatDoes, you can use conversational AI to generate your app, set up a backend, and manage releases, all in one place. Explore the platform at catdoes.com.
Nafis Amiri
Co-Founder of CatDoes