Blog
Tutorials
How to Submit App to App Store: 7 Steps (2026)
Step-by-step guide to submitting your app to the Apple App Store. Covers developer account setup, App Store Connect, review process, and common rejections.

Nafis Amiri
Co-Founder of CatDoes

Submit Your App to the Apple App Store in 7 Steps
TL;DR: Submitting an app to the Apple App Store requires an Apple Developer Program membership ($99/year), a finalized and tested app binary, a public privacy policy, and properly configured metadata in App Store Connect. The review process typically takes 24-48 hours. Below, every step is covered from account setup through handling rejections.
The App Store submission process trips up more founders than the actual app development. Apple's ecosystem has strict requirements at every stage, and missing even one prerequisite means delays or outright rejection. This guide breaks down each step so you can submit with confidence and avoid the most common pitfalls.
Table of Contents
What You Need Before Submitting
Setting Up Your Apple Developer Account
Preparing Your App Binary for Submission
Configuring Your App in App Store Connect
Building a Product Page That Converts
Uploading and Submitting Your Build
The Review Process and Handling Rejections
Frequently Asked Questions
What You Need Before Submitting
Before touching the "Submit for Review" button, four things must be in place. Missing any one of them guarantees a failed submission or rejection.
Requirement | What It Is | Why It Matters |
|---|---|---|
Apple Developer Program | A $99/year paid membership | Without it, you cannot access App Store Connect, TestFlight, or any distribution tools |
Certificates & Provisioning Profiles | Digital credentials linking your app to your developer account | These verify your identity and allow your app to be installed on devices |
A Finalized App Binary | The compiled, tested, ready-to-upload package of your app | Must be stable and complete — Apple rejects buggy or placeholder-filled builds |
A Public Privacy Policy | A publicly accessible URL explaining your data collection practices | Mandatory since 2018. A missing or vague policy is one of the top rejection reasons (Guideline 5.1) |
Get these four things right from the start and you'll avoid the most common submission blockers.

Setting Up Your Apple Developer Account
Your first step is enrolling in the Apple Developer Program at developer.apple.com/programs. The $99 annual fee unlocks App Store Connect, TestFlight, and the full suite of developer tools you need to publish.
Once enrolled, you need to create three things in the Apple Developer portal:
An App ID (Bundle Identifier): A unique reverse-domain string (e.g.,
com.yourcompany.appname) that identifies your app across Apple's systems. This cannot be changed after submission.A Distribution Certificate: Proves that the app binary was built by you. You'll need an "Apple Distribution" certificate for App Store submissions.
A Provisioning Profile: Ties your App ID and certificate together, telling Apple which app is allowed to be distributed and by whom.
Non-technical founders often hit a wall here. The certificate and provisioning profile system is genuinely confusing the first time through. If you're using a no-code builder like CatDoes, this step is handled automatically — the platform generates and manages all signing credentials for you.
Preparing Your App Binary for Submission
The app binary is the compiled package you'll upload to Apple. Before creating this final build, run through these checks:
Test on real devices. Simulators miss performance issues, touch responsiveness problems, and camera/GPS bugs. Our guide on how to test an app on iPhone covers the process in detail.
Remove all placeholder content. Every screen should show final text, images, and data. Apple's review team flags "Lorem ipsum" and empty states.
Verify your privacy policy URL. Load it in a browser. Confirm it clearly explains what data you collect, how you use it, and how users can request deletion. The URL must be publicly accessible — not behind a login.
Test the critical user path. Sign up, use the core feature, make a purchase (if applicable), and sign out. If any step crashes or errors, Apple will find it.
Apple's automated checks will also flag issues like missing required device capabilities, unsupported architectures, or private API usage. Fix these before uploading — they'll block your submission entirely.
Configuring Your App in App Store Connect
App Store Connect is Apple's web portal where you manage everything about your app — from the initial submission to every future update. This is where the real work of getting noticed begins.
Creating Your App Record
Create a new app record with these details (most cannot be changed later):
App Name: Up to 30 characters. Must be unique across the entire App Store.
Primary Language: The default language for your app's metadata.
Bundle ID: Must exactly match the App ID you created in the Developer portal.
SKU: Your internal tracking ID. Not visible to users.
Writing Metadata That Ranks and Converts
Your metadata directly affects App Store search visibility. According to Apple's product page guidelines, keyword-rich metadata is a primary input for App Store search ranking.
The app name (30 chars) and subtitle (30 chars) are your two most important keyword slots. The subtitle sits directly below the app name — use it for your main selling point, not a tagline. "Budget Tracker & Bill Reminders" beats "Take Control of Your Finances."
For the description, lead with your biggest benefit in the first two sentences. These are the only lines visible before the "more" tap. Break features into bullet points and weave in search terms naturally — think about what a user would type to find your app.
Privacy Labels and Compliance
Apple requires you to fill out the App Privacy questionnaire declaring every piece of data your app collects — including data collected by third-party SDKs (analytics, ads, crash reporting). This information becomes the privacy "nutrition label" users see before downloading.
Be thorough and accurate. Inaccurate privacy labels are a rejection trigger under Guideline 5.1.1, and Apple has been increasing enforcement since iOS 17.
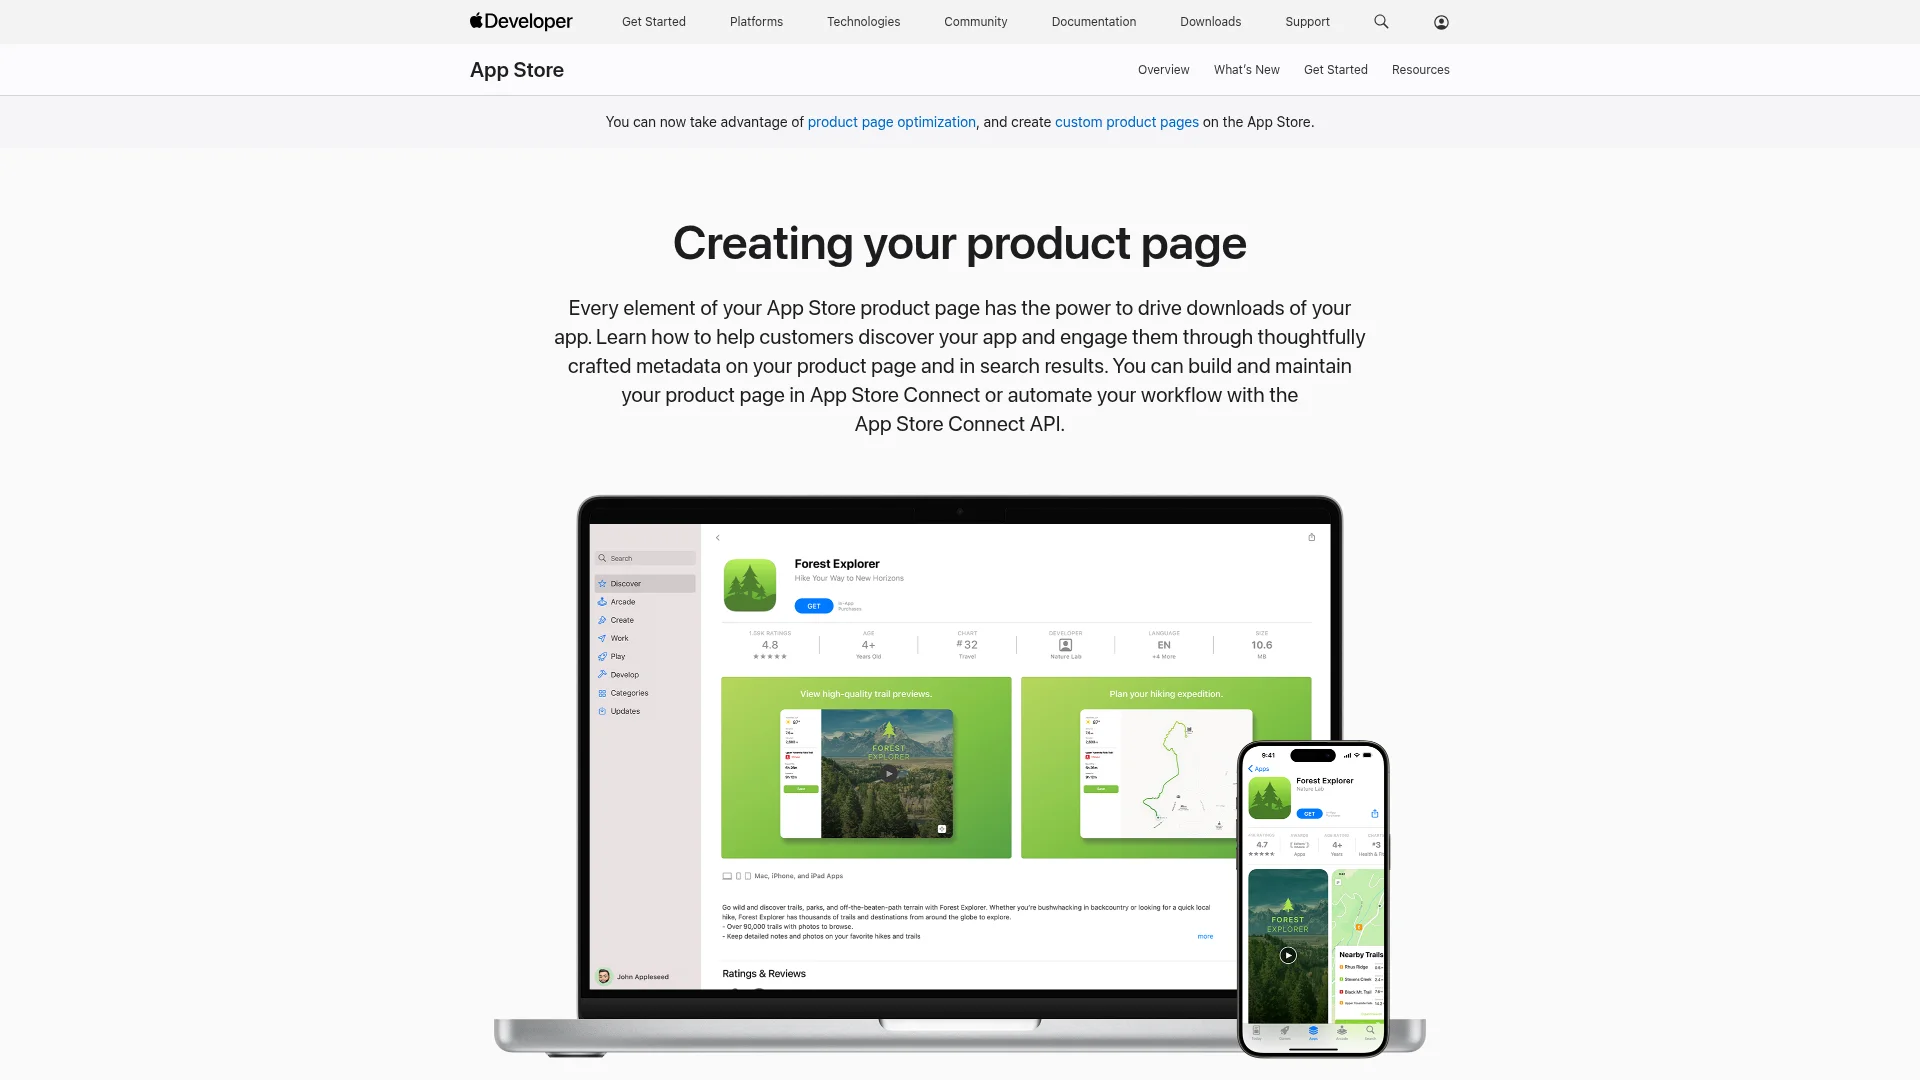
Building a Product Page That Converts
Your product page is where download decisions happen. The screenshots and preview video do most of the selling — users spend just a few seconds deciding whether to tap "Get."
Screenshot Strategy
You get up to 10 screenshot slots. Treat them as a visual story, not a random collection of screens:
Slots 1-2: Core value proposition. Show the main screen with a bold text overlay stating the #1 benefit.
Slots 3-5: Key features in action. How does your app solve the problem?
Slots 6-8: Differentiators. What sets you apart from competitors?
Slots 9-10: Social proof, customization options, or advanced features.
Apple is strict about screenshot dimensions — every iPhone and iPad model requires specific sizes. Submitting incorrectly sized assets leads to rejection. For guidance on visual quality, see our app design best practices guide.
App Preview Videos
App previews are optional 15-30 second videos showing your app in use. They auto-play on the product page and can significantly boost conversion. Use actual screen recordings rather than animated mockups — authenticity builds trust. Focus on the most compelling features and keep the pacing tight.
Uploading and Submitting Your Build
With metadata and visuals complete, upload your compiled app binary (.ipa file) to Apple.
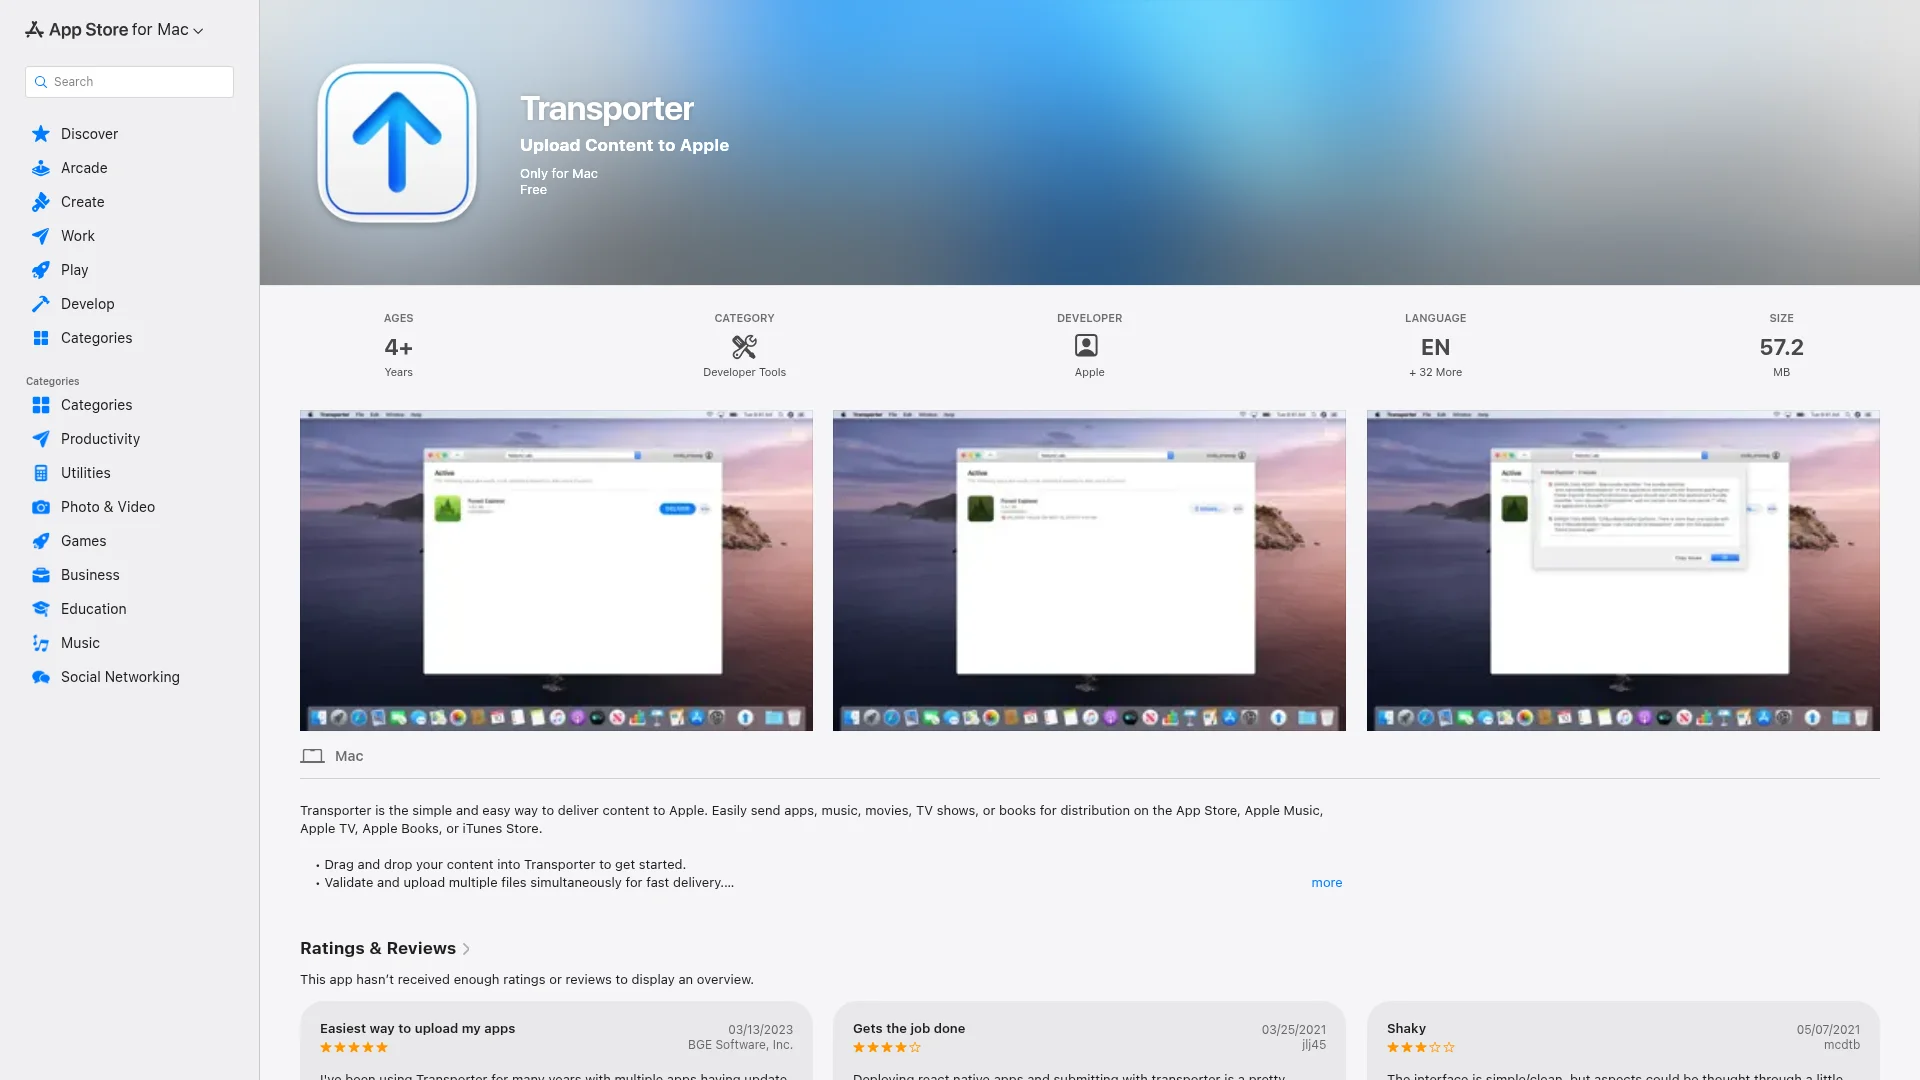
Upload Methods
Two tools handle the upload:
Xcode: Archive your app and upload directly from the IDE. Best if you're building the code yourself.
Transporter: A standalone Mac app with drag-and-drop upload. Ideal for founders who receive the final build from a developer and just need to handle submission.
After upload, Apple runs automated processing (a few minutes to over an hour). The build then appears in your app record, ready to attach to a submission.
Final Compliance Checks
Before submitting, you must answer three compliance questionnaires. These are legally binding declarations:
Export Compliance: Declare whether your app uses encryption. Most apps using standard HTTPS are exempt, but you must still answer the question. Getting this wrong delays your submission.
Content Rights: Confirm you have legal rights to all third-party assets — images, fonts, music, and code libraries.
Advertising Identifier (IDFA): If your app tracks users for ad targeting, declare it here. Since iOS 14.5, you must also implement AppTrackingTransparency to request user consent.
Once everything is attached, click "Add for Review" and then "Submit to App Review." Your status changes to "Waiting for Review" and you can no longer edit metadata or swap builds without pulling the entire submission.
The Review Process and Handling Rejections
Apple reviews most submissions within 24 to 48 hours, though first-time submissions can take longer. You can check current median review times on Apple's developer review page.
Common Rejection Reasons
Rejection is normal — many successful apps were rejected on their first attempt. Apple always cites a specific guideline. These are the ones that catch most developers:
Guideline | What It Means | How to Fix It |
|---|---|---|
2.1: App Completeness | App crashes, has broken links, or feels unfinished | Test on multiple real devices. Every button, link, and feature must work. Provide demo credentials if login is required. |
4.3: Spam | App appears copied, auto-generated, or adds no unique value | Highlight what makes your app original. If you have multiple similar apps, consolidate them. |
5.1.1: Data Collection | Privacy disclosures are missing or inaccurate | Audit every SDK for data collection. Make your privacy label 100% accurate. |
1.2: User-Generated Content | No moderation system for user-posted content | Add report/block features and a content policy before submitting. |
Communicating Through the Resolution Center
Rejections land in the Resolution Center inside App Store Connect. This is your direct line to the review team. Three rules for handling it well:
Stay professional. There's a human on the other side. Treat it as a problem-solving conversation, not a dispute.
Ask for specifics. If the rejection is vague, reply with: "Could you clarify which part of the app triggered this guideline?" Apple reviewers typically respond with concrete details.
Document your fix. When resubmitting, write a clear note explaining what you changed and how it addresses the cited guideline. Don't just upload a new build silently.
If you believe the review was wrong, you can appeal to a review board for a second opinion. Use this sparingly and only with a well-reasoned case.
Frequently Asked Questions
How Long Does the App Store Review Take?
Most submissions are reviewed within 24 to 48 hours. First-time submissions for new apps may take longer — occasionally up to a week depending on app complexity, submission volume, and how clear your reviewer notes are. Subsequent updates are typically reviewed faster.
Can I Submit an App to the App Store for Free?
No. An active Apple Developer Program membership ($99/year) is required. This fee covers access to App Store Connect, TestFlight, developer tools, and the ability to create signing certificates. There is no free tier for App Store distribution.
What Is the Difference Between TestFlight and App Store Submission?
TestFlight is Apple's beta testing platform. You can invite up to 10,000 external testers to find bugs before going public. TestFlight builds go through a lighter review process.
App Store submission is the full public launch. Apple reviews against their complete set of guidelines for quality, safety, and content. It's the final gate before your app is available to everyone.
Use TestFlight to catch bugs with a small group, then submit to the App Store when you're confident the app is ready.
The submission process has a lot of moving parts — certificates, compliance checks, metadata optimization, and Apple's review queue. If you'd rather skip the technical overhead, CatDoes handles the entire build-and-submit workflow automatically. You focus on your app idea, and the platform manages signing, packaging, and submission.
Nafis Amiri
Co-Founder of CatDoes


