Blog
Tutorials
How to Launch an App: (2026 Guide)
Learn how to launch an app with our practical guide. We cover everything from validating your idea to navigating app store submission for a successful release.

Nafis Amiri
Co-Founder of CatDoes

Launching an app is about far more than building a cool piece of software. It's about creating a clear path from a raw idea to a product people actually want to use, and that journey needs a real plan for validation, design, testing, and getting into the market. Knowing how to launch an app comes down to two things: solving a genuine problem and executing every stage without missing a beat.
TL;DR: A successful app launch runs through five phases: validate the idea, design and prototype, build, test, and submit to the app stores. Skipping any stage is where most launches fail. Here's the short version:
Validate first: Confirm real people need your app through competitor research and user personas before you write any code.
Design before you build: Map user flows, wireframe, then prototype so you catch problems while they're cheap to fix.
Build lean: Ship the core features that solve the main problem first; add extras later.
Test in layers: Functional, usability, and performance testing plus a beta group before launch day.
Optimize your store listing: App Store Optimization (ASO) decides whether anyone ever finds you.
Table of Contents
Your Blueprint for a Successful App Launch
Validate Your Idea Before You Build
Design and Prototype a User-Centric App
Build Your App on a Solid Foundation
Test Your App for a Flawless Launch
Navigate the App Store Submission Process
Frequently Asked Questions About Launching an App
Your Blueprint for a Successful App Launch
Learning how to launch an app means turning a great idea into something tangible that finds its audience. The process starts well before you write a single line of code and keeps going long after you hit "publish" on the app stores. This guide walks through the entire lifecycle, from a back-of-the-napkin sketch to post-launch momentum.
The market you're stepping into is massive and crowded. Users downloaded more than 140 billion apps in 2025, and the average person keeps only a handful of apps in regular rotation. Yours has to deliver real value to earn one of those spots on the home screen.
The core principle is simple: combine a strong, validated idea with careful execution at every stage. Rushing any part of the process, from user research to testing, usually leads to a disappointing launch that never gains traction.
This flow chart gives you a high-level look at what it takes to bring an app to life.
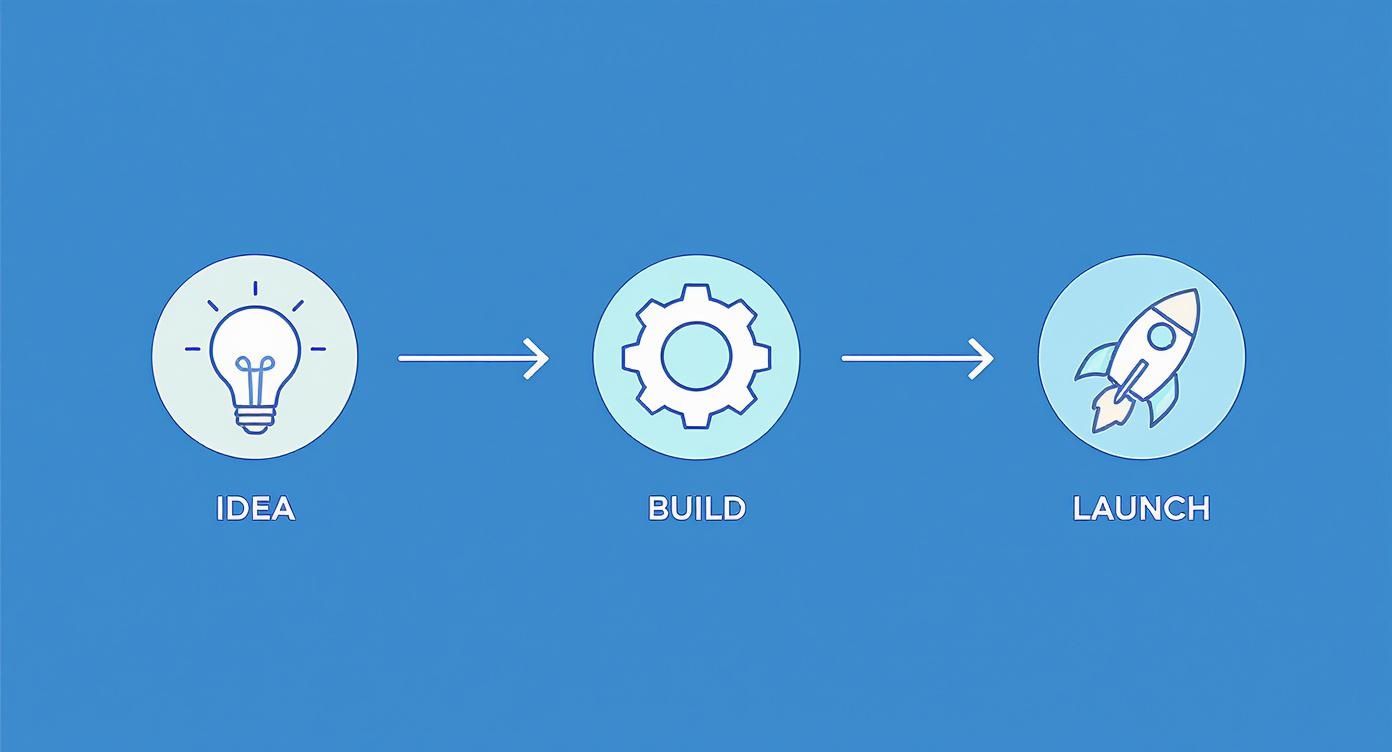
Each icon represents a critical phase: the spark of an idea, the work of the build, and the final push into the market. To make the journey clearer, here's a breakdown of the main stages.
Key Stages of an App Launch
Launch Stage | Primary Goal | Key Activities |
|---|---|---|
Ideation & Research | Validate the problem and define the solution. | Market research, competitor analysis, defining the target audience, outlining core features. |
Design & Prototyping | Create the user experience and visual interface. | Wireframing, mockups, interactive prototypes, user flow mapping. |
Development | Build the functional front-end and back-end. | Writing code, setting up databases and servers, integrating APIs. |
Testing & QA | Ensure the app is stable and performs well. | Functional, usability, performance, and security testing. |
Launch & Marketing | Release the app and attract the first users. | App store submission, marketing materials, promotional campaigns. |
That table is your high-level map. Now let's get into the specifics of each stage.
Validate Your Idea Before You Build
Every app starts with an idea, but not every idea leads to a great app. Before you're neck-deep in mockups or code, the single most important thing you can do is confirm that real people are waiting for what you want to build. Plenty of founders skip this step, and it's a costly mistake.
The goal is simple: get evidence that people actually need your app. That means digging into the market, getting to know your future users, and understanding who you're up against.
Do Some Competitor Reconnaissance
You're almost certainly not the first person to have your idea, and that's a good thing. Existing competitors are a free source of market research. Your job is to pick them apart and find the gaps where your app can shine.
First, identify your direct and indirect competitors. Direct competitors are apps doing the same thing for the same people. Indirect competitors solve the same problem differently. For a fitness app, another fitness app is a direct competitor, while a personal trainer or a gym membership is an indirect one.
Go through their offerings and look at:
Feature sets: What do they nail, and which crucial features are they missing?
User reviews: App store reviews are a goldmine of honest feedback. Look for patterns in complaints and feature requests.
Pricing models: Free, freemium, subscription, one-time purchase? This tells you what the market will tolerate.
Marketing strategies: Check their social media, blogs, and ads to see how they talk to their audience.
This isn't about copying anyone. It's about learning from their wins and losses so you can offer a sharper, more focused solution.
Define Your Target Audience and User Personas
An app built for "everyone" usually ends up being an app for no one. Knowing exactly who you're building for guides every decision, from the features you prioritize to the words in your marketing.
Start with basics like age, location, and income, then go deeper into interests, habits, values, and frustrations. What drives them? What daily annoyance can your app eliminate?
The more specific you are about your target user, the easier it is to build something they genuinely love. Vague descriptions lead to vague features and a product that resonates with no one.
Once you have a clear picture, create user personas, fictional characters who represent your ideal customers. Give them a name, a job, some goals, and a few challenges. A persona for a meal-planning app might be "Busy Brian," a 34-year-old professional who wants to eat healthier but is too swamped to hunt for recipes. Just like that, you know your app needs to be fast, simple, and built around convenient meal prep.
Nail Your Unique Value Proposition
Once you've scoped out the competition and know your audience, you can define what makes your app different. Your unique value proposition (UVP) is a clear, simple sentence that explains the benefit you offer, how you solve a problem, and what sets you apart.
A strong UVP gets straight to the point. Instead of something generic like "a great photo-editing app," a sharper UVP would be "the only photo editor that applies cinematic color grades to your videos in one tap." That statement becomes your North Star, guiding both development priorities and marketing copy. By focusing on a specific niche and a clear value, you set yourself up to build a targeted solution rather than just another app in the store. This focus matters even more when you build your first version, for that, read our guide on what a minimum viable product is and how to approach it.
Design and Prototype a User-Centric App

With a solid idea and a clear audience, it's time to shift from the what to the how. How will your app look, feel, and function for a real person? This is the design and prototyping phase, where abstract concepts become a tangible user experience.
An intuitive design isn't a luxury. It's a requirement for survival. Users can choose from millions of apps across the Apple App Store and Google Play, so a clunky or confusing interface is one of the fastest ways to get uninstalled.
Mapping the User Journey with Flows and Wireframes
Before you get lost in colors and fonts, map out the app's structure. Start with user flows, simple diagrams that chart the path a user takes to get something done. For a social app, a flow might show the steps from opening the app to posting a photo.
Those flows become the blueprint for your wireframes, the bare-bones, black-and-white layouts of each screen. Wireframes deliberately ignore visual flair to focus on structure, hierarchy, and functionality. Their job is to:
Establish content hierarchy: Decide what information matters most on each screen.
Define navigation: Show how users move from one part of the app to another.
Plan functionality: Place buttons, forms, and interactive elements logically.
This low-fidelity approach is a huge time-saver. Moving a few gray boxes around now is far easier than tearing down and rebuilding a polished screen later.
Creating High-Fidelity Mockups
Once the skeleton is in place, add the visual layer. High-fidelity mockups are static, full-color designs that show exactly how the app will look, bringing your color scheme, typography, and imagery to life.
Mockups are critical for nailing the app's aesthetic and emotional appeal. They turn structural wireframes into an engaging interface and give stakeholders, from potential investors to your development team, a clear vision of the final product.
Good UI design isn't just about making things look pretty. It's about creating a clear visual language that guides the user, builds trust, and makes the app a pleasure to use. Every color, font, and icon should serve a purpose.
If you want to go deeper, our guide on app design best practices can help you create a more polished, effective interface.
Building an Interactive Prototype
A mockup shows how the app looks; a prototype shows how it works. A prototype is a clickable, interactive version of your app that simulates the real experience. Using tools like Figma or Adobe XD, you link your mockup screens together into a realistic simulation that feels like a finished product.
This is arguably the most important part of the pre-development process, because it lets you experience the app's flow as a real user would, long before writing any code. Building a prototype offers three big advantages:
Early user testing: Put the prototype in front of potential users and watch them navigate. You'll immediately spot confusing layouts and awkward paths you'd never catch on your own.
Stakeholder alignment: Everyone on the team shares the same understanding of the final product, with no more "I thought it would work like this" conversations later.
Reduced rework: Catching design flaws now saves an enormous amount of time and money compared to fixing them after the app is built.
This cycle of designing, prototyping, and gathering feedback is the secret to building an app people actually want to use.
Build Your App on a Solid Foundation

This is where your idea stops being designs and prototypes and becomes a real, working product. The development stage turns your visual blueprint into a functional engine, clean, efficient code that powers every button, feature, and interaction your users touch.
Getting it right means making smart technology choices, building a solid foundation for your core functions, and making sure the pieces work together. Let's break down how to approach it.
Choosing Your Technology Stack
One of your first big decisions is picking a technology stack, the mix of languages, frameworks, and tools your app is built with. This choice influences development speed, performance, and how easily you can scale later. You generally have two paths:
Native development: Separate, dedicated apps for each platform, iOS in Swift, Android in Kotlin. This gives you the best performance and deepest access to the phone's hardware.
Cross-platform development: A single codebase that runs on both iOS and Android using frameworks like React Native or Flutter. This cuts development time and cost, making it a go-to for many startups.
For most projects, a cross-platform solution like React Native (Expo), the approach platforms like CatDoes use, hits the sweet spot, allowing fast development without compromising the user experience.
Building Your Core Features
With your stack sorted, focus on your core features, the unique value your app offers. The trick is not to build everything at once. Prioritize the handful of essential features that solve your user's biggest problem.
This iterative approach gets a working version into testers' hands much faster. For a new social app, the first build might just cover creating a profile, posting content, and viewing a feed. Extras like direct messaging or live streaming can come in later updates.
The real goal is a robust, stable foundation. Writing clean, well-documented code now isn't just good practice. It's a direct investment in your app's future. It makes debugging easier and adding features far smoother.
Understanding the financial side of development matters too. For a detailed look at the expenses involved, see our breakdown of mobile app development costs.
Integrating Essential Third-Party APIs
Modern apps are rarely built in a silo. Most rely on other services for key functions instead of building them from scratch, and those connections happen through Application Programming Interfaces (APIs). Think of an API as a bridge that lets your app talk to another service. Common integrations include:
Payment gateways: Services like Stripe or PayPal to handle in-app purchases.
Social logins: Letting users sign up with existing Google, Facebook, or Apple accounts.
Mapping services: Pulling in Google Maps or Apple Maps for location features.
Analytics tools: Connecting to platforms like Mixpanel or Amplitude to understand user behavior.
Integrating these services properly can save hundreds of development hours and give users the polished, seamless experience they expect.
Setting Up a Scalable Backend
While users tap away on the front-end, the backend is the invisible server-side engine that makes everything work. It manages accounts, stores data, and runs your business logic. A strong backend is critical for performance and growth. A typical one has a few key parts:
Backend Component | Purpose | Example Technology |
|---|---|---|
Server | Executes business logic and handles requests. | Node.js, Python |
Database | Stores and retrieves all of the app's data. | PostgreSQL, MongoDB |
Authentication | Manages sign-ups, logins, and security. | Supabase Auth, Firebase Auth |
Managed backend platforms have made this much simpler by offering an all-in-one solution: a database, authentication, and auto-generated APIs in one place. That can dramatically speed up your timeline and free you to focus on the user-facing features that truly matter. From here, the process moves to the next step: rigorous testing.
Test Your App for a Flawless Launch
Releasing a buggy app is like opening a restaurant with a dirty kitchen. It doesn't matter how great the menu is, because a bad first impression can sink your reputation before you get started. Testing isn't a box to check. It's your last line of defense against negative reviews, uninstalls, and a failed launch.
A solid testing strategy goes well beyond making sure buttons work. It ensures the entire experience is smooth, intuitive, and reliable, catching everything from small visual glitches to major performance drains.
The Different Layers of Quality Assurance
To truly bulletproof your app, think in layers. Each type of testing tackles a different aspect of quality, and stacking them creates a strong safety net. The essential types to focus on:
Functional testing: The most basic layer. Does every feature do what it's supposed to? If a user taps "Add to Cart," does the item actually get added? It's a systematic check that the app behaves exactly as designed.
Usability testing: Moves beyond function to the feel of the app. An app can be perfectly functional but a nightmare to navigate. Usability testing means watching real people use your app to see where they get stuck.
Performance testing: How does the app hold up under pressure? This covers speed, responsiveness, battery impact, and stability across different networks, from strong Wi-Fi to spotty mobile data.
A buggy or slow app is one of the top reasons users hit uninstall. Crashes, freezes, and long load times erode trust fast, often before a user ever reaches your best features.
The Power of Beta Testing
Once your internal team has put the app through its paces, get fresh eyes on it. A beta testing program invites a select group of your target users to try the app before its official release. It's your best chance to gather honest, unbiased feedback and uncover issues you'd never find on your own.
Running a successful beta comes down to a few steps. Find testers who match your ideal customer profile. Give them a dead-simple way to report bugs and share thoughts, whether that's a form or a dedicated platform. Most importantly, listen and prioritize the fixes that make the biggest difference to the experience.
The kind of app you're building also shapes your strategy. Games remain the single largest revenue category, generating well over half of all consumer app spending, while subscription and AI-powered apps are among the fastest-growing segments. Knowing these trends helps you tailor testing and positioning to market expectations.
Automating Your Testing Process
Manually testing every feature after every code change is impractical. That's where automated testing saves the day. Using integrated testing suites, you write scripts that automatically run checks on your app's core functionality.
This is especially critical for regression testing, which confirms a new feature or bug fix hasn't accidentally broken something that used to work. Automation catches these domino-effect issues early and often, making development faster and more reliable, a cornerstone of knowing how to launch an app successfully.
Navigate the App Store Submission Process
You've designed, developed, and tested your app. Now for the final hurdle before it reaches users: submitting it to the Apple App Store and Google Play. This part is less about code and more about meticulous preparation.
Getting it right is critical. A rejection from either store means frustrating delays, so having your assets ready is the best way to ensure a smooth approval. Think of it as your chance to make a great first impression on both the review teams and your future customers.
Your Pre-Submission Asset Checklist
Before you hit "submit," gather a specific set of visuals and text. These are what potential users see before they decide to download, so they need to be polished and compelling. Both stores have slightly different rules, but a standard kit covers most of your bases:
App icon: Your app's face. Keep it simple, memorable, and sharp at every size.
Screenshots: High-quality images showing your key features and interface. Aim for at least five compelling shots that tell a story.
App previews (optional): Short videos demonstrating your app in action can meaningfully boost downloads. Don't skip these if you have the resources.
Promotional text: A concise, one-line summary that grabs attention at the top of your store listing.
App description: A detailed explanation of what your app does, who it's for, and what makes it special.
Too many founders treat the app description as an afterthought. That's a mistake. It's a powerful marketing tool and a key piece of your App Store Optimization strategy. Use it to sell the benefits, not just list the features.
Mastering App Store Optimization
App Store Optimization (ASO) is how you make your app visible in the stores. With millions of apps out there, good ASO is what helps users find you in the first place. It's the app store equivalent of SEO for websites, and you can't afford to ignore it. Focus your ASO on a few key areas:
ASO Element | Best Practice |
|---|---|
App Title | Include your most important keyword next to your brand name. Keep it descriptive but stay under 30 characters for full visibility. |
Keywords | Research relevant, high-traffic terms your audience actually searches for. Use keyword research tools to find opportunities. |
Subtitle (iOS) | A short phrase expanding on your title, another chance to use important keywords and explain your value. |
Ratings & Reviews | Positive reviews directly affect ranking. Gently encourage happy users to leave feedback after a good experience. |
Thinking strategically about these elements is fundamental to launching an app that actually gets discovered. An optimized listing keeps your hard work from getting buried in a crowded marketplace. Nail this, pass the review, and your app is finally ready for the world. For the official rules, review Apple's App Store guidelines and set up your release in the Google Play Console.
Frequently Asked Questions About Launching an App
Getting your app across the finish line always raises a few last-minute questions. Here are straightforward answers to the ones we hear most often from founders.
What's the Real Cost to Launch an App?
The honest answer is that it varies widely. A simple app built by a freelancer or small shop could land in the low thousands. A complex platform with custom features and a sophisticated backend can easily climb past $100,000. That's exactly why AI-native platforms are changing the game, they drastically lower the financial hurdle, making it possible to get a high-quality app to market without a massive upfront investment.
How Long Does App Store Approval Actually Take?
Approval times have improved, but they're still not something you can set your watch to. For the Apple App Store, plan on roughly 24 to 48 hours; a first submission or an app with complex features may take longer. Google Play is often quicker, sometimes approving within hours, though it can stretch to a week. Build a buffer of one to two weeks into your launch timeline to absorb reviews or unexpected rejections.
Triple-check the store guidelines before you submit. A rejection for something small, like a missing privacy policy link, can throw off your entire launch schedule. Read the rules for both Apple and Google one last time, it's a must-do.
What Should I Do Right After My App Goes Live?
Getting your app live isn't the end. It's the beginning. The first few weeks are crucial for building momentum. Here's your immediate to-do list:
Watch your analytics closely: Is anything crashing? Where are users dropping off? Look for bugs and early engagement patterns.
Gather feedback aggressively: Dive into your reviews and reach out to your first users directly to understand their experience, good and bad.
Announce it everywhere: Share the launch on social media, your email list, and your website. Let people know it's ready.
Reply to every review: A quick, thoughtful response to both positive and negative reviews shows you're listening and that you care.
This initial sprint sets the stage for everything that follows. Staying engaged and responsive from day one is how you build a loyal community and a solid foundation for growth.
Ready to skip the complexity and turn your idea into a real app? CatDoes uses AI to handle the entire process, building, testing, and preparing it for launch, translating your vision into a product ready for the app stores. Start building your app for free today at catdoes.com.
Nafis Amiri
Co-Founder of CatDoes