
Blog
Tutorials
How to Create Own App From Idea to Launch, Step by Step
Discover how to create own app from idea to launch with practical steps, design tips, AI tools, testing, and store submission.

Nafis Amiri
Co-Founder of CatDoes

That initial spark for an app idea is exhilarating. But the real work, the stuff that actually leads to a successful app, starts when you move from concept to validation. The key to learning how to create own app isn't about diving into code. It's about doing the rigorous groundwork first.
This means confirming your idea actually solves a real problem for a specific group of people before you sink a dollar or an hour into development.
Transforming Your Idea Into a Validated Concept

Every great app you use daily started as a simple idea. The ones that actually made it, though, were built on a solid foundation of research. Skipping this phase is the most common mistake I see, and it almost always leads to building a beautiful app that nobody needs.
So, instead of jumping straight into Figma or Xcode, your first job is to become a detective. Your mission is to uncover the truth about your market, your potential users, and the other players in the space. This process turns your gut feelings into hard facts, giving you a clear roadmap for the entire project. It's less about building and more about learning.
Pinpoint Your Target Audience
You can't build an app for everyone. The most successful apps I've seen serve a well-defined niche. A great way to start is by creating a user persona, which is just a fictional character who represents your ideal customer. Give them a name, an age, a job, and, most importantly, list their daily headaches and goals.
Ask yourself some sharp questions to bring this person to life:
What are their biggest pain points that your app could actually fix?
How do they use technology? Are they power users who love complex features, or do they need something dead simple?
Where do they hang out online? This is gold for your marketing strategy later on.
An app for busy working moms will have a completely different feel and feature set than one for college students trying to manage study schedules. Getting this distinction right from the start is fundamental. The more specific you are, the easier every subsequent decision becomes.
Conduct Practical Market Research
Once you know who you're building for, you need to understand the world they operate in. Market research doesn't have to be some massive, expensive undertaking. You can gather powerful insights with simple, direct methods.
Start with online surveys using free tools like Google Forms or SurveyMonkey. Find relevant online communities, think Facebook groups, Slack channels, or Reddit forums where your target audience lives, and post your survey there. Crucially, ask questions about their problems, not your solution.
The goal here isn't to ask, "Would you use my cool new app?" It's to figure out how severe the problem you think you're solving really is. A validated, painful problem is the single best indicator of a viable app idea.
You should also try to conduct a few one-on-one interviews. A 15-minute chat with a potential user can reveal more nuance and emotion than a hundred survey clicks ever will. These initial steps are part of a bigger validation strategy, and you can get the full playbook on https://catdoes.com/blog/how-to-validate-a-business-idea.
Analyze Competitors to Find Your Niche
Your app won't exist in a vacuum. Looking at your competitors isn't about copying what they do; it's about spotting their weaknesses and finding gaps in the market. Head over to the App Store and Google Play and see who the top players are in your category.
I like to use a simple spreadsheet to track what I find:
Core Features: What are they doing well? What's their main hook?
User Reviews: What are people complaining about? The 1-star and 2-star reviews are a goldmine for feature ideas.
Pricing Model: Is it free with ads, a subscription, or a one-off purchase?
Unique Value Proposition (UVP): What's their core marketing message? How do they sell themselves?
This analysis helps you figure out what will make your app different. Maybe your competitors have clunky interfaces, are missing a feature everyone is begging for, or are just too expensive. That gap is where your app can win. As you start firming up your concept, you should also be thinking about solid intellectual property protection to safeguard your unique ideas from the get-go.
Blueprint Your App's Features and User Flow
With a validated concept in hand, it's time to translate that vision into a concrete plan. This is the moment you decide exactly what your app will do and how people will actually move through it.
Trying to build an app without this step is like starting a house with no architectural drawings. It’s a recipe for confusion, wasted effort, and a final product that just doesn't work right. The goal here is to get everyone on the same page before a single line of code is written or a pixel is designed. Getting this right saves a massive amount of time and money down the road.
Define What Your App Does with User Stories
Instead of starting with a dry, technical list of features, think from your user’s point of view. This is where user stories are incredibly powerful. A user story is a simple, non-technical sentence that frames a feature around what the user wants to accomplish.
They usually follow a simple format: "As a [type of user], I want [an action], so that [a benefit]."
Let’s imagine a fitness tracking app. The user stories might look like this:
As a new user, I want to sign up easily using my social media account so I can get started quickly.
As a runner, I want to log my daily runs with distance and time so I can track my progress.
As a health-conscious user, I want to view a dashboard of my weekly activity so I can stay motivated.
Writing stories this way forces you to tie every feature directly back to user value. It’s the best defense against adding cool-sounding but ultimately useless functions that just complicate the experience.
Prioritize Features for a Lean Launch
You're going to end up with a long list of great ideas, but you can’t build them all at once. This is where you have to get ruthless with prioritization to define a Minimum Viable Product (MVP). An MVP is the most basic version of your app that still solves the core problem for your very first users.
A common and incredibly effective framework for this is the MoSCoW method. It helps you sort every potential feature into one of four buckets to decide what's absolutely essential for your first launch.
Here’s how the MoSCoW method breaks down:
Must-Have: These are non-negotiable. The app simply cannot function or deliver its core value without them (e.g., the ability to log a run).
Should-Have: Important features that add significant value but aren't critical for the initial launch (e.g., sharing a run on social media).
Could-Have: These are desirable "nice-to-have" features that can be added if time and resources permit (e.g., a dark mode theme).
Won't-Have (this time): Features that are explicitly out of scope for the first release. This keeps the project focused.
Focusing on the "Must-Haves" gets your app to market faster so you can start gathering real user feedback. To get a better handle on this, check out our guide on what a minimum viable product is and how it can seriously accelerate your journey.
Map the User Journey with Wireframes
Once you know what you're building, you need to map out how users will interact with it. A wireframe is a low-fidelity, black-and-white sketch of your app's screens. Think of it as a simple blueprint showing where things like buttons, text, and images go, without getting bogged down by colors or fonts.
At the same time, you should create a user flow diagram. This is just a simple chart that maps out every single step a user takes to complete a task, like signing up or logging a workout. This map helps you visualize the entire journey, spot potential dead ends, and make sure the navigation feels natural.
This planning stage is more critical than ever. Building an app used to require deep coding knowledge, but AI is changing the entire game. With 63% of developers now integrating AI features, the AI mobile app market is projected to hit a staggering $221.9 billion by 2034. A remarkable 70% of mobile apps already use AI to improve user experience, driving a 112% YoY growth in AI-powered apps.
Choosing the Right App Development Path
You've blueprinted your features and mapped out what your app needs to do. Now comes the biggest decision you'll make: how to actually build it.
This is a major fork in the road. The path you pick will define your budget, timeline, and what your app can ultimately do. This isn't just a technical choice; it’s a strategic one that needs to line up perfectly with your resources and goals.
Let's break down the three main routes available today. Getting this right from the start can save you from costly restarts and a whole lot of frustration down the line.
The Traditional Coding Route
The classic approach is to hire a freelance developer or a full-on development agency to write your app from scratch. This path gives you complete control and limitless flexibility. If your app has incredibly complex features, needs to integrate with unique hardware, or requires a totally bespoke design, traditional coding is often the only way to get it done.
But all that power comes with a hefty price tag.
Custom coding is slow and expensive. The bill for a first version can easily run into the tens or even hundreds of thousands of dollars. You'll also need someone technical, a project manager or a CTO, to manage the process and translate your vision into technical specs for the developers.
This route makes sense for:
Highly Complex or Unique Apps: Think sophisticated gaming engines, specialized AI algorithms, or anything requiring direct hardware control.
Well-Funded Startups: Companies that have raised significant capital and need a completely custom solution from day one.
Enterprise-Level Tools: Large-scale internal software with very specific security and integration demands.
This decision tree gives you a good visual for how mapping your app's core functions directly influences which development path makes the most sense.
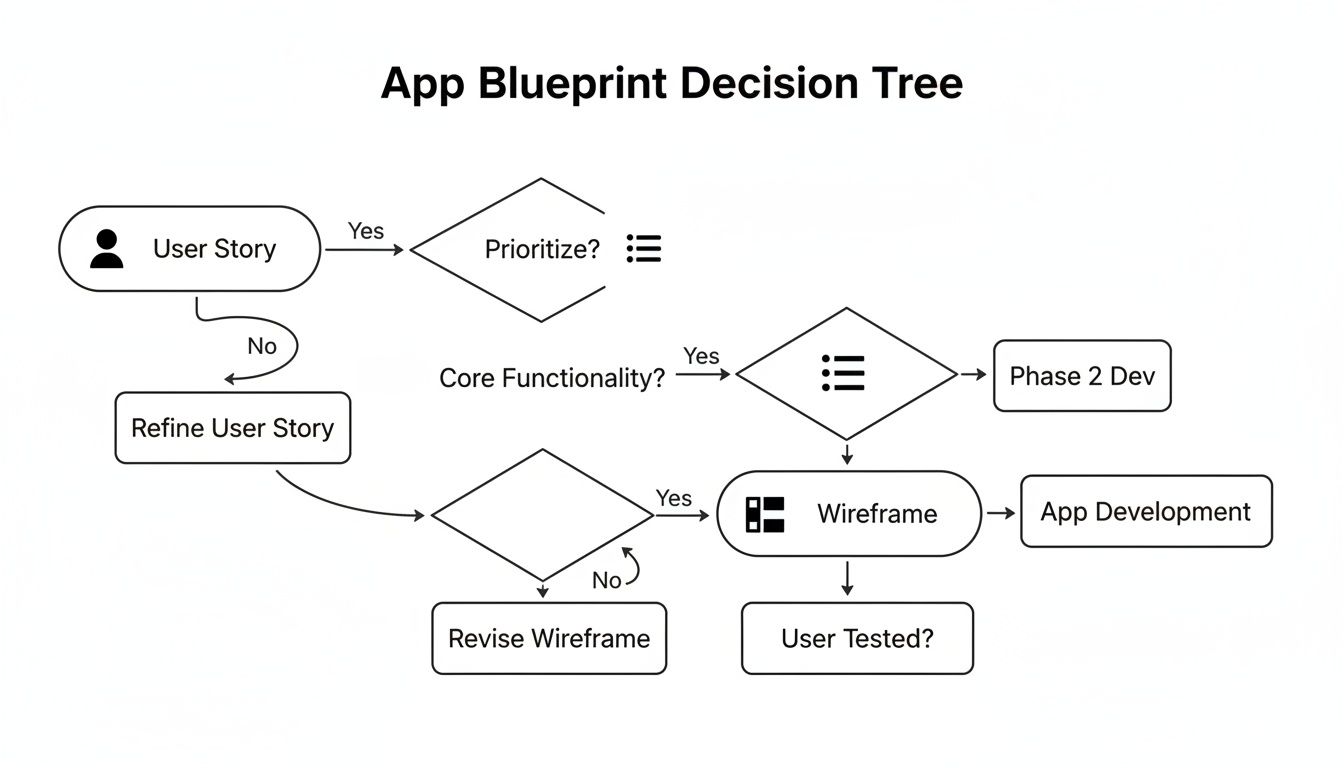
As you can see, getting your user stories and features locked down before you choose a path is critical. It ensures you build only what you absolutely need for a successful launch.
Low-Code and No-Code Platforms
The rise of low-code and no-code platforms has completely changed the game. These tools offer a visual, drag-and-drop way to build an app, kind of like putting together digital LEGO blocks. They empower non-technical founders to assemble powerful apps from pre-built components.
This approach has torn down the old barriers to entry. The market, valued at $28.75 billion last year, is projected to hit an incredible $264 billion by 2032. This explosion is driven by the 137.8 billion global app downloads in 2024 and a market revenue of $935 billion, making app creation more accessible than ever. You can read more about these trends from IBM's application development insights.
These platforms are perfect for building standard business apps, internal tools, or straightforward consumer applications without writing a single line of code. They democratize app development, empowering creators to bring ideas to life quickly and affordably.
The trade-off? You give up some customization. While you gain incredible speed and save a ton of money, you're working within the limits of the platform. If you have a truly novel feature in mind, a no-code tool might not be able to handle it. You can learn more in our guide to no-code application development.
AI-Native App Development
The newest and most disruptive path is AI-native development. Platforms like CatDoes represent a fundamental shift. Instead of dragging components or writing code, you simply describe your app's functionality in plain English.
An AI system interprets your requirements and generates the entire app for you: the user interface, the backend logic, and even the database connections. It blends the speed of no-code with a level of customization that used to be reserved for traditional coding.
For example, you could just say, "Create a user profile screen with a profile picture, name, and bio, plus a button to edit the information." The AI agent gets to work, building the visual components and the underlying code to make it all functional. This conversational approach makes development fast and intuitive, letting you iterate rapidly with natural language.
This is the ideal path for:
Startup MVPs: Build and test a functional product in days, not months, to see if your idea has legs.
Small Businesses: Create professional apps for customers or internal teams without a huge budget.
Non-Technical Founders: Turn a clear vision into a production-ready app without needing to learn code or manage developers.
Comparing App Development Methods
To make the right call, it helps to see the options side-by-side. Each path has clear trade-offs between cost, speed, and the technical skill required.
Method | Average Cost (MVP) | Time to Market | Technical Skill | Ideal For |
|---|---|---|---|---|
Traditional Coding | $50,000 - $250,000+ | 6-12+ months | Expert | Highly complex, bespoke apps with significant funding. |
Low-Code/No-Code | Low monthly subscription | Weeks to months | Low to None | Standard business apps, internal tools, simple consumer apps. |
AI-Native Development | Low monthly subscription | Days to weeks | None | MVPs, small business apps, and non-technical founders. |
Choosing your development path is a strategic move. By weighing your app's complexity against your budget and timeline, you can pick the method that gives you the best shot at turning your idea into a successful reality.
Building and Testing a Polished Mobile App
With your blueprint ready and a development path chosen, the real fun begins. This is the moment your wireframes and ideas finally become a tangible, functioning application. It’s no longer about what your app will do, but about making it do it.
This phase is a dynamic loop of creation, refinement, and validation, where you bring your vision to life, one screen and feature at a time.
From Prompt to Product with AI Development
If you've gone with an AI-native platform, your most valuable skill isn't coding, it's clear communication. The way you describe your app's needs directly shapes the final product. Instead of wrestling with complex functions, you'll be writing simple, direct prompts.
Want a login system? You just tell the AI agent: "Create a user authentication flow. Users should be able to sign up with an email and password or log in with their Google account." The AI gets to work, generating the necessary screens, backend logic, and database tables to make it happen.
This conversational style applies to every piece of your app. You can ask for a dashboard, a settings page, or a photo gallery, and the platform assembles the components for you. It's a method that drastically shrinks the initial build time, turning concepts into interactive prototypes in hours, not weeks.
Integrating Backend Services
Every modern app needs a brain, a place to store data, manage users, and handle all the behind-the-scenes logic. This is the backend, and for many aspiring creators, setting up a server is the most intimidating part of learning how to create their own app.
Thankfully, modern tools like Supabase make this incredibly simple. Think of it as a powerful, ready-to-use backend in a box. When you build with an AI-native tool that integrates with it, you can just state what you need. For example: "I need a database table to store user workout entries with fields for date, exercise type, duration, and calories burned."
The AI handles the rest, setting up the database and wiring it to your app's interface. This integration typically provides:
User Authentication: Securely manage sign-ups, logins, and user profiles right out of the box.
Databases: Store and retrieve app data without writing a single line of complex SQL.
Storage: Let users upload files like profile pictures or documents with ease.
This approach removes a massive technical roadblock, letting you stay focused on what the user actually sees and experiences.
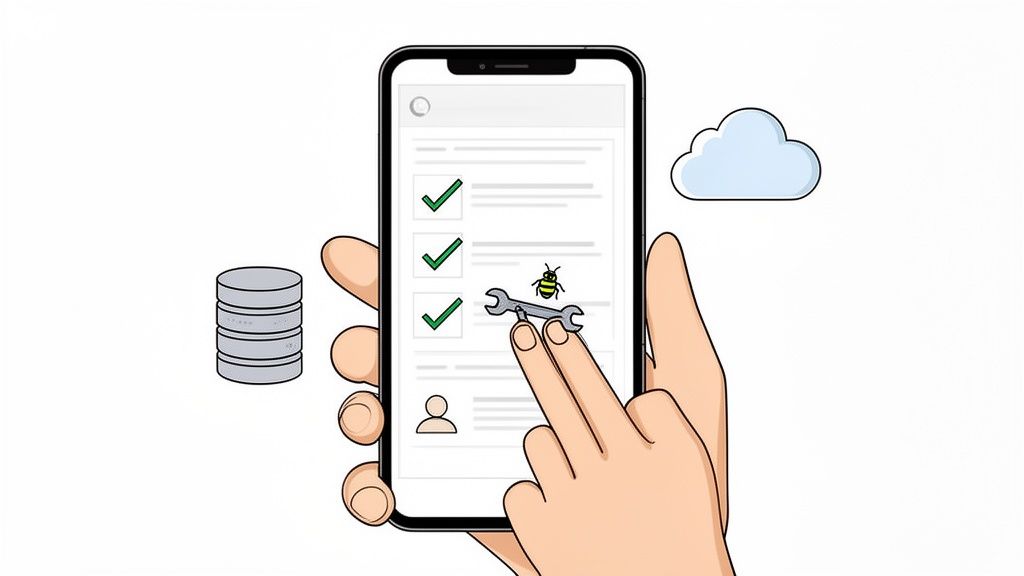
The Non-Negotiable Step of Testing
Building is only half the battle. No app is perfect on the first try, which is why rigorous testing is an absolute must. This isn't just about finding crashes; it's about making sure the app actually feels intuitive and delivers on its promise.
The most critical piece of this puzzle is User Acceptance Testing (UAT). This just means getting your app into the hands of real people, your target audience, and watching them use it. Their feedback is pure gold. They'll find confusing navigation, uncover bugs you completely missed, and suggest improvements you never would have thought of.
Testing reveals the gap between how you think your app works and how users actually experience it. Closing that gap is what turns a functional app into a great one.
Imagine trying to build your own mobile app the old way, with teams of developers, designers, and endless revision cycles. In 2024, the global mobile app market hit a staggering $750 to $800 billion valuation, and it's projected to explode to $1.1 trillion by 2034 with a blistering 21.55% annual growth rate. Yet, a shocking 90% of new apps fail, often crushed by high costs and timelines that average 6 to 12 months.
Previewing on Real Devices
Testing in a computer simulator is one thing, but nothing beats seeing and feeling your app on an actual smartphone. Modern development tools have made this part incredibly easy.
Many platforms, including CatDoes, let you scan a simple QR code with your phone's camera. This instantly loads a live preview of your app onto your device, whether it's an iPhone or an Android. This creates a powerful and immediate feedback loop. You can tweak something in the builder, scan the code, and see the result on your phone seconds later.
This cycle of build, preview, test, and refine is the core engine of app development. It lets you make small, continuous improvements that add up to a polished, professional, and user-friendly final product that’s ready for the world.
Navigating the App Store Launch Process
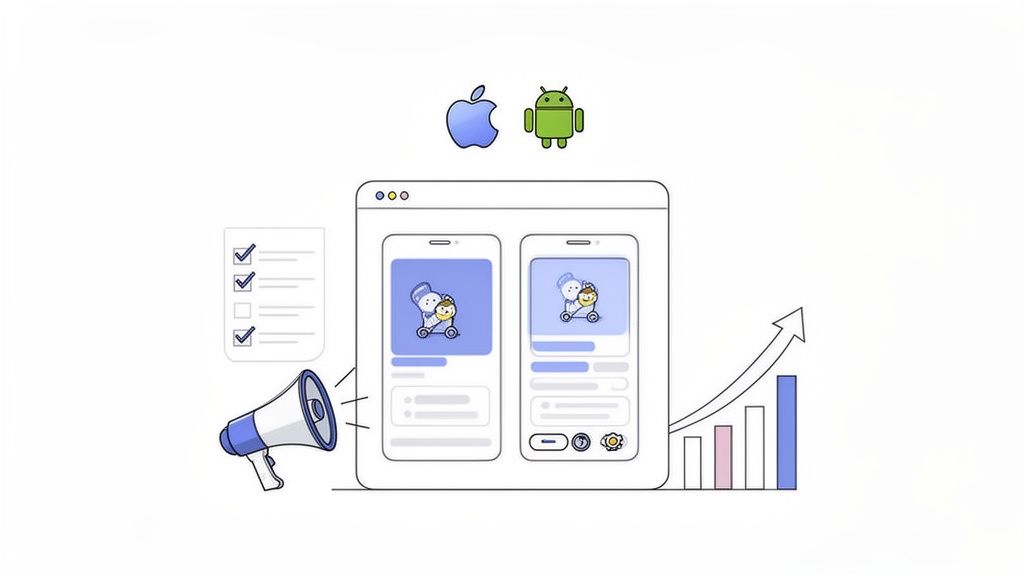
Alright, your app is built, tested, and looking sharp. Now for the final hurdle between you and your first users: the app stores. Don't be fooled. This isn't just a simple upload. It’s a strategic play that blends technical prep with smart marketing to nail that first impression.
Getting your app onto the Apple App Store and Google Play Store is a process that demands real attention to detail. A strong launch here is the difference between getting discovered and getting lost in the noise.
Crafting Your Digital Storefront
Before you can even think about submitting, you need to assemble all the assets that will represent your app to the world. This is your digital storefront, and every single piece plays a part in convincing someone to hit "Download." This is a huge part of learning how to create own app that people actually find and use.
Your store listing is part marketing, part information. Think of it like the packaging on a physical product. It has to be compelling.
A well-crafted app store page does more than just describe features. It tells a story, solves a problem, and sets expectations, turning a casual browser into an engaged user before they even open the app.
Here’s a quick checklist of the must-have assets for both platforms:
App Name and Icon: Your name needs to be memorable and unique. The icon has to be simple, instantly recognizable, and look good on any phone background.
Screenshots and App Previews: These are your most powerful visual sales tools. Don’t just show random screens. Create a visual story that walks users through the app's key benefits.
Compelling Description: You have seconds to grab someone's attention. Your first line should punch hard with your app's main value proposition, then you can dive into the features.
Privacy Policy: This is non-negotiable. Both stores require a link to a privacy policy, especially if your app collects any kind of user data.
These elements are often your only shot at making a case for your app. Make them count.
The Art of App Store Optimization (ASO)
App Store Optimization (ASO) is basically SEO for mobile apps. It’s the ongoing process of making your app more visible inside the app stores so you can rank higher in search results and, hopefully, get featured.
The foundation of good ASO is solid keyword research. You have to figure out the exact search terms your ideal customers are typing into the search bar. Weave these keywords naturally into your app’s title, subtitle (on iOS), and description. For a meal planning app, you'd want to target terms like "healthy recipes," "meal planner," or "grocery list." Getting this right can drive a huge number of organic downloads.
Sidestepping Common Rejection Hurdles
Both Apple and Google have notoriously strict guidelines. They want to ensure every app on their platform is high-quality, secure, and offers a great user experience. Getting that rejection email after a week of waiting is brutal, but most rejections are totally avoidable.
Here are the most common traps that get apps rejected:
Crashes and Bugs: This one’s a no-brainer. If your app is unstable, it's getting rejected. Test it obsessively on different devices and OS versions.
Incomplete Information: Don't be lazy with your submission. Provide clear, accurate metadata, including a detailed description and real contact info.
User Privacy Violations: Be completely transparent about what data you collect and why. A missing or vague privacy policy is a surefire way to get flagged.
Poor User Interface: Apple, in particular, has a very high bar for UI/UX. If your app looks unfinished or is confusing to navigate, they won't approve it.
Modern tools can take a lot of the technical sting out of the submission process. For example, an AI-native platform like CatDoes comes with an automated build-and-release agent. This system packages up all the necessary files, ensuring they meet the exact technical specs for both stores, which seriously cuts down the risk of a technical error. As you get ready for launch day, it pays to read up on how to successfully launch your app on an app store, as many of the core principles apply no matter where you're publishing.
Common Questions About Building an App
Jumping into app creation brings up a lot of questions. It’s totally normal to wonder about the budget, the timeline, and the right tools for the job. We get these questions all the time, so let's clear up the big ones right now.
My goal here is to give you the quick, straight-to-the-point answers you need to move forward with confidence.
How Much Does It Cost to Create an App?
This is the big one, and honestly, the answer is: it depends entirely on how you build it. The price tag can be anything from a monthly subscription to a six-figure investment.
Let's look at the typical costs for getting a first version, or Minimum Viable Product (MVP), out the door:
Traditional Coding: Going the route of a freelance developer or an agency is by far the most expensive. A straightforward MVP can easily run between $50,000 and $250,000, and often way more for anything complex.
Low-Code/No-Code Platforms: These tools have completely changed the game, making app creation much more affordable. You’re typically looking at a monthly subscription, usually somewhere between $25 to $500 a month, depending on the features you need.
AI-Native Development: Platforms in this space, like CatDoes, also work on a subscription model. This makes building an app a predictable monthly expense and gets rid of the scary, massive upfront cost.
The key takeaway is that you don't need a huge venture capital check anymore. Modern tools have made it possible to launch a powerful, fully functional app on a realistic budget.
What Is the Best Platform for a Beginner?
If you're just starting out, the best tool is the one that gets out of your way and lets you focus on your idea, not on learning to code. For that reason alone, beginners should avoid traditional development paths.
Your best bet as a non-technical creator is an AI-native platform. These tools handle almost all the technical details for you. Instead of fiddling with visual editors or trying to figure out databases, you just describe what you want your app to do in plain English. It's the most direct and intuitive way to get from a thought in your head to a real app you can test.
An AI-native platform offers the most direct path from concept to creation for a true beginner. It cuts out the need to learn a visual builder or understand backend architecture.
This lets you build fast, get feedback from actual users, and make changes on the fly without needing to call in a developer.
How Can I Legally Protect My App Idea?
Thinking about protecting your intellectual property early on is a smart move. While you can't just patent an idea, you can absolutely protect the unique way you bring that idea to life.
Here are the main ways you can legally protect your app:
Copyrights: This automatically protects your original code, the words in your app, your graphics, and your user interface design. You don't have to file anything for copyright to kick in, but registering it gives you much stronger legal ground if you need it.
Trademarks: This is for protecting your app's name, logo, and any slogans. A trademark stops others from using a similar brand identity that might confuse people.
Patents: A patent can protect a truly unique and non-obvious process or invention within your app. This is the most complicated and expensive type of protection, usually saved for groundbreaking new technology.
Non-Disclosure Agreements (NDAs): Before you show your app to potential partners, developers, or investors, have them sign an NDA. This is a simple contract that legally prevents them from sharing your private information.
For most people building their first app, focusing on copyrights and trademarks gives you a solid layer of protection without breaking the bank on legal fees. As you grow, it's always a good idea to chat with a lawyer who specializes in tech.
Ready to stop planning and start building? With CatDoes, you can describe your app idea in plain English and watch as our AI agents build a production-ready application for you. Transform your vision into reality today by visiting https://catdoes.com.
Nafis Amiri
Co-Founder of CatDoes


