Blog
Tutorials
How to Create an App on Your Own (2026 Guide)
Learn how to create an app on your own in 2026, from idea to launch. This guide covers validation, MVP design, no-code and AI tools, and app store publishing.

Nafis Amiri
Co-Founder of CatDoes

Ever look at the app store and think, "My idea could be on there"? It's a common thought, but learning how to create an app on your own feels like a huge leap. The good news? It's more achievable today than ever before. This guide is your roadmap, designed to take you from a rough concept to a published app, even if you don't have a massive budget or a team of developers on standby.
Key Takeaways
You can build an app on your own through three paths: traditional coding (6–12+ months), no-code platforms (1–3 months), or AI-native tools (1–4 weeks).
Validate demand and scope a lean MVP before you build anything — it is the step that saves the most time and money.
Always test on a real device, not just a browser preview, before you submit.
Publishing costs are small but unavoidable: a one-time $25 fee for Google Play and a $99/year Apple Developer subscription.
Table of Contents
Your Blueprint From Idea To App Store
Defining And Designing Your App
Choosing Your Development Path
Building And Testing Your App
Launching And Growing Your App
Frequently Asked Questions
Your Blueprint From Idea To App Store
In 2026, the idea of a solo founder building and launching a successful app isn't a fantasy anymore. It's a mainstream business strategy. The global mobile app market has absolutely exploded, growing from less than $200 billion in 2019 to a staggering estimated $522 billion to $935 billion by 2024. And it shows no signs of slowing down, making this the perfect moment to jump in. Discover more mobile app market insights on cmarix.com.
This insane growth means you’re not just working on a side project; you’re tapping into a massive, hungry marketplace. With Android and iOS dominating nearly the entire mobile world, a well-planned app has a shot at reaching a global audience. The journey from a napkin sketch to an app store feature isn't magic; it's a series of clear, manageable phases.
Understanding The App Creation Lifecycle
The whole process can be broken down into a simple, repeatable workflow. You start with an idea, move into design and planning how people will actually use it, and then shift into the build and launch stages. The best part is that modern tools have made every single one of these steps more accessible.
This flow chart gives you a bird's-eye view of the journey from a raw concept to a polished, launch-ready product.
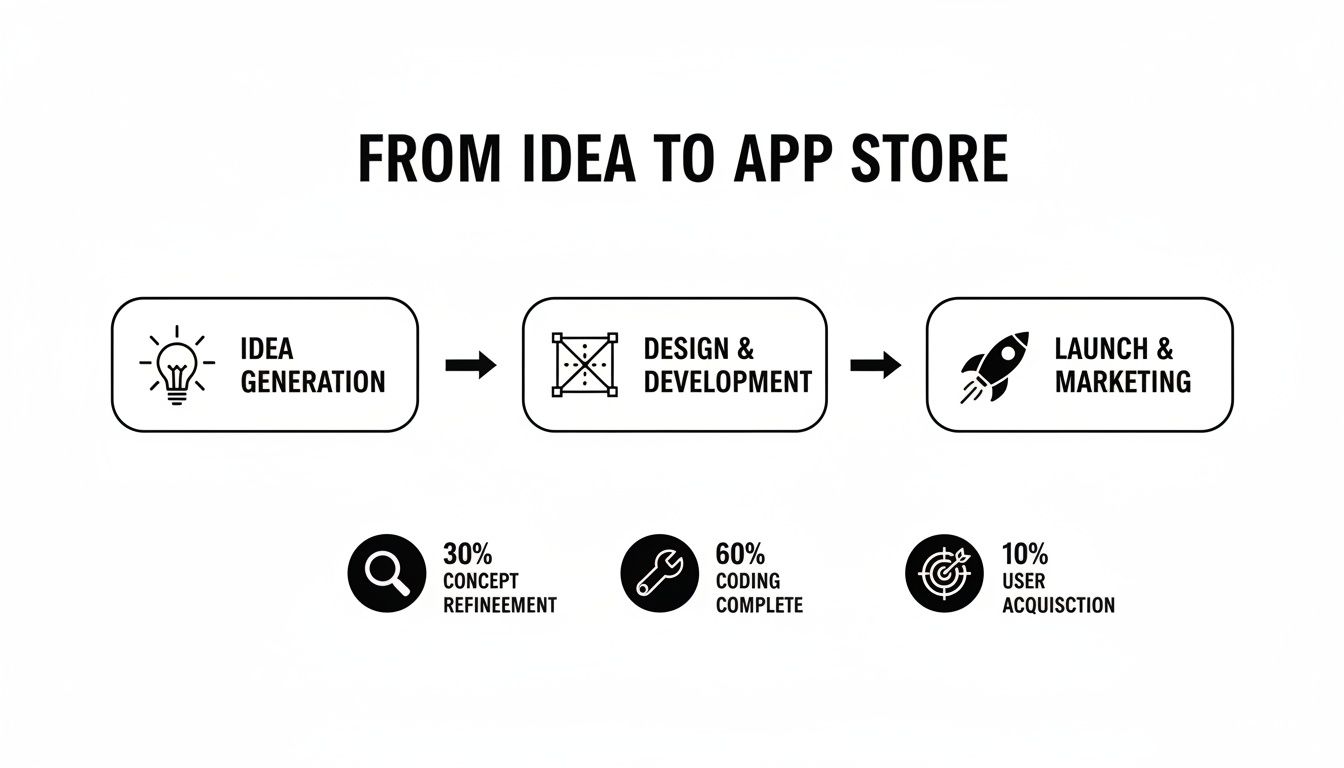
Each stage builds on the one before it, methodically turning an abstract thought into a real application that people can download and use.
But here’s a secret: a great idea isn't enough. Success comes from execution. The groundwork you lay before a single line of code is written will make or break your app. This critical first phase involves three key things:
Validating your concept to make sure people actually want what you're building.
Defining a lean Minimum Viable Product (MVP) to focus your energy and launch faster.
Grasping user experience (UX) basics so your app feels intuitive and isn't a frustrating mess.
The single biggest mistake I see founders make is diving straight into development without proving there’s a real audience for their idea. Proper validation saves an incredible amount of time, money, and heartache down the road.
We’re going to break this entire process down into simple, actionable steps. You'll learn how to define your app's scope, sketch out basic wireframes, and make smart tech choices. Better yet, we’ll explore how AI-powered tools are completely changing the game, making app creation a realistic goal for anyone with a solid idea.
If you want to really nail that first step, check out our guide on how to validate a business idea. It'll help you start off on the right foot.
Defining And Designing Your App
A brilliant app idea is just the beginning. The real magic happens when you translate that concept into a concrete plan, a step that’s absolutely crucial if you're learning how to create an app on your own. Before you even think about code or builders, this is where you lay the foundation that saves countless hours down the road.
This phase is all about proof, focus, and design. You need to prove people actually want what you’re building.

Confirming Your App Idea Has An Audience
It’s easy to fall in love with your own idea. The hard part is finding out if anyone else will. Don't skip this. A little validation now prevents a lot of wasted effort later.
Start by spying on the competition. Head to the app stores and Google, searching for apps that solve a similar problem. See what they do well, but more importantly, look for what they do poorly. User reviews are gold mines here. They are a direct line to customer frustrations, missing features, and bugs. This is where you find your opening to do better.
Next, do some quick keyword research. Free tools can show you how many people are searching for terms related to your app's core function. A high search volume is a strong signal that you’re onto something.
Finally, just talk to people. Create a dead-simple survey and share it in relevant online groups or with friends. Ask about their pain points and float your idea as a potential solution. There is no substitute for this kind of direct feedback.
Scoping Your Minimum Viable Product
Once you've confirmed there's a real need, it's time to narrow your focus. This means defining your Minimum Viable Product (MVP). The MVP isn’t your dream app; it's the most stripped-down version that solves one core problem for your user.
Resisting the urge to add "just one more feature" is one of the hardest but most important disciplines in app development. A focused MVP gets you to market faster, allowing you to learn from real user feedback instead of assumptions.
Trying to build everything at once is the number one rookie mistake. To define your MVP, just answer this one question: What is the single most important action a user must be able to complete in my app?
List the absolute bare-minimum features needed for that one action to work. That’s it. Everything else goes on a "future features" list. For a meal-planning app, the MVP might just let users find a recipe and add it to a calendar. Grocery list generation? Calorie counting? Those can wait for version two.
This lean approach is a lifesaver:
Faster Launch: You get into users' hands in weeks, not months.
Lower Initial Cost: Fewer features mean less development time and expense.
Real-World Feedback: You learn what users actually want, not what you think they want.
Crafting The User Experience And Interface
With a tight MVP scope, you can now think about how the app will look and feel. This breaks down into two connected parts: User Experience (UX) and User Interface (UI).
UX is all about the journey. It's the logic of the app, making it intuitive and easy to get from point A to point B. A good place to start is by mapping out the main user flow, which is the step-by-step path someone takes to complete that core MVP action.
UI is the visual layer: the colors, buttons, and fonts. It’s what makes the app look clean, professional, and trustworthy. The goal is to guide the user's eye without creating clutter. Applying essential software design best practices from the beginning will save you from major headaches later on.
You don’t need to be a designer to get this right. Start with simple wireframes, which are just basic, black-and-white layouts of each screen. You can literally sketch them on a napkin or use free online tools. Wireframes force you to think about structure and flow before getting distracted by colors.
Once you have wireframes, you can create a more detailed prototype. This becomes the blueprint for the entire development stage. If you need a hand with this, our guide on building a product prototype walks you through it step-by-step.
Choosing Your Development Path
Alright, you’ve got your app’s blueprint sketched out. Now comes the biggest decision you'll make in this entire process: how are you actually going to build this thing?
The path you choose here will shape everything, including your timeline, your budget, and what your final app can even do. Get this right, and you're set up for success.
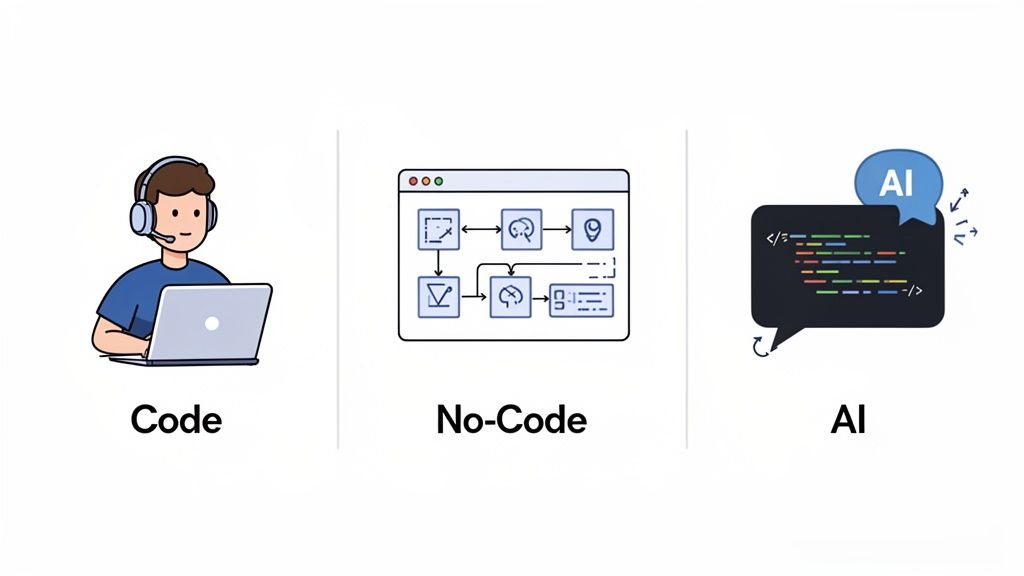
There are really three main ways to go about this on your own: the old-school coding route, the visual world of no-code platforms, and the new, more direct path of AI-native development. Let's break down what each one means for you so you can pick the one that fits your skills and goals.
The Traditional Coding Route
This is the classic, roll-up-your-sleeves approach. It means learning programming languages like Swift for iOS or Kotlin for Android and writing every line of your app from scratch.
Going this route gives you ultimate power and control. If you can dream it, you can build it. There are no platform limitations holding you back, so highly custom features or complex logic are completely on the table.
But that freedom comes with a hefty price tag, which is your time. The learning curve is incredibly steep. For an experienced developer, a simple app can take hundreds of hours. For a beginner? You can multiply that number significantly.
Pros: Total creative control, unlimited customization, and direct access to every native feature on a device.
Cons: A massive learning curve, a huge time commitment, and you're on the hook for every single bug fix and update.
Best For: People who already have a programming background or those who are genuinely passionate about learning to code and have a very flexible timeline.
No-Code And Low-Code Platforms
Over the last decade, a different approach has completely changed the game for non-technical founders. No-code platforms let you build apps with visual, drag-and-drop editors. Low-code is similar but gives you the option to add small snippets of custom code for extra functionality.
These tools are brilliant for getting straightforward apps off the ground quickly. Think internal business tools, simple directories, or content-driven apps. They can shrink your development time from many months down to just a few weeks.
The catch? You’re building inside a walled garden. You're limited to the features and integrations the platform offers. If you need a unique piece of functionality that isn't supported, you’re usually stuck.
There’s a subtler catch, too. “No-code” rarely means “no technical thinking.” You still have to model your data, connect logic flows, and reason through conditional rules to make anything beyond a template actually work. That hidden learning curve is exactly the wall most non-technical founders hit. It is also the line the next approach erases completely.
The rise of visual development tools has been a game-changer for entrepreneurs. Suddenly, building a functional MVP is possible without needing to hire an expensive development agency or spend a year learning to code.
Historically, this just wasn't an option. The low-code market was recently valued at around $28.75 billion and is projected to explode to roughly $264 billion by 2032. That massive growth tells you just how many creators are jumping on this path. You can learn more about recent application development trends on ibm.com.
The AI-Native Development Path
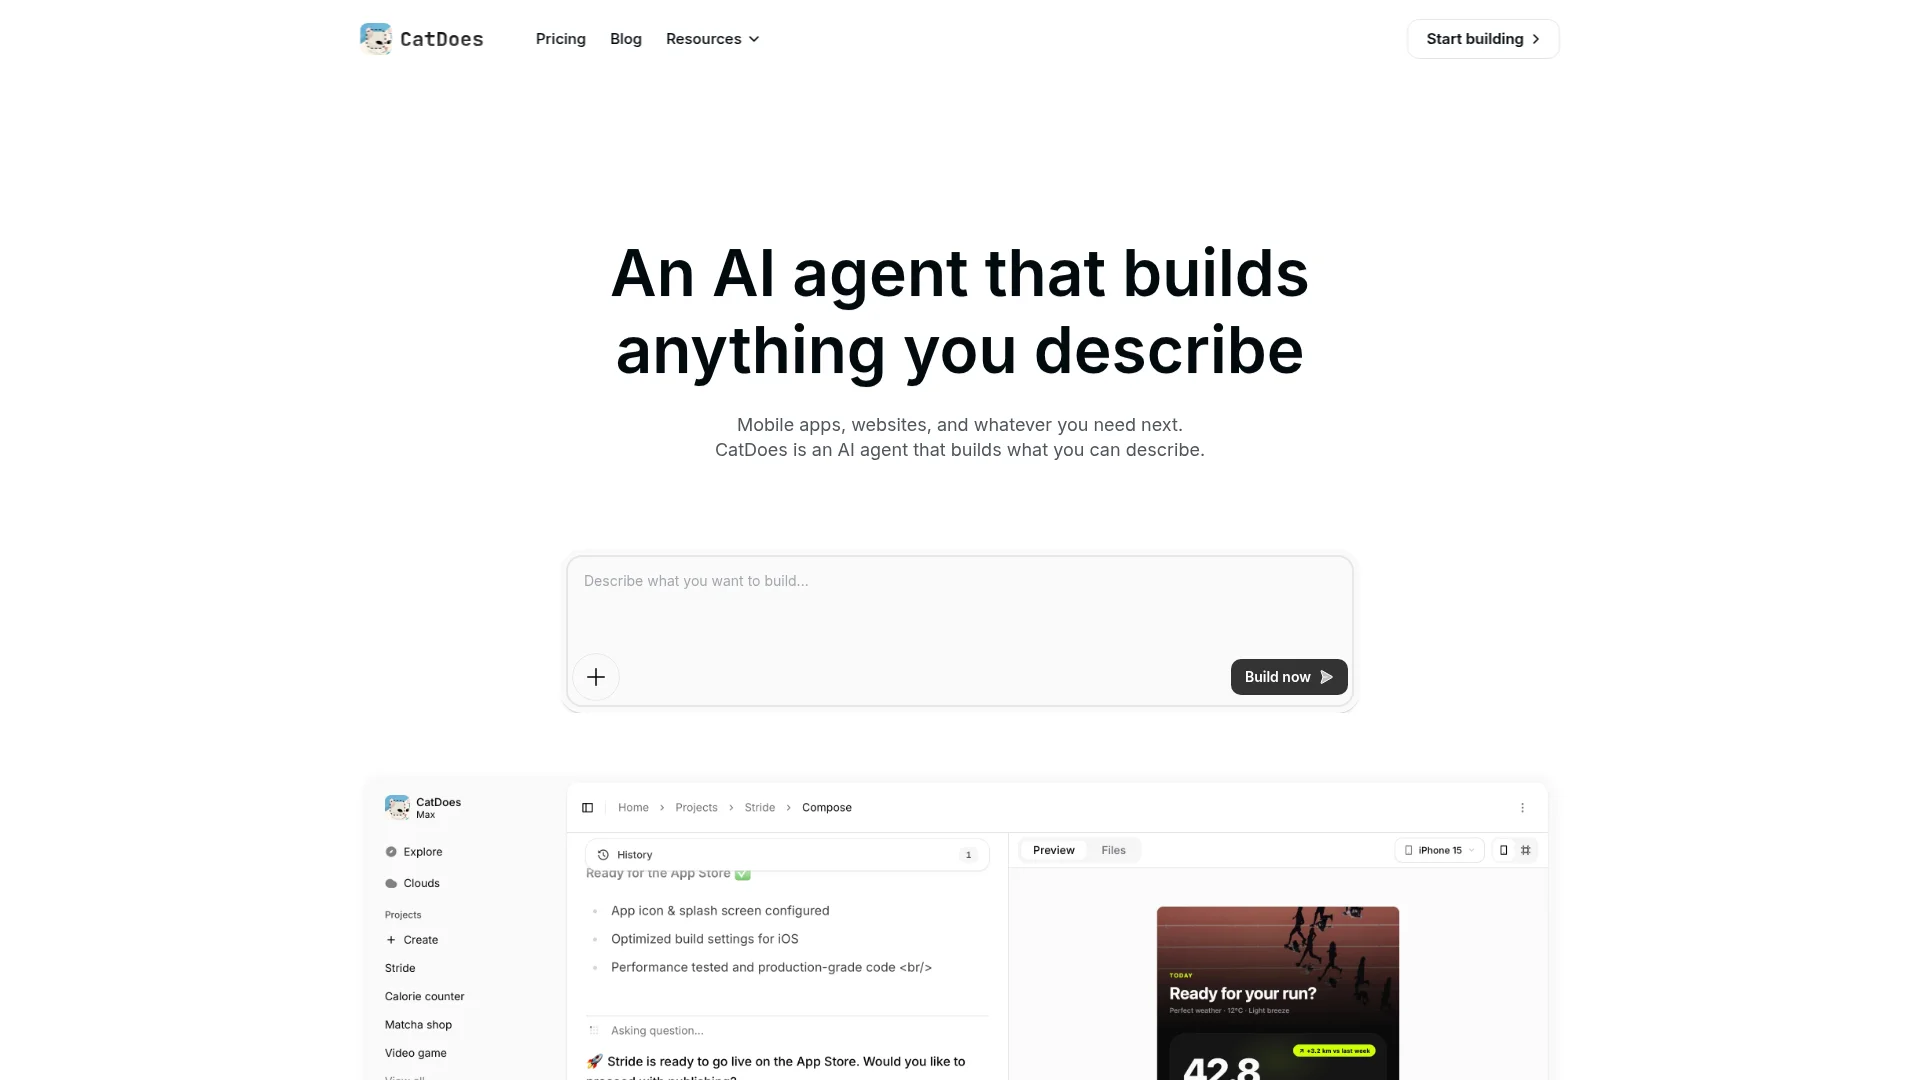
The newest, and frankly most direct, route is what we call AI-native development. Platforms like CatDoes lead this charge, using artificial intelligence to turn your app idea, described in plain English, into a fully coded, functional application.
You simply explain what your app does, who it's for, and the features it needs, in plain English. The AI then generates the interface, writes the backend code, and provisions a full cloud backend for you: database, user authentication, file storage, and realtime. With CatDoes that backend (CatDoes Cloud) is included on every plan, so you never wire up a separate service like Firebase or Supabase, and you never touch a data model or a logic flow yourself. You get the speed of no-code with power and flexibility much closer to traditional coding.
Best of all, you aren't locked into a proprietary system. The AI generates real, human-readable code (like React Native), which you can export at any time. If your app takes off and you need to bring in a developer for advanced features, they can pick up right where the AI left off.
It also takes you all the way to launch. CatDoes ships the same project to the Apple App Store, Google Play, and the web with your own custom domain, so a single plain-English description can become a real, downloadable app in every place your users are.
This path is perfect for solo founders who want to build a truly custom, ready-for-market app without needing a technical background. It automates all the tedious, time-consuming work while giving you a rock-solid, scalable foundation.
Comparing App Development Paths For Solo Creators
To make the decision easier, here’s a quick breakdown of how these three paths stack up against each other based on what matters most when you're building alone.
Development Path | Technical Skill Required | Time to MVP | Cost | Best For |
|---|---|---|---|---|
Traditional Coding | High (Programming languages, frameworks) | 6-12+ months | Low (Time is the main cost) | Custom, complex apps; learning to code |
No-Code/Low-Code | Low (Visual editors, logic flows) | 1-3 months | Medium (Monthly subscriptions) | Simple, template-based apps |
AI-Native (e.g. CatDoes) | None (plain-English descriptions) | 1-4 weeks | Low to Medium (free plan, then tiered) | Custom, ready-to-launch apps with zero coding; backend, app-store deploy & code export included |
Ultimately, choosing your path is a personal call. Take a hard look at your own technical comfort, your budget, and how fast you need to get your idea into the hands of users. This one decision sets the stage for everything that follows.
Building And Testing Your App
Alright, you've locked in your design and chosen a development path. Now the real work begins. This is where your validated idea and careful planning finally start looking and feeling like a real, functional application. Don't think of this as a one-and-done build, though. It's a living cycle: create, test, and refine.
The modern way to create an app on your own is to let intelligent automation handle the heavy lifting. This frees you up to obsess over the user experience instead of getting bogged down in complex code. The whole process becomes less of a technical nightmare and more of a creative conversation.
Bringing Your Idea To Life With AI
If you went with an AI-native tool like CatDoes, the initial build is refreshingly direct. You kick things off by describing your app just like you'd explain it to a colleague. Forget database schemas; you’d just say: "Create an app for logging daily workouts. Users need to sign up, add exercises with sets and reps, and see their workout history."
The AI takes those instructions and generates a complete, interactive design. You can click through every screen, test the user flow, and see how it all hangs together before a single line of permanent code is written. This is a huge win because you can spot design issues when they're still easy to fix.
Once you give the design a thumbs-up, the platform's software agents get to work. They write the front-end code (usually in a flexible framework like React Native), configure the backend logic, and provision your cloud database, authentication, and storage. In minutes, you have the first working version of your app, with no coding on your part.
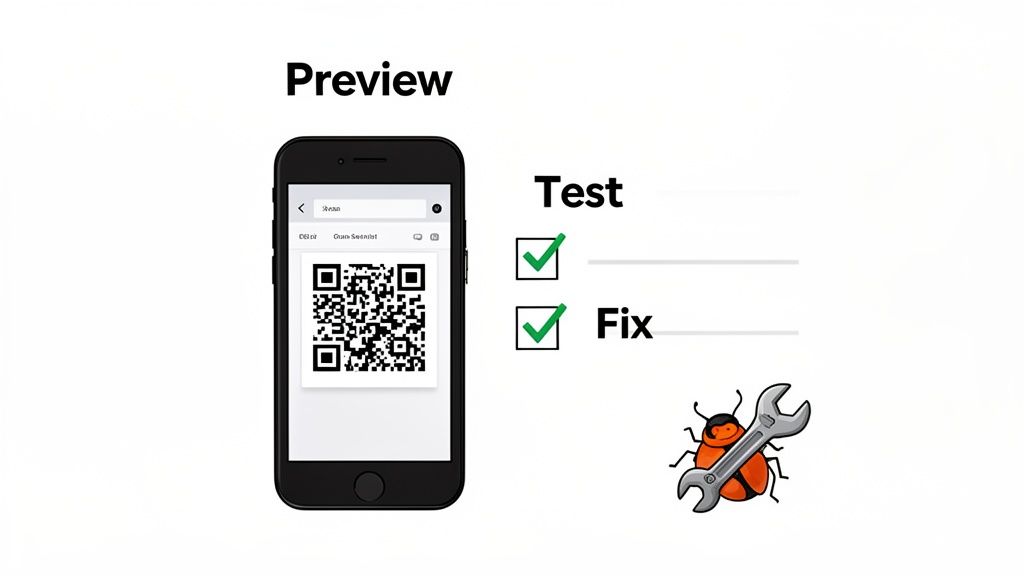
The Iterative Testing Loop
No first draft is ever perfect. The most important part of this whole phase is getting into a tight, iterative loop: Build, Test, Fix, Repeat. Your goal is simple: find and squash bugs before your users do. Every round of testing makes the app more stable and the experience more polished.
Modern platforms make this feedback cycle incredibly fast. You don't need complicated developer tools or simulators just to see your app in action.
Live Browser Previews: As the AI builds, you can often watch the changes happen in real-time, right in your web browser. It’s perfect for quick checks on layout and basic features.
On-Device Testing via QR Code: For a true feel of the experience, just scan a QR code with your phone. This instantly loads the latest build onto your device, letting you test it in the real world.
Testing on an actual device is non-negotiable. An app's feel (the size of touch targets, its responsiveness, the way gestures work) is completely different on a phone than in a browser. This one step will uncover problems you'd otherwise miss completely.
As you test, you'll inevitably find things you want to change. Maybe a button is too small, a workflow is confusing, or a feature just doesn't work as you imagined. With an AI tool, giving feedback is just another conversation. You can type instructions like, "Change the main button color to blue," or "Add a confirmation pop-up before a user deletes their workout." The AI understands, makes the changes, and the testing loop starts again.
Parallel Paths For Coders And No-Coders
If you're building your app with traditional code or a different no-code platform, the core idea of testing and iterating is the same, but the mechanics are a bit different.
For Traditional Coders: You'll be setting up a local development environment, using a version control system like Git to manage your code, and running simulators (like Xcode for iOS or Android Studio for Android) to test your builds. This also involves writing unit tests for individual functions and integration tests to make sure all the pieces of your app play nicely together.
For No-Code Builders: Most no-code platforms have a "preview" mode that lets you test your app's logic and user flow inside their editor. For on-device testing, you'll likely use a companion app from the platform. The feedback loop here is less about code and more about tweaking visual workflows and database connections.
No matter which path you take, a simple testing checklist is a lifesaver. Make sure it covers these bases:
Core Functionality: Does the main feature of the app work flawlessly every time?
User Interface: Do all the buttons, forms, and menus look right and feel intuitive on different screen sizes?
Performance: Is the app fast? Does it load quickly and respond instantly to user input?
Edge Cases: What happens if someone enters bad data or their internet connection drops?
This build-and-test cycle is the heart of app development. It's where you methodically turn your raw idea into a polished, stable, and user-friendly product that’s ready for the world.
Launching And Growing Your App
Getting your app built and tested is a huge milestone, but the final hurdle is getting it into the hands of real users. This is the moment your project goes from a private build to a public product, and it’s all about navigating the launch and planting the seeds for future growth.
This process revolves around the two major marketplaces: the Apple App Store and the Google Play Store.
Preparing For The App Stores
Before you can even think about submitting your app, you’ll need to set up developer accounts with both Apple and Google. Just a heads up, both charge an annual fee. It’s just a necessary cost of doing business in the mobile world.
Once your accounts are live, your focus shifts to creating your "storefront." These are the marketing assets that will convince people to download your app, and they are far from an afterthought. A great first impression is critical.
You’ll need to prepare a few key things:
App Icon: This is your app's tiny billboard. It needs to be simple, memorable, and look sharp against any home screen wallpaper.
Screenshots: Think of these as your visual sales pitch. Don’t just show random screens; craft a story that walks a user through your app's main purpose and coolest features.
App Description: This is your chance to use SEO-friendly language to explain what your app does and what problem it solves. Lead with the most compelling benefits right away.
Navigating The Submission And Review Process
Submitting your app for the first time can feel a little intimidating, but it’s a very structured process. Both Apple and Google have detailed guidelines you absolutely must follow. Trying to cut corners here is the fastest way to get a rejection, so take the time to read them carefully.
Common reasons for rejection include privacy issues, missing information, or bugs the reviewers find. This is exactly why that testing phase we covered earlier is so important. Your app needs to be stable, and you must have a clear, accessible privacy policy.
Modern platforms like CatDoes can make this stage much less painful. CatDoes runs an App Store review simulation that flags likely rejection reasons before you ever submit, then its build and release agents package your app correctly for each store so you dodge common technical errors. For a solo creator, catching those problems in advance is a massive advantage. If you want a detailed breakdown of every step, our guide on how to submit an app to the app store has you covered.
Driving Growth After Launch Day
Getting approved is a fantastic feeling, but the work is just beginning. The app market is incredibly competitive. The new game isn't just about building; it's about shipping fast, learning from feedback, and battling aggressive user churn.
The data is sobering: about 77% of users abandon a new app within just three days of installing it. This stark reality has forced everyone, from solo founders to big companies, to simplify their apps and cut non-essential features from early versions. With global app marketing spend projected to hit roughly $109 billion in 2025, you can’t afford to be inefficient.
Your first users are not just download stats; they are your most valuable source of feedback. Listen to them, engage with them, and use their insights to make version two ten times better.
You don't need a huge marketing budget to get those initial users. Start small and smart.
Reach Out to Your Network: Share the app with friends, family, and colleagues. Ask them for brutally honest feedback.
Engage in Niche Communities: Find the online forums or social media groups where your ideal users hang out. Share your app as a genuine solution to a problem they're discussing. Don't just spam a link.
Collect Feedback and Monitor Analytics: Use simple analytics to see what people are actually doing in your app. Which features get the most use? Where are they getting stuck? This data is pure gold for planning your first update.
Your launch isn't the finish line. It's the starting gun for a continuous cycle of learning, improving, and growing. From here, scaling your app is its own discipline: doubling down on what users love, cutting what they ignore, and shipping improvements on a steady cadence.
Frequently Asked Questions
Even with a clear plan, a few practical questions always pop up right before you dive in. Getting these sorted out can be the final push you need to go from idea to actually building something. Here are the most common ones I hear from people going it alone.
Can I Really Build an App for Free?
Yes and no. You can absolutely build and test a functional app without spending a dime upfront. Most modern builders, including CatDoes, have generous free plans that are perfect for getting your first version off the ground.
But "free" to build isn't the same as "free" to launch. To get your app into the hands of the public, you have to publish it on the official app stores, and they charge for entry.
The Google Play Store has a one-time setup fee of about $25.
The Apple App Store requires a $99 annual subscription to their Apple Developer Program.
So, while the creative and development part can be free, budget for these small but unavoidable publishing costs.
How Long Does It Realistically Take to Build an App by Myself?
This is the classic "it depends" question, but we can put some real numbers on it. The timeline hinges almost entirely on the path you choose and how complex your app idea is. A simple tool with one or two key functions is worlds away from a multi-faceted social platform.
Here’s a rough but realistic breakdown for getting a Minimum Viable Product (MVP) out the door:
Your Development Path | Realistic Time to an MVP |
|---|---|
Traditional Coding (starting from scratch) | 6 to 12+ months |
Using a No-Code / Low-Code Platform | 1 to 3 months |
With an AI-Native Platform (like CatDoes) | 1 to 4 weeks |
As you can see, AI-native platforms are a game-changer. They automate the most tedious parts of design and coding, letting you get a working app ready for real users in a fraction of the time.
Here's a hard-won piece of advice: The single biggest factor in your timeline isn't your tool, it's your focus. A tightly scoped, well-defined MVP will always beat a sprawling, feature-heavy dream app to market. Always.
What's the Single Hardest Part of Making an App?
It’s probably not what you think. While the technical side of things can feel intimidating, most solo founders I know agree on this: the hardest part is getting that initial momentum after you launch.
Building is just the first step. The real challenge is finding your first users, convincing them to try your app, and then, most importantly, getting honest feedback from them. It’s a relentless cycle of marketing, listening, and tweaking your app based on what people actually do, not what you think they'll do. It takes a ton of persistence, but it's also where the real journey begins.
Ready to stop wondering and start building? With CatDoes, you can describe your app idea in plain English and watch as AI generates the design, code, and backend for you. Bring your vision to life in weeks, not months. Start building your app for free on catdoes.com.
Nafis Amiri
Co-Founder of CatDoes


