Blog
Tutorials
How to Build a Database for Your App From Scratch
Learn how to build a database with this comprehensive guide. We cover everything from schema design to choosing the right tech and launching your app.

Nafis Amiri
Co-Founder of CatDoes
Before you write a single line of code, you need a plan for your data. This is, without a doubt, the most critical step in building an app. It's about breaking down your big idea into its core pieces of information, figuring out what makes them unique, and then mapping out how they all connect.
Getting this right from the start saves you from massive headaches and costly rebuilds down the road. This blueprint, called a schema, is the foundation your entire app will stand on.
From App Idea to a Solid Database Plan
Every great app starts with a simple idea, not a database. Your first job is to translate that idea into the raw information it needs to function. Think of it like a chef gathering ingredients before cooking. What does your app need to collect, store, and show users to be useful?
If you're building a social media app, for example, you aren't just building "a social platform." You're managing users, posts, comments, and likes. Each one of these is a distinct 'thing' your database needs to track. This is where the abstract idea starts to become a concrete plan.
Identifying Your Core Components
The easiest way to start is by listing out all the major nouns related to what your app does. This simple exercise will give you the names of your main database tables.
Let's stick with the social media app example:
Users: The people using the app. They'll have a username, an email, maybe a profile picture.
Posts: The content users share. A post will have some text, maybe an image, and a timestamp.
Comments: Replies to posts. A comment has to be linked to a specific user and a specific post.
Likes: How users react to a post. A "like" is really just a connection between a user and a post.
This initial brainstorm is all about defining the building blocks of your app's world.
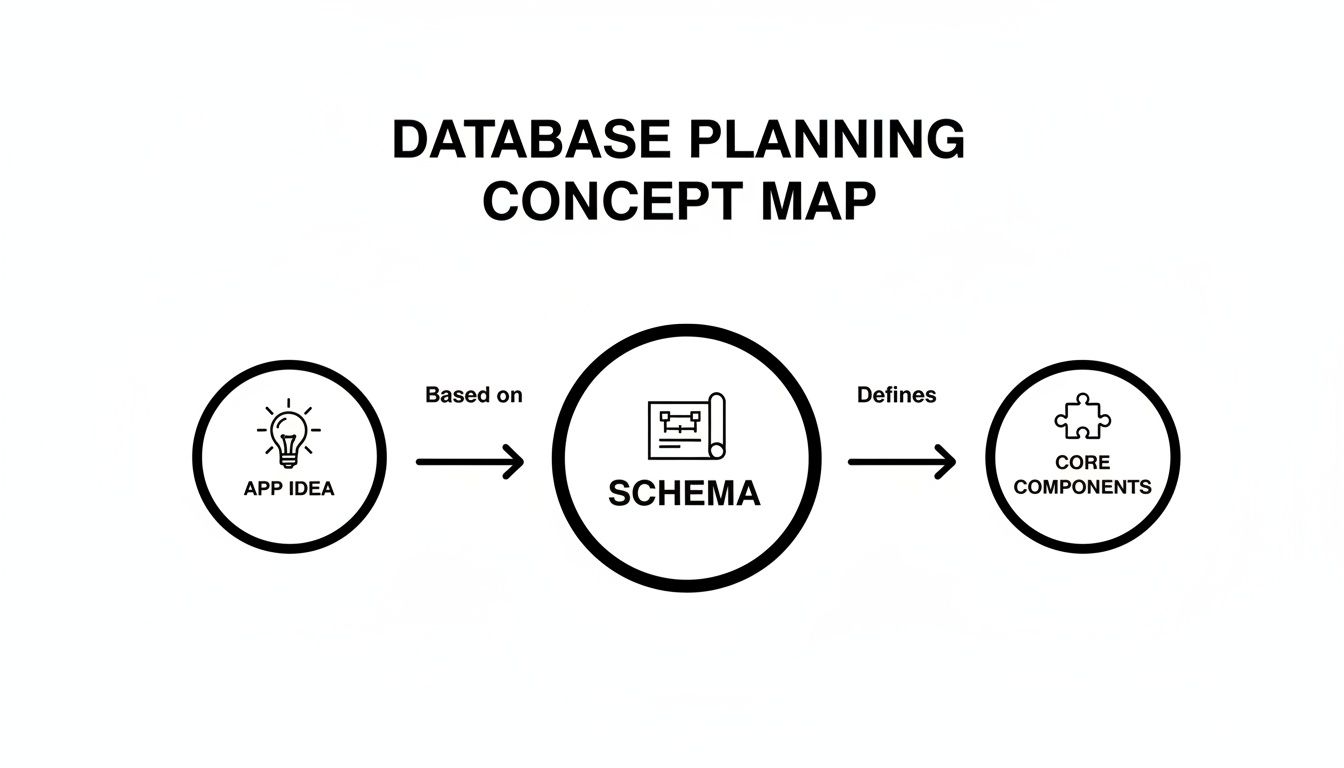
As you can see, a strong database begins with a clear concept, which you then deconstruct into core components before structuring them into a formal schema.
This phase is tightly linked to your original vision. If you're still refining that, our guide on how to validate a business idea can help you sharpen your focus, which in turn clarifies exactly what data you need.
Defining Properties and Data Types
Once you have your list of components, it's time to get specific. What details do you need to store for each one? For a User, you might need:
user_id(a unique number to identify them)username(text)email(text, and it must be unique)password_hash(text, for security)profile_picture_url(text, to store a link)created_at(a timestamp)
See how each property has a data type? Choosing the right one is crucial for performance and making sure your data is clean. Using a 'number' for user_id is far more efficient for lookups than using 'text'.
Mapping the Relationships
This is where the magic happens. A database isn't just a collection of lists; its power comes from the connections between those lists. These relationships are what bring your app's logic to life.
For our social app, the relationships are pretty intuitive:
A User can have many Posts. This is a classic "one-to-many" relationship.
A Post can have many Comments. Another "one-to-many."
A User can also make many Comments.
Here's a tricky one: a User can Like many Posts, and a Post can be Liked by many Users. This is called a "many-to-many" relationship.
Sketching this out on a whiteboard or a piece of paper is incredibly helpful. This visual map of your schema becomes your guide for the actual build. It ensures every piece of data has a home and that you can efficiently ask your database complex questions, like "show me all the comments made by this user on that specific post."
Alright, you've got your app's data mapped out. Now comes the big decision: where is all that information actually going to live?
This is a critical fork in the road. The database technology you pick will have a huge impact on your app's speed, how easily it can grow, and how much of a headache it is to add new features down the line. It’s about more than just a brand name; you're choosing a core philosophy for how your data gets organized.
The choice usually comes down to two main camps: relational (SQL) and non-relational (NoSQL) databases. They have completely different strengths, and knowing the difference is the key to getting this right.
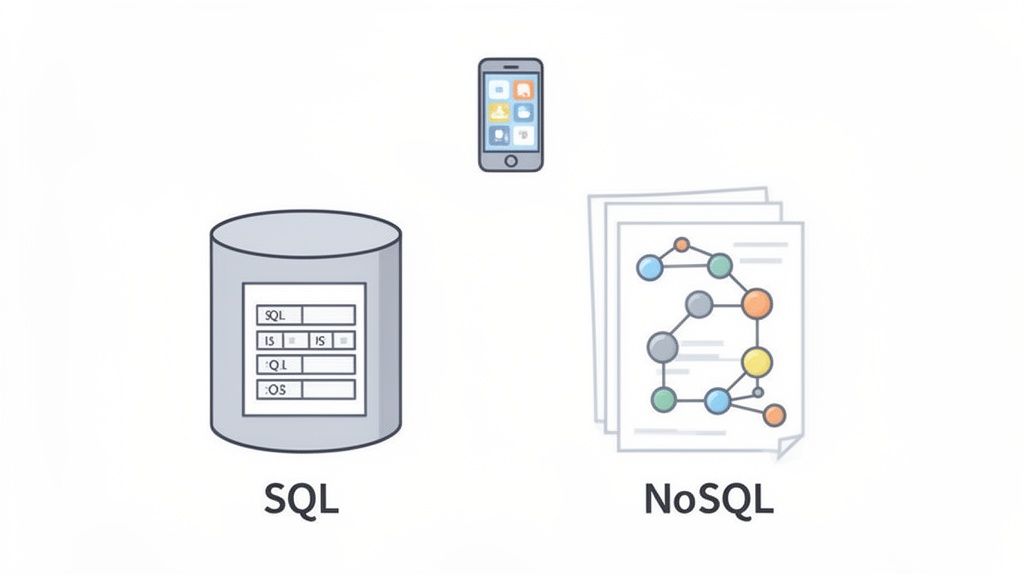
SQL Databases for Structured Data
Relational databases, which speak Structured Query Language (SQL), are the battle-tested workhorses of the tech world. Think of them as a collection of perfectly organized spreadsheets. Data lives in tables with strict rows and columns, and this rigid structure, called a schema, is defined upfront.
For our social media app, a SQL database like PostgreSQL is a fantastic choice. The reason is simple: the relationships are predictable. A posts table will always have a user_id that links back to a specific user in the users table. This guarantees every post has an owner.
That strictness is SQL's killer feature. It's the right call when your data is highly structured and the relationships between pieces of data are everything.
When data integrity is non-negotiable, a SQL database is often the safest bet. Its schema enforcement prevents messy or incomplete data from ever entering your system, making your application more reliable.
NoSQL Databases for Flexibility
On the other side, you have NoSQL databases. Don't let the name fool you; it really means "Not Only SQL." These databases were born out of the modern web's need for blistering speed and massive scale.
Instead of rigid tables, NoSQL databases store data in more flexible formats, like JSON-style documents, key-value pairs, or graphs. A great example is MongoDB, which uses a document model. This is perfect for apps where your data structure might change over time or isn't consistent across all entries.
Let’s say you want to add a "poll" feature to our social app. With NoSQL, you could just add a new poll_data object to some of the post documents. You don't have to change the structure for all the other posts that aren't polls. This kind of agility can dramatically speed up development, especially when you're moving fast.
The Rise of Backend as a Service
There's a third option that's become incredibly popular because it simplifies everything: Backend as a Service (BaaS).
Platforms like Supabase offer a brilliant middle ground. They give you a powerful, managed database, often a rock-solid SQL one like PostgreSQL, but wrap it in a clean, easy-to-use dashboard. Even better, they bundle in other critical features like user authentication, file storage, and instant APIs.
For a mobile app built with React Native and Expo, a BaaS is a massive productivity boost. It takes server management, security, and scaling completely off your plate. You get the reliability of SQL without the operational headache, letting you focus almost entirely on building a great user experience.
The growth in this space is no surprise. The global database management system market hit USD 132.09 billion in 2025 and is projected to reach USD 406.03 billion by 2034. You can discover more insights about the expanding DBMS market to see just how essential these technologies are becoming.
To make the choice clearer, here’s a quick comparison of the three approaches.
Comparison of Database Types SQL vs NoSQL vs BaaS
This table breaks down the key characteristics of SQL, NoSQL, and Backend-as-a-Service (BaaS) platforms to help you decide which is best for your application.
Feature | SQL (e.g., PostgreSQL) | NoSQL (e.g., MongoDB) | BaaS (e.g., Supabase) |
|---|---|---|---|
Data Structure | Rigid schema, structured tables | Flexible schema, documents/JSON | Often SQL-based, but with simplified management |
Best For | Data with clear, predictable relationships (e.g., user profiles, financial data) | Unstructured or rapidly changing data (e.g., content, IoT data) | Mobile apps, prototypes, and projects needing rapid development |
Scalability | Scales vertically (more power to one server) | Scales horizontally (more servers) | Managed and automated scaling |
Development Speed | Can be slower due to upfront schema design | Faster iteration and flexibility | Extremely fast; backend is pre-built |
Management | Requires server setup, maintenance, and security management | Similar management overhead to SQL | Fully managed, minimal dev-ops required |
So, what’s the takeaway? SQL gives you structure and reliability. NoSQL offers flexibility and speed. And BaaS delivers a powerful, managed solution that lets you build faster than ever before. Choosing the right one comes down to what your specific project needs most.
With our schema planned out, it's time to actually build the thing. For this, we're going to use Supabase, a platform that's become a go-to for developers who want the power of a PostgreSQL database without the headache of managing servers. It's a Backend as a Service (BaaS) that gives us a cloud-hosted database and a ready-made API in minutes.
Honestly, the speed is what wins people over. You sign up, create a project, and you've got a fully functional database ready to go. No complex setup, no server configuration. This lets you jump straight into building your app's features.
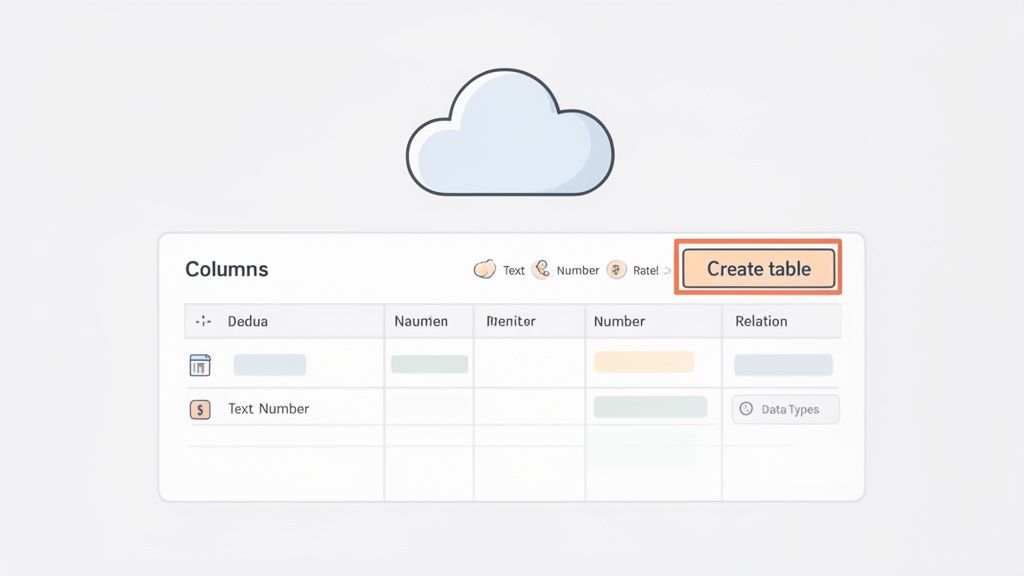
The dashboard makes it even easier. It gives you a visual way to create tables and define columns, so you can build out your entire database structure without touching a single line of SQL.
This is the table editor, which will be our home base for turning that schema we designed into a real, working database.
Creating Your First Table
Let's start with the users table we mapped out earlier. Inside your Supabase dashboard, find the Table Editor and hit "Create a new table." This brings up a simple form where you'll name your table and add the columns.
Each column is just a property for our users. For instance, we'll need columns for username, email, and so on. Supabase gives you a ton of data types to choose from, which helps make sure your data is stored correctly and efficiently.
Here’s how we'd set up that users table:
id: Supabase handles this for you, creating a unique identifier that acts as the Primary Key. It's crucial for linking tables.
username: Use the
textdata type. A good pro-tip is to enforce uniqueness to avoid duplicate usernames right at the database level.email: Also
text, and you should definitely make this field unique, too.profile_picture_url: This can be a simple
textfield where we'll store the URL to an image.created_at: Pick the
timestamptz(timestamp with time zone) type. Supabase can even default this to the current time whenever a new user signs up, which is super handy.
Building tables through a visual interface like this is one of the biggest perks of a BaaS. It cuts down the setup time that used to be a manual, error-prone chore. This shift toward managed services is part of a bigger trend: database automation.
This space is growing like crazy. The global database automation market was valued at USD 1.93 billion in 2024 and is projected to hit USD 8.04 billion by 2030. If you're curious, you can read the full research about database automation trends to see just how much this is changing the development game.
Establishing Relationships Between Tables
A database isn't just a collection of lists; its real power comes from connecting those lists. These connections, or relationships, are what bring the logic of your app to life. Let's build our posts table and link it to the users table.
Go ahead and create a new table called posts. Give it a few columns, like content (text) and created_at (timestamptz). Now for the important part: linking a post back to the user who created it. We do this with a special type of column.
This is what's known as a foreign key. It's a column in the posts table that will hold the id of a user from the users table.
A foreign key is a column in one table that uniquely identifies a row of another table. It is the practical implementation of the relationships you mapped out in your schema, creating a direct link between your
postsandusers.
Setting this up in Supabase is pretty straightforward:
Add a new column to your
poststable. Let's call ituser_id.Its data type needs to match the
idcolumn inusers(Supabase often usesuuid).Next to the data type, click the little link icon. This lets you configure the foreign key. You'll simply select the
userstable and itsidcolumn as the reference.
This relationship enforces data integrity. It means you literally can't create a post with a user_id that doesn't exist in the users table. This simple rule prevents "orphaned" data and keeps your database clean and predictable. To get a better handle on the platform's capabilities, you can learn more about what Supabase is and its core features in our detailed guide.
And just like that, you have a functional, cloud-hosted database with tables and relationships all set up. It’s now ready to store data for your React Native application. The next move is connecting our frontend to this shiny new backend.
Connecting Your Database to Your React Native App
Alright, your database is live and the schema is locked in. Now for the fun part: making your app and database talk to each other. This is where your static mobile app design springs to life, ready to handle real user data. We’re going to hook up our Supabase backend to a React Native Expo project.
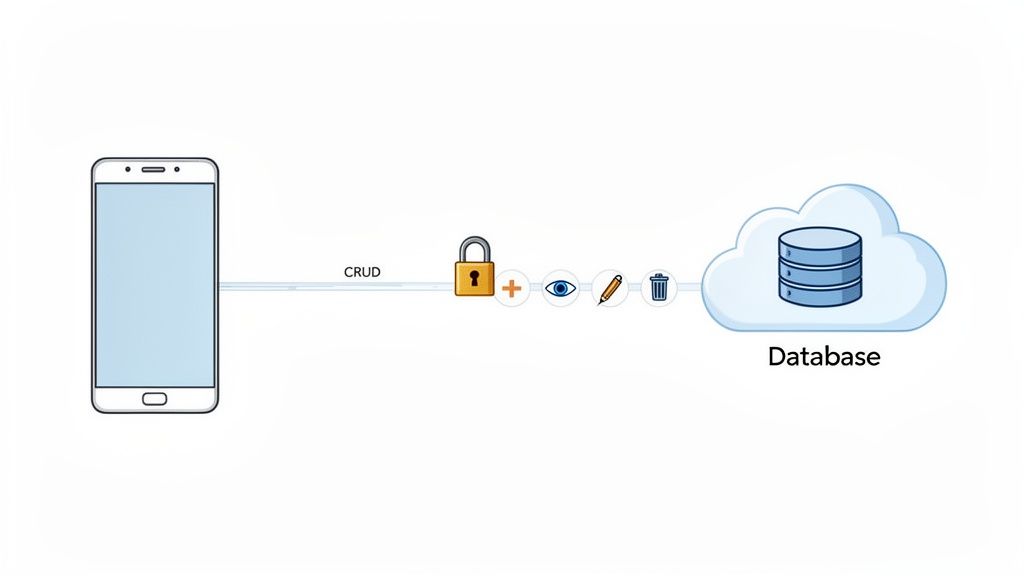
This process breaks down into two main jobs. First, we need to build a secure way for users to sign up and log in. No shortcuts on authentication. Second, we’ll implement the core data operations, known as CRUD: Create, Read, Update, and Delete. These four actions are the absolute foundation of almost any data-driven feature you can think of.
Establishing the Supabase Connection
Before your app can send or receive a single piece of data, it needs the right credentials. Supabase keeps this straightforward by giving you a unique Project URL and an anon API Key. Think of these as the address and the entry pass for your database.
You can grab these keys right from your Supabase project dashboard, under the "API" section. To get them working in your React Native app, you’ll first need to install the official Supabase JavaScript client library.
Pop open your terminal and run: npm install @supabase/supabase-js
Once that's installed, you'll want to create a client instance somewhere central in your app. I usually stick this in a dedicated config file so it's easy to import into any screen or component without repeating myself.
// lib/supabase.js import { createClient } from '@supabase/supabase-js';
const supabaseUrl = 'YOUR_SUPABASE_PROJECT_URL'; const supabaseAnonKey = 'YOUR_SUPABASE_ANON_KEY';
export const supabase = createClient(supabaseUrl, supabaseAnonKey);
Just be sure to swap the placeholder values with your actual project URL and anon key. With this client initialized, your app is officially ready to communicate with your Supabase backend. If you need a refresher on the mobile side of things, our guide on how to create an app with React Native is a great place to start.
Implementing User Authentication
For any app handling personal information, solid authentication isn't just a feature, it's a requirement. Supabase’s built-in auth system is a lifesaver here. It manages all the tricky stuff like password hashing and session tokens, letting you add sign-up and login features with just a few lines of code.
Here's a quick look at a basic sign-up function:
import { supabase } from './lib/supabase';
async function signUpWithEmail(email, password) {
const { data, error } = await supabase.auth.signUp({
email: email,
password: password,
});
if (error) {
console.error('Error signing up:', error.message);
return;
}
console.log('User signed up:', data.user); }
A login function is just as simple, using supabase.auth.signInWithPassword() instead. This clean, direct approach lets you build secure user management into your app without getting bogged down in boilerplate.
Performing CRUD Operations
Once a user is logged in, it's time to start managing their data. CRUD operations are the heartbeat of your app. They're what let users create new posts, read their messages, update a profile, or delete old content.
Let's break down how to handle each operation with the Supabase client.
Create (Adding Data) To add a new record, like a new blog post, you'll use the
.insert()method. It takes an object that represents the new row you want to add to yourpoststable.async function createPost(userId, content) {
const { data, error } = await supabase
.from('posts')
.insert([{ content: content, user_id: userId }]);
}
Read (Fetching Data) To pull data from the database, you use the
.select()method. You can grab everything from a table or, more commonly, filter the results. For example, you could fetch only the posts belonging to a specificuser_idfor a profile page.async function fetchUserPosts(userId) {
const { data, error } = await supabase
.from('posts')
.select('*')
.eq('user_id', userId);
}
The ability to perform these operations efficiently is what makes modern apps feel so responsive and alive. This seamless link between a snappy frontend and a powerful backend is a huge driver of growth in the software world.
The numbers back this up. The database software market was valued at USD 174.68 billion in 2025 and is on track to hit USD 465.66 billion by 2032. This massive growth shows just how critical flexible, powerful database solutions have become.
Updating and Deleting Data
Creating and reading data is only half the story. To give users full control, they also need to be able to modify and remove their information. These two actions complete the CRUD cycle.
Here's how you handle the final two operations:
Update (Modifying Data) The
.update()method lets you change an existing record. You'll typically target a specific row using a filter, like the post's uniqueid.async function updatePostContent(postId, newContent) {
const { data, error } = await supabase
.from('posts')
.update({ content: newContent })
.eq('id', postId);
}
Delete (Removing Data) Finally, the
.delete()method removes a row from your table. Just like with updating, you'll use a filter to tell Supabase exactly which record to get rid of.async function deletePost(postId) {
const { data, error } = await supabase
.from('posts')
.delete()
.eq('id', postId);
}
And there you have it. By mastering these four fundamental operations, you have the complete toolkit needed to build a fully functional, data-driven mobile app.
Best Practices for Database Security and Scaling
Getting your app launched with a working database is a huge milestone, but it’s really just the beginning. The real work is keeping that database secure, fast, and reliable as your user base grows. An initial setup that flies for ten users can quickly grind to a halt under the pressure of a thousand, leading to sluggish performance and serious security gaps.
Building a database isn't a one-and-done task. It's an ongoing commitment to protecting user data and ensuring a smooth experience. Getting these practices right from the start is fundamental for building user trust and making sure your app can handle success without falling over.
Fortifying Your Data with Row Level Security
One of the most powerful tools in your security arsenal, especially if you're using a platform like Supabase, is Row Level Security (RLS). By default, anyone with your API key could potentially access any data in your tables. That's a scary thought. RLS completely changes the game by letting you write specific rules that control exactly who can see or change which rows.
Think of it as a digital bouncer for every single piece of data. For our social media app, this is non-negotiable. You can create a policy that says a user can only view or edit posts where their own user_id matches the user_id column in the posts table.
That one simple rule makes it impossible for one user to accidentally (or maliciously) peek at or delete someone else's content. It moves the security logic out of your application code and puts it directly into the database, creating a much stronger, more reliable barrier against unauthorized access.
The Importance of Regular Backups
Data loss is one of the most catastrophic things that can happen to an app. It can happen for all sorts of reasons, for example an accidental deletion by a team member or a hardware failure at the data center. You name it. Without a backup, that data could be gone forever, taking your users' trust with it.
Thankfully, most managed database providers, including Supabase, offer automated backup solutions. It’s absolutely critical to enable these and get familiar with their frequency and retention policies.
A few key points on backups:
Automation is Key: Don't ever rely on manual backups. Set up an automated schedule so it's one less thing you have to worry about.
Test Your Restores: A backup is completely useless if you can't restore from it. You need to periodically test your backup files in a staging environment to make sure they're complete and functional.
Store Backups Securely: Always keep your backup files in a separate, secure location from your primary database server. This protects you if there's a server-wide meltdown.
Backups are your ultimate safety net. They are the one thing standing between a minor inconvenience and a complete business-ending disaster. Treat them with the importance they deserve.
Optimizing Queries for Scalability
As your app takes off, the number of requests hitting your database will skyrocket. A query that was instant with 100 rows might take several seconds with 100,000, bringing your app to a grinding halt. This is where query optimization becomes your best friend.
The most effective way to speed up data retrieval is by using database indexes. An index works just like the index in a book. Instead of scanning the entire table to find what it's looking for (a "full table scan"), the database can use the index to jump directly to the data it needs.
For example, since our app will frequently look up posts by user_id, adding an index to that column in the posts table will dramatically speed up loading user profile pages. Most BaaS platforms make adding indexes as simple as clicking a button in their table editor. Beyond security, ensuring your database runs efficiently is crucial for a smooth user experience; learn more about database performance optimization for peak efficiency.
Implementing these practices is how you build a database that's not just functional, but truly production-ready.
A Few Common Questions About Building a Database
As you get started, a few questions always seem to pop up. Let's tackle the big ones so you can move forward with confidence.
How Much Is This Going to Cost?
The price tag can be anywhere from completely free to thousands of dollars a month. It all boils down to your scale, how much you want to manage yourself, and the services you pick.
For most new projects, a service like Supabase offers a generous free tier that's more than enough to get your app off the ground. You can build and launch without spending a dime.
As your app grows, you'll slide into paid plans based on real-world usage:
Database size: How much storage your data takes up.
API requests: The number of times your app "talks" to the database.
Compute power: The horsepower needed to run your queries efficiently.
Going the self-hosted route on a cloud provider like DigitalOcean or AWS can seem cheaper at first, but you're on the hook for managing everything, such as security, updates, backups, and scaling. Those operational costs can add up fast.
What’s the Easiest Database to Actually Learn?
For anyone just starting out, a Backend as a Service (BaaS) platform like Supabase or Firebase is, without a doubt, the easiest way in. These services handle all the messy, complicated parts of database management for you.
Instead of wrestling with server setup and security rules, you get a clean, visual interface to create tables and manage data. This lets you focus on core database concepts without needing to master complex SQL commands on day one. It's a hands-on way to understand how data structures and relationships work, and it's the path I recommend to anyone learning the ropes.
How Long Does It Realistically Take to Build a Database?
You can get a basic, working database up and running incredibly fast. With a BaaS platform, once you have your schema mapped out, you can set up your core tables and relationships in less than an hour. The technical setup itself isn't the big time sink anymore.
The real investment is in the planning.
The hours you spend aren't in the initial setup; they're in thoughtfully designing your schema. Rushing your planning is the single biggest reason for painful refactoring and delays down the road. A well-planned schema will save you hundreds of hours later.
Of course, connecting that database to your app and building out all the features will take much longer. But laying the foundation? You can knock that out in an afternoon.
Can I Change My Database Structure After I Launch?
Yes, you can, but you have to be careful. Modifying a live database schema, a process called a migration, is a very common but delicate task. You can add new tables, add columns to existing ones, or even change a column's data type.
The big challenge is making sure those changes don't break your app or, even worse, corrupt your data. For instance, if you rename a column from user_email to email_address, any part of your app still looking for user_email will crash.
Always, always test your schema changes in a development or staging environment before you even think about touching your production database.
Ready to skip the technical hurdles and turn your idea into a production-ready mobile app? With CatDoes, our AI agents handle everything from design to database setup and app store submission. Start building for free today and launch your app faster than ever.
Nafis Amiri
Co-Founder of CatDoes


