Blog
Tutorials
How to Add Payments to an App (2026 Guide)
How to add payments to an app without building them from scratch: pick Stripe or in-app purchases, compare 2026 fees, and set it up with CatDoes in 7 steps.

Nafis Amiri
Co-Founder of CatDoes

The easiest way to add payments to an app in 2026 is to skip building a payment system at all. Tell an AI app builder like CatDoes what you sell, and it connects ready-made payment tools to your app. That means Stripe for cards, Apple and Google in-app purchases for digital features, and a small server function that unlocks access once the money arrives.
The part no tool can decide for you is which payment option to use. Sell a digital feature inside an iPhone app through the wrong one and Apple rejects the build. Pick the most convenient one without checking the fees and you can hand over 30% of every sale.
This guide is for founders and small teams adding payments to a new or existing app. It covers which option fits what you sell and what Apple and Google allow right now. It also compares what each route costs on a $9.99 subscription and walks through how to add payments with CatDoes in 7 steps.
TL;DR: Don't build billing yourself. Physical products and real-world services take cards through Stripe, and the app stores take no cut. Digital features and subscriptions inside iPhone and Android apps go through Apple and Google in-app purchase. RevenueCat handles that code for you, free until $2,500 a month in revenue and 1% after that. Websites, and US iPhone users you send to the web, can pay through Stripe Checkout at 2.9% + 30¢. The fastest way to put it together is CatDoes: describe your app and what you sell, and it writes the payment code and runs the server side on its own backend.
Table of Contents
What It Takes to Add Payments to an App
4 Ways to Add Payments Without Building From Scratch
Which Payment Option Fits What You Sell
Apple and Google Payment Rules in 2026
What Payments Cost: Fees Compared
Stripe vs RevenueCat: Which One Do You Need?
How to Add Payments to Your App With CatDoes in 7 Steps
How to Test Payments Before Real Money Moves
What You Still Have to Do Yourself
6 Payment Mistakes That Get Apps Rejected or Lose Money
Frequently Asked Questions
Start Charging for Your App
What It Takes to Add Payments to an App
Adding payments to an app comes down to five jobs, and payment providers already do four of them. Your work is connecting them and deciding who gets access after someone pays.
A checkout screen, where the customer enters a card or taps Apple Pay or Google Pay.
Card security. Stripe, Apple, and Google hold the card details, so card numbers never touch your servers.
Recurring billing: renewals, failed cards, upgrades, and cancellations.
A webhook, which is a message the provider sends your server when a payment succeeds, renews, or gets refunded.
An access record in your own database that says this user has paid, so the app unlocks the right features.
The first four come ready-made from Stripe, Apple, Google, or RevenueCat. The fifth lives in your app's backend, and it's the one that breaks quietly. If you unlock access on the "thank you" screen instead of waiting for the webhook, a customer who gets a refund keeps everything.
4 Ways to Add Payments Without Building From Scratch
There are four realistic ways to add payments without writing a billing system. They differ in how much of the connecting work lands on you.
Option | What you do | Best for | Watch out for |
|---|---|---|---|
Stripe Payment Links | Create a product in the Stripe dashboard and paste the link into your app or site | A few products, no server | Unlocking access is still up to you |
Merchant of record (Paddle, Lemon Squeezy, Stripe Managed Payments) | Sign up, create products, and drop in their checkout | Web apps and software sold worldwide | Higher fees, in exchange for handling sales tax and VAT for you |
Payment SDKs (Stripe, RevenueCat) coded by a developer | A developer installs the SDK and writes the server endpoints, webhooks, and access logic | Teams that already have an engineer | Developer time, plus code you maintain |
AI app builder like CatDoes | Describe what you sell; the agent builds the checkout, the webhook handler, and the access rules on its built-in backend | Founders and small teams building an app without a developer | You still create the Stripe, Apple, and Google accounts yourself |
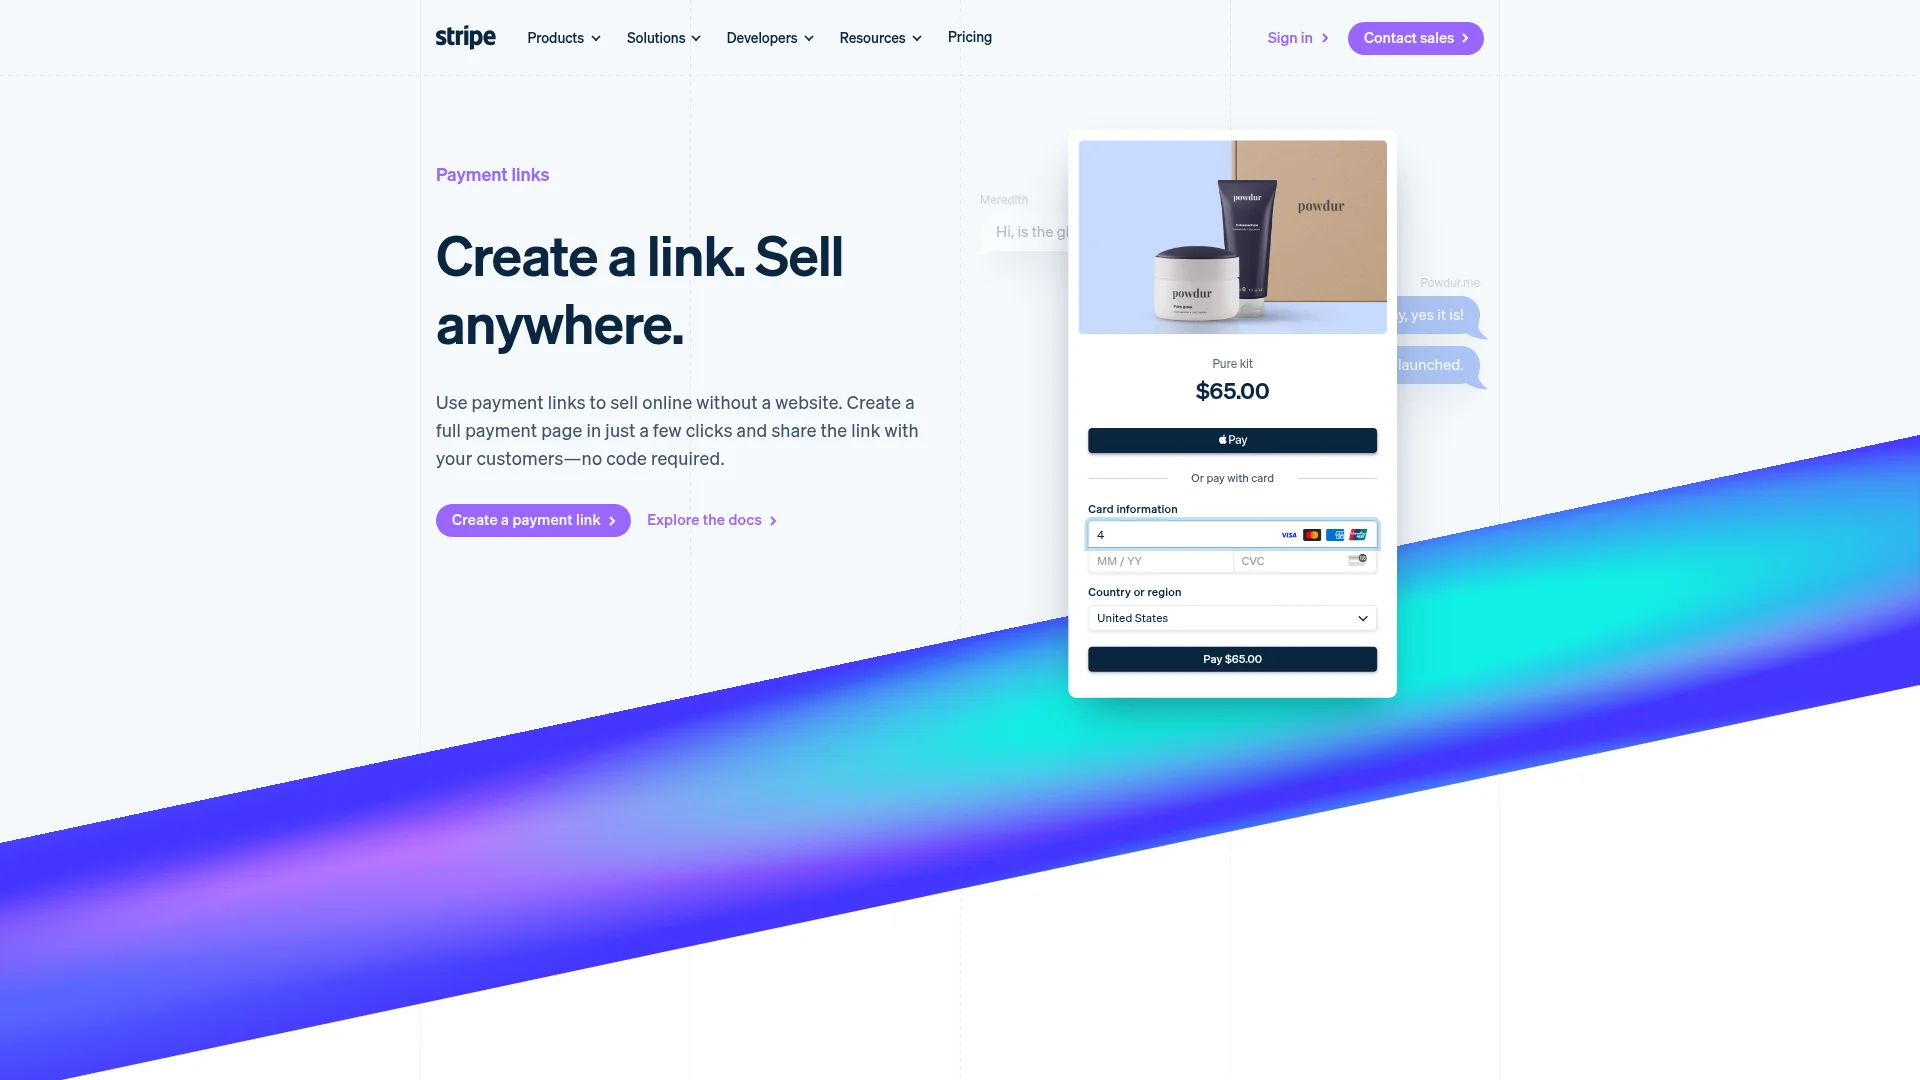
Payment Links are the quickest way to get paid, and Stripe's own pitch is "no code required." The catch shows up the day after launch, when someone has to match each payment to a user account by hand. If you're building a new app anyway, pick the AI builder. It's the only option on this list where the payment code comes out of the same conversation as the rest of the app.
Which Payment Option Fits What You Sell
What you sell decides your payment option. Your favorite tool doesn't get a vote. Apple and Google split everything into physical things, which must not go through in-app purchase, and digital things used inside the app, which usually must.
What you sell | iPhone app | Android app | Website or web app |
|---|---|---|---|
Physical products (clothes, food, prints) | Stripe (card, Apple Pay) | Stripe (card, Google Pay) | Stripe Checkout |
Real-world services (rides, delivery, in-person classes) | Stripe | Stripe | Stripe Checkout |
Premium features, content, or subscriptions | In-app purchase via RevenueCat; US users can also be linked to a Stripe web checkout | Google Play Billing via RevenueCat; US apps may use their own billing, with a Google fee | Stripe Checkout, or a merchant of record |
Credits, coins, or tokens | In-app purchase; US link-out allowed | Google Play Billing; US alternatives allowed | Stripe Checkout, or a merchant of record |
Payouts to sellers in a marketplace | Stripe Connect | Stripe Connect | Stripe Connect |
Plenty of apps sell more than one kind of thing, so they use more than one option. A fitness app can sell an in-person training session through Stripe and a premium workout plan through in-app purchase.
If you haven't settled on subscriptions, one-time unlocks, or credits yet, our guide to app monetization strategies compares them. Splitting each payment between sellers and your platform is its own topic, covered in our guide on how to build a marketplace app.
Apple and Google Payment Rules in 2026
Both stores still require their own billing for digital goods used inside an app, but the exceptions changed a lot in 2025 and 2026. Here's where things stand at the end of September 2026.
Apple App Store
Apple's App Review Guidelines say that "if you want to unlock features or functionality within your app," you must use in-app purchase (guideline 3.1.1). Physical goods and services used outside the app are the reverse. Under 3.1.3(e), they must be paid "such as Apple Pay or traditional credit card entry," never through in-app purchase.
Live one-on-one services between two people, like tutoring or fitness training, may also skip in-app purchase under 3.1.3(d), but group sessions can't.
The big change is in the US, where Apple rewrote its guidelines in May 2025 to comply with a court ruling. Apps on the US storefront can now include buttons and links that send users to buy on the web.
Apple's guideline 3.1.1(a) now says its link entitlements "are not required for developers to include buttons, external links, or other calls to action in their United States storefront apps." Outside the US and the EU's separate rules, those links are still banned.
Apple's standard commission is 30%. It drops to 15% for subscriptions after a subscriber's first paid year. It's also 15% in the App Store Small Business Program, open to developers who earned up to $1 million in the prior calendar year.
Can Apple charge a fee on US web purchases?
Not yet. In December 2025, the Ninth Circuit ruled that Apple may eventually charge a fee based on its real costs. Until the district court approves one, Apple "should not be able to charge any commission for linked-out purchases."
On August 13, 2026, Apple asked the district court for 15% on standard apps, 10% on subscription renewals, and 5% for Small Business Program apps. The Supreme Court agreed to hear Apple's appeal on June 30, 2026, and no fee has been approved. Build your pricing so it still works if a fee arrives, but today a US link-out costs you nothing from Apple.
Google Play
Google's Payments policy requires Google Play Billing for in-app digital goods, and says it "must not be used" for physical goods or services like food delivery or gym memberships. Since June 30, 2026, sales to users in the US, EEA, and UK fall under a new fee structure. It's a 10% service fee plus a 5% billing fee on your first $1 million a year and on all auto-renewing subscriptions, per Google's service fee page.
In the US, Google no longer requires Play Billing after the Epic v. Google injunction took effect in October 2025. You can offer your own billing or link out to the web. But starting October 1, 2026, developers in those programs report those sales and pay Google a service fee, including 10% on subscriptions.
The EU runs on its own terms. Apple's new EU rules start October 1, 2026, with in-app purchase at 26% (15% for small developers) and link-out offers at 15% (10% for small developers).
What Payments Cost: Fees Compared
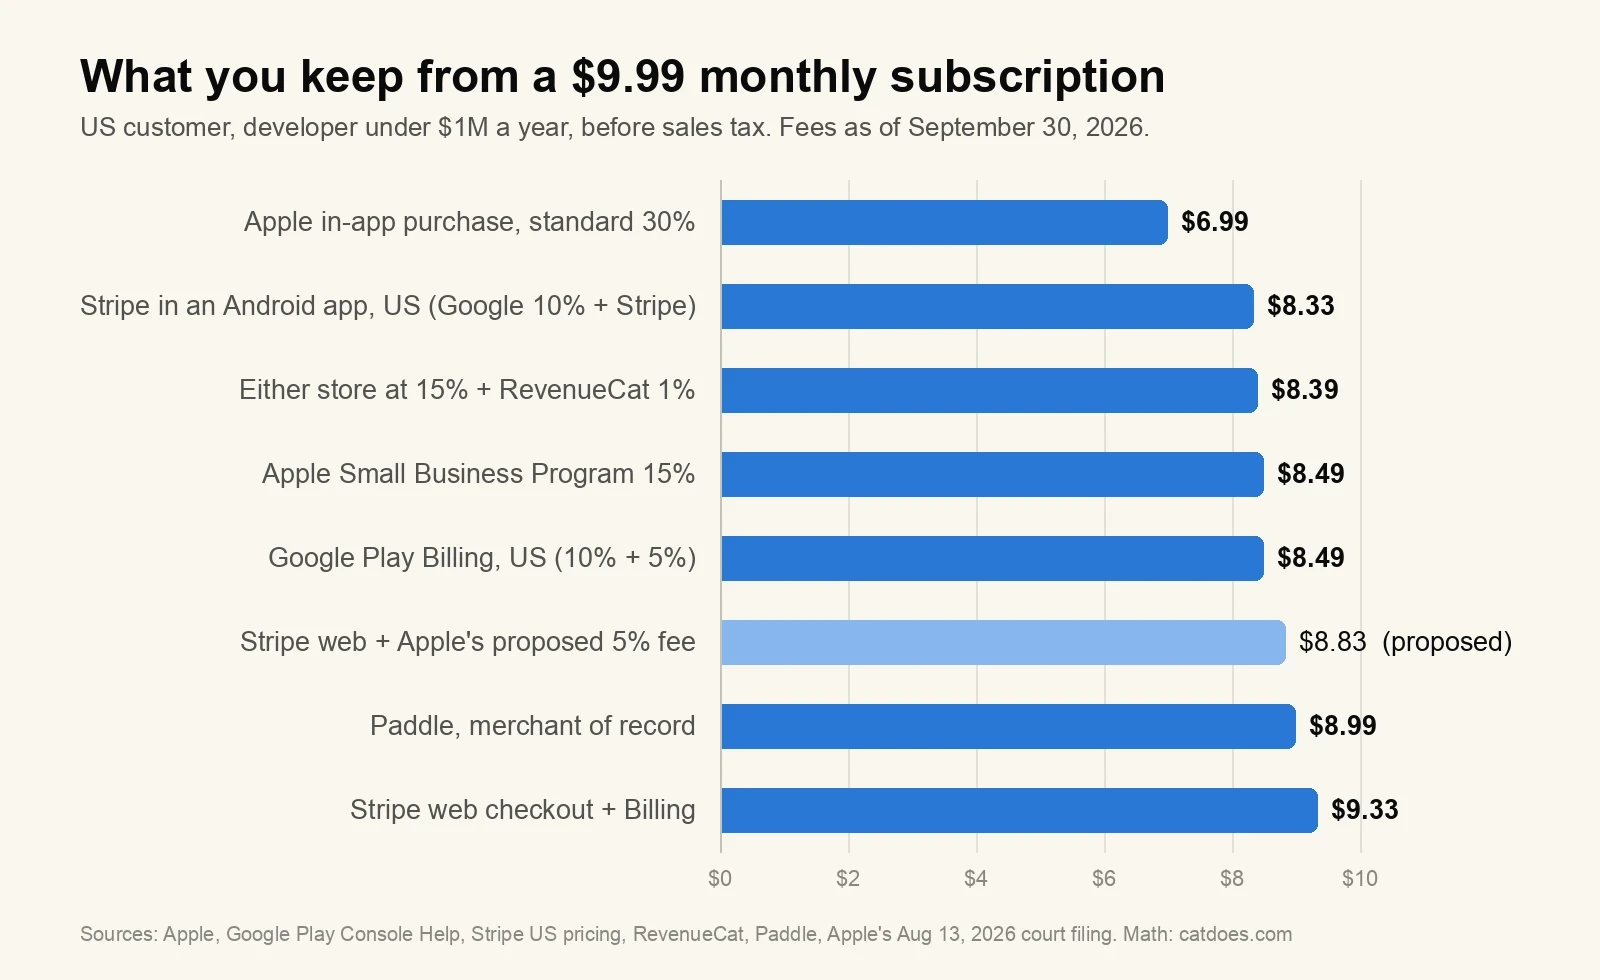
On a $9.99 monthly subscription, you keep between $6.99 and $9.33 depending on the route. The table assumes a US customer, a developer earning under $1 million a year, and prices before sales tax.
Payment route | Fee on $9.99 | You keep |
|---|---|---|
Apple in-app purchase, standard 30% | $3.00 | $6.99 |
Stripe inside an Android app, US (10% Google fee + Stripe) | $1.66 | $8.33 |
Either store at 15% plus RevenueCat's 1% | $1.60 | $8.39 |
Apple in-app purchase, Small Business Program 15% | $1.50 | $8.49 |
Google Play Billing, US (10% + 5% billing fee) | $1.50 | $8.49 |
Stripe web checkout, if Apple's proposed 5% small-developer link-out fee is approved | $1.16 | $8.83 |
Paddle as merchant of record (5% + 50¢) | $1.00 | $8.99 |
Stripe web checkout with Stripe Billing (2.9% + 30¢ + 0.7%) | $0.66 | $9.33 |
The Stripe numbers come from Stripe's US pricing: 2.9% + 30¢ per domestic card charge, plus 0.7% of volume for Stripe Billing subscriptions. At 500 subscribers, Stripe on the web keeps $4,665.18 a month against $4,245.75 through Apple's 15% tier, a $419.43 difference. That only counts customers who actually finish the web checkout, though.
The table also hides sales tax. Apple, Google, and Paddle act as the merchant of record, so they collect and pay sales tax and VAT for you. With plain Stripe you're the seller, and Stripe Tax starts at 0.5% per transaction.
One result surprised me: Stripe inside an Android app doesn't save money on US subscriptions. Google's 10% plus Stripe's costs leaves you $8.33, which is less than the $8.49 you keep with Google Play Billing.
Stripe vs RevenueCat: Which One Do You Need?
Use Stripe to take card payments, and RevenueCat to manage Apple and Google in-app purchases. You can also run both at once, with RevenueCat on the phone, Stripe on the web, and one shared record of who has paid. RevenueCat is free until you reach $2,500 in monthly tracked revenue, then charges 1% of what it tracks.
Stripe | RevenueCat | |
|---|---|---|
What it does | Processes card, Apple Pay, and Google Pay payments and hosts checkout pages | Wraps Apple StoreKit and Google Play Billing in one SDK and tracks every subscription |
Use it for | Physical goods, services, web apps, US link-outs | Digital features and subscriptions inside iPhone and Android apps |
Pricing | 2.9% + 30¢ per US card charge; Stripe Billing adds 0.7% | Free up to $2,500 in monthly tracked revenue, then 1% |
React Native and Expo | @stripe/stripe-react-native | react-native-purchases |
Sales tax | Your job (Stripe Tax is an add-on) | Handled by Apple and Google |
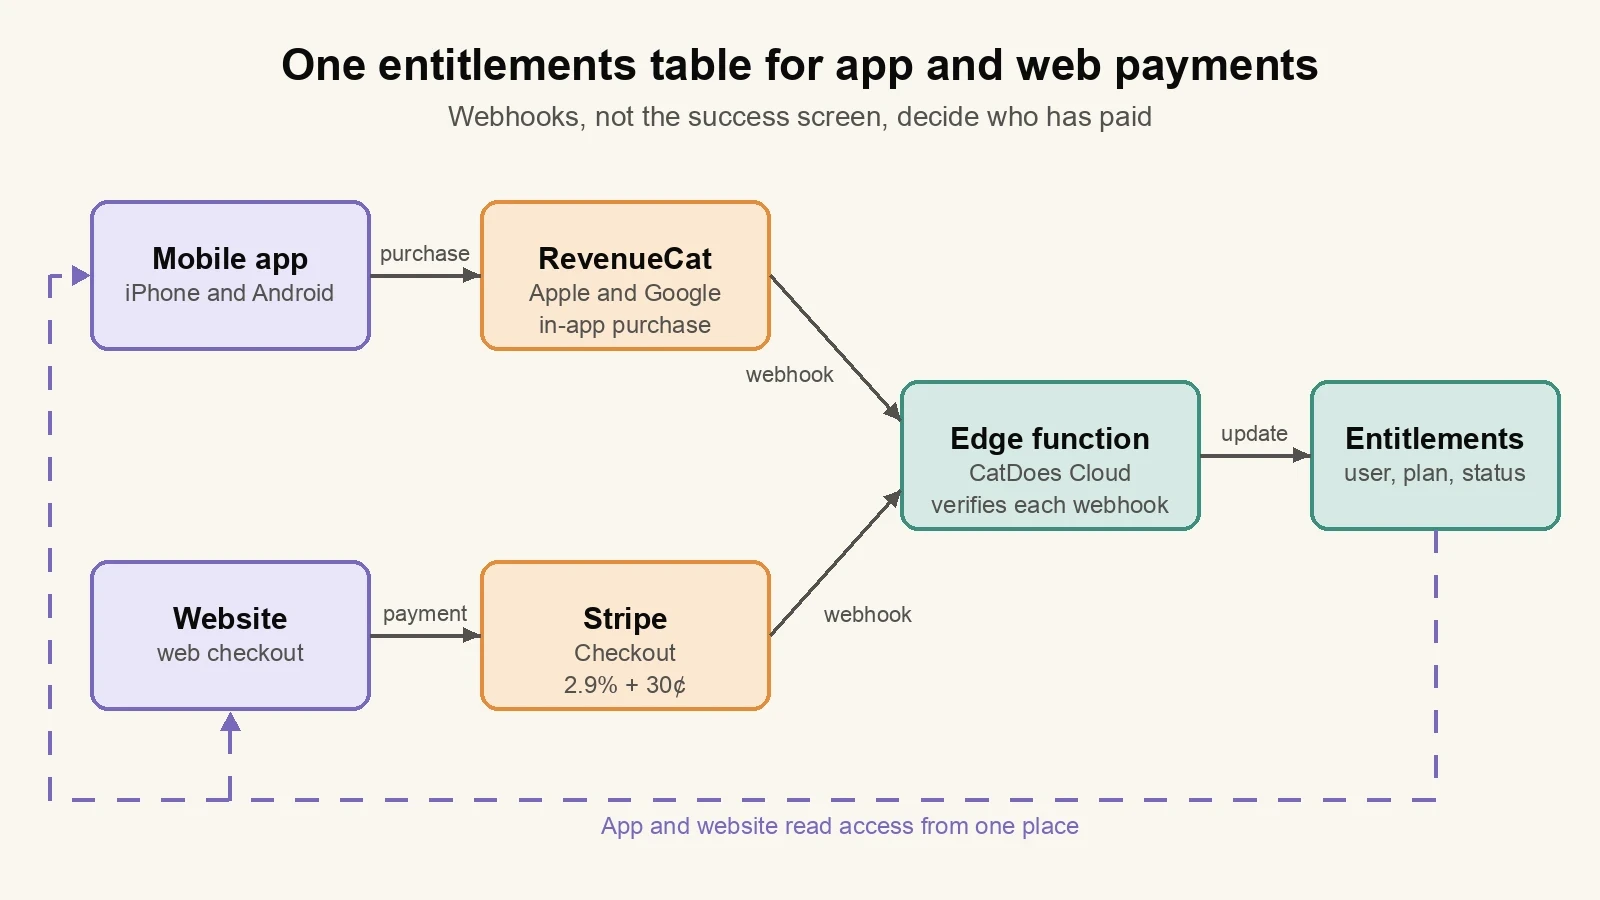
You don't have to choose between them for the web. RevenueCat's own web billing uses Stripe as the payment gateway, so a purchase on your website unlocks the same entitlements as one in the app. RevenueCat's docs say web purchases add no extra RevenueCat fees, though Stripe's 2.9% + 30¢ still applies.
My advice for a first app: start with in-app purchase through RevenueCat and add a web checkout once people are paying. The web route saves money, but only on the customers who make the trip. If you're comparing subscription SDKs, check each free tier against the revenue you actually expect.
Adapty is free under $5K a month and 1% after that. Qonversion is free up to $7K in tracked revenue, then 0.8%. Superwall, which focuses on paywalls, is free up to $10K in monthly paywall revenue, then 1%.
How to Add Payments to Your App With CatDoes in 7 Steps
CatDoes is an AI agent that builds mobile apps and websites from a plain-English description, on a React Native Expo codebase you own. There's no separate payments plugin to configure. You describe what you sell, the agent writes the payment code into your project, and the server side runs on CatDoes Cloud.
Step 1: Decide what you sell and where
Use the table above to pick a payment option for each product and each platform: iPhone, Android, and web. Write one line per product, such as "Pro plan, $9.99 a month, in-app purchase on iPhone and Android, Stripe on the website."
Step 2: Plan the payment flow before anything gets built
Start in plan mode by adding "Don't build anything yet" to your message. The CatDoes docs suggest prompts like "Plan a checkout flow for my store. Think through each step the user goes through, what happens on each page, and how errors should be handled." For a subscription app, you can paste this and fill in your details:
"Plan payments for my app. Don't build anything yet. Users can buy a Pro plan for $9.99 a month. On iPhone and Android, use in-app purchases through RevenueCat. On the website, use Stripe Checkout. Store each user's plan in one entitlements table that only webhooks from RevenueCat and Stripe can update. Add a paywall screen, a Restore Purchases button, and a link to manage the subscription. Write down the screens, the database tables, and the webhook events you'll handle, including refunds and cancellations."
Read the plan and fix anything that doesn't match how you want to charge. Changing a written plan is cheaper than changing built code.
Step 3: Create your payment accounts
The agent can't open accounts in your name. Create a Stripe account, and for in-app purchases, a RevenueCat project plus your products in App Store Connect and the Google Play Console. The next steps need the product IDs and keys from these accounts.
Step 4: Ask CatDoes to build the checkout and the webhook
Tell the agent to build the plan. In the app, it adds the paywall, the purchase buttons, and the restore flow.
On the server, it uses CatDoes Cloud edge functions, which CatDoes provides "for custom backend logic, webhooks, and third-party integrations." One function receives the Stripe and RevenueCat webhooks and updates the entitlements table. Your app then checks one place to know who has paid.
Add payments to my app with CatDoes
Step 5: Add your keys, starting with test keys
When the agent needs a key, it asks for it in your chat with Compose, and you paste it there. Start with Stripe's test-mode keys and switch to live keys only after everything works.
Publishable keys can live in the app, but secret keys and webhook signing secrets belong only in server-side code, never in the app bundle.
Step 6: Test every payment path
Run a successful purchase, a declined card, a cancellation, and a refund, and check that access changes each time. The next section lists the free test tools for Stripe, Apple, and Google.
Step 7: Run an App Store review check, then ship
Payment rules sit in section 3.1 of Apple's guidelines, and breaking them gets a build rejected. Before you submit, ask CatDoes for an App Store review simulation. The agent simulates Apple App Store and Google Play review on your project and tells you whether it would be approved and what to fix.
Then ask the agent to build your iOS app and submit it to the App Store. Builds usually take 10 to 30 minutes, and you upload the Android build to Google Play yourself. App Store and Google Play releases start on the Starter plan, $50 a month or $42 billed yearly.
How to Test Payments Before Real Money Moves
Stripe, Apple, and Google each have a free test mode, and you need all three if you sell on all three. Here's what each one gives you:
Stripe: in test mode, pay with the card number 4242 4242 4242 4242, any future expiry date, and any 3-digit CVC.
Apple: create Sandbox Apple Accounts in App Store Connect and sign in with them on a test device. In TestFlight, subscriptions renew daily, up to 6 times in a week, so you can watch renewals without waiting a month.
Google Play: add license testers in the Play Console. They get test cards, including one that "approves then charges back," so you can check what happens to access after a chargeback.
Expo: in-app purchase libraries need custom native code, which Expo Go can't load, so real purchases need a development build. RevenueCat's SDK switches to a mock "Preview API Mode" inside Expo Go, so you can still check the paywall screens there.
With CatDoes, you preview the app on your phone through Expo Go. Check the paywall screens there, then test real purchases in a TestFlight build or a Google Play test track.
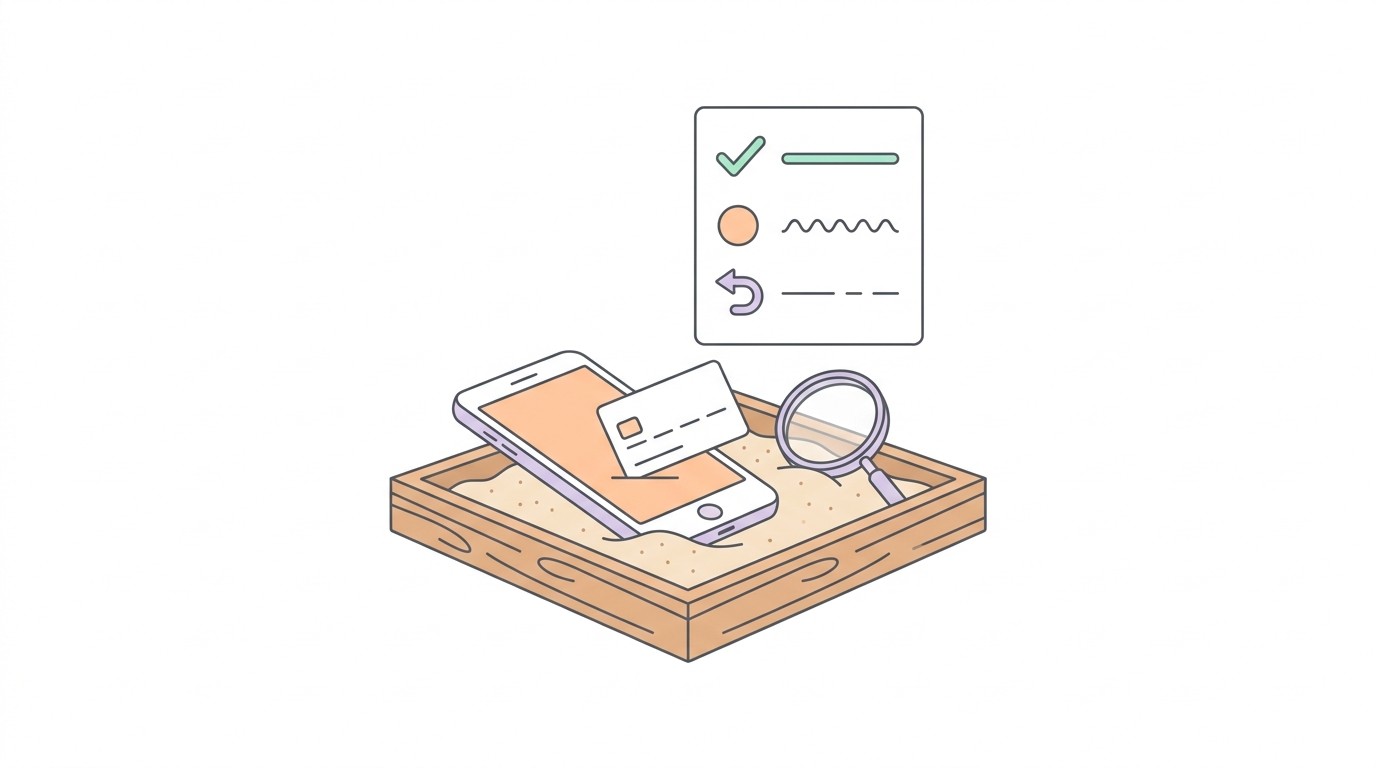
Finish with a refund, because it's the easiest test to skip. If a refunded test user still has the paid features, the webhook isn't updating the entitlements table, and you want to find that before launch, not after.
What You Still Have to Do Yourself
An AI builder writes the code, but some steps need your identity, your bank account, or your signature. Start these early, since you can do them while the app is being built:
Join the Apple Developer Program ($99 a year) and create a Google Play developer account ($25 once).
Sign Apple's Paid Apps Agreement and add your banking and tax details in App Store Connect. Apple says "the Account Holder must sign the Paid Apps Agreement" before you can sell apps or offer in-app purchases.
Activate your Stripe account with your business and bank details.
Create each in-app product in App Store Connect and the Google Play Console, with its price, description, and review screenshot.
Decide who handles sales tax. The stores do for in-app purchases. With Stripe, you do, unless you add Stripe Tax or use a merchant of record.
Review itself is quick. Apple says 90% of submissions are reviewed in less than 24 hours, and an incomplete submission is what slows it down.
6 Payment Mistakes That Get Apps Rejected or Lose Money
Watch for these six. The first four can get a build rejected, and the last two cost you money after launch.
Selling digital features through Stripe inside an iPhone app outside the US. That breaks guideline 3.1.1. Use in-app purchase, and add a web link only for the US storefront.
Charging for physical goods through in-app purchase. Apple's 3.1.3(e) and Google's Payments policy both require a normal payment method for anything used outside the app.
No way to restore purchases. Apple's guidelines say "you should make sure you have a restore mechanism for any restorable in-app purchases."
A vague subscription screen. Guideline 3.1.2(c) says to "clearly describe what the user will get for the price" before asking anyone to subscribe.
Unlocking access on the success page. Redirects can be faked or skipped. Only a verified webhook should change what a user can access.
Putting secret keys in the app. Anyone can pull strings out of an app bundle, and a leaked Stripe secret key lets them act on your account. Keep it in server-side code.
Frequently Asked Questions
What's the easiest way to add payments to an existing app?
Connect ready-made tools instead of building billing yourself: Stripe for card payments and RevenueCat for in-app purchases. If your app's code is on GitHub, you can import it into CatDoes and describe the payments you want, and the agent adds them to your existing code.
Can I use Stripe instead of Apple in-app purchases?
For physical goods and real-world services, yes, and Apple requires it. For digital features, apps on the US storefront can link users to a Stripe web checkout, with no Apple commission until a court approves a fee. Everywhere else outside the EU, digital features inside the app need in-app purchase.
How much does Apple take from in-app purchases?
Apple takes 30% by default. It takes 15% if you're in the Small Business Program (up to $1 million in the prior calendar year) and on subscriptions after a subscriber's first paid year. US web purchases you link to from the app carry no Apple commission for now.
Which subscription SDK is best for a small app team?
RevenueCat is a safe start, and it's the SDK Expo's own in-app purchase tutorial uses. It's free until you pass $2,500 in monthly tracked revenue, then 1%. Adapty (free under $5K a month, then 1%) and Qonversion (free up to $7K, then 0.8%) give you more room before paying, so compare them against the revenue you expect.
How long does it take to set up in-app checkout?
The code is rarely the slow part when an AI builder writes it. The waiting is in account setup: Stripe activation, Apple's Paid Apps Agreement with banking and tax details, and in-app products that go through review. Apple says 90% of submissions are reviewed in less than 24 hours.
Can an AI app builder add login and payments to an app?
Yes. CatDoes sets up user sign-up and login through CatDoes Cloud, then adds Stripe or RevenueCat when you describe what you sell. You still create the payment accounts and products yourself.
Do I need a backend to accept payments in an app?
For anything beyond a Payment Link, yes. You need a server to create checkout sessions, receive webhooks, and store who has paid. CatDoes Cloud includes a database, authentication, storage, and edge functions on every plan, so you don't set one up separately.
Does Google Play still require Google Play Billing?
Outside the US, yes, for digital goods. In the US, Google stopped requiring it after the Epic v. Google injunction, but apps that use their own billing or link out pay Google a service fee from October 1, 2026, including 10% on subscriptions.
Start Charging for Your App
The hard part of adding payments to an app is now the decision. The code is the easy part. Match what you sell to the right payment option, check the fee table, and let Stripe, RevenueCat, Apple, and Google handle cards, renewals, and receipts.
CatDoes writes that payment code into an app you own and simulates App Store review before you submit. The Free plan publishes to the web, and App Store and Google Play releases start on Starter.
Ready to start charging? Add payments to my app with CatDoes
Nafis Amiri
Co-Founder of CatDoes