Blog
Tutorials
Build a Prototype of an App and Bring Your Idea to Life
Learn how to create a prototype of an app from start to finish. This guide covers tools, processes, and practical tips for validating your concept quickly.

Nafis Amiri
Co-Founder of CatDoes

Build a Prototype of an App and Bring Your Idea to Life
So you've got a killer app idea. It’s bouncing around in your head, a mix of screens, features, and possibilities. But how do you get it out of your head and into something real without immediately diving into expensive, time-consuming code?
You build a prototype.
From Idea to Interaction: Understanding App Prototypes
Staring at a great app idea can feel like looking at a blank canvas. The first and most critical brushstroke is creating a prototype. Think of it as a detailed architectural blueprint for a house; it lets you walk through the rooms and test the layout before anyone pours the foundation. In the app world, it’s a working model that breathes life into your concept.
This tangible, interactive model lets you test user flows, figure out the navigation, and get honest feedback from the people who will actually use it. By spotting design flaws and usability problems at this stage, you sidestep costly changes down the line. It turns your abstract idea into something investors and early users can actually touch and feel.
Why Every App Starts with a Prototype
The whole point of building a prototype is to answer the tough questions early. Does this app actually solve the problem I think it does? Is the interface intuitive, or just confusing? Will people even want this? Getting answers with a simple model is infinitely smarter than finding out you were wrong after launching a fully coded product.
A prototype is the bridge between a raw idea and a market-ready application. It is the fastest way to learn what works and, more importantly, what does not, without writing a single line of production code.
The Evolution of Prototyping
Prototyping isn't new; it's always been at the heart of innovation. When the first iPhone was in development, the App Store prototype was a game-changer. Steve Jobs' initial vision led to a rapid prototype that launched with just 500 apps. Today, that validation mindset is more critical than ever, with thousands of new apps hitting the stores every month. It’s a reality that underscores just how essential modern tools have become.
Of course, a good prototype is built on a solid foundation of user experience design principles. A well-thought-out prototype doesn't just look good; it sets the stage for a stronger final product. To see how great UX directly impacts an app's success, check out our guide on UX design for your app. This first step isn’t just about the visuals. It’s about creating a successful user journey from the very beginning.
Choosing the Right Blueprint for Your Prototype
Not all prototypes are created equal. Just like an architect uses different blueprint styles for different stages of a project, you need to pick the right kind of prototype for your specific goal. The key concept here is fidelity, which is just a fancy way of describing how detailed and functional your prototype is.
Think of it as a spectrum. On one end, you have a quick napkin sketch which is rough, fast, and perfect for brainstorming. On the other, you have a polished, interactive model that looks and feels almost exactly like the final app. The trick is to match the level of detail to what you need to accomplish right now.
Early on, speed is your best friend. You want the flexibility to explore a dozen ideas without getting bogged down in pixels. Later, you'll need something much more realistic to get meaningful feedback from users or to show investors you mean business.
This diagram nails the progression: the prototype is the critical bridge that turns an abstract idea into something tangible.
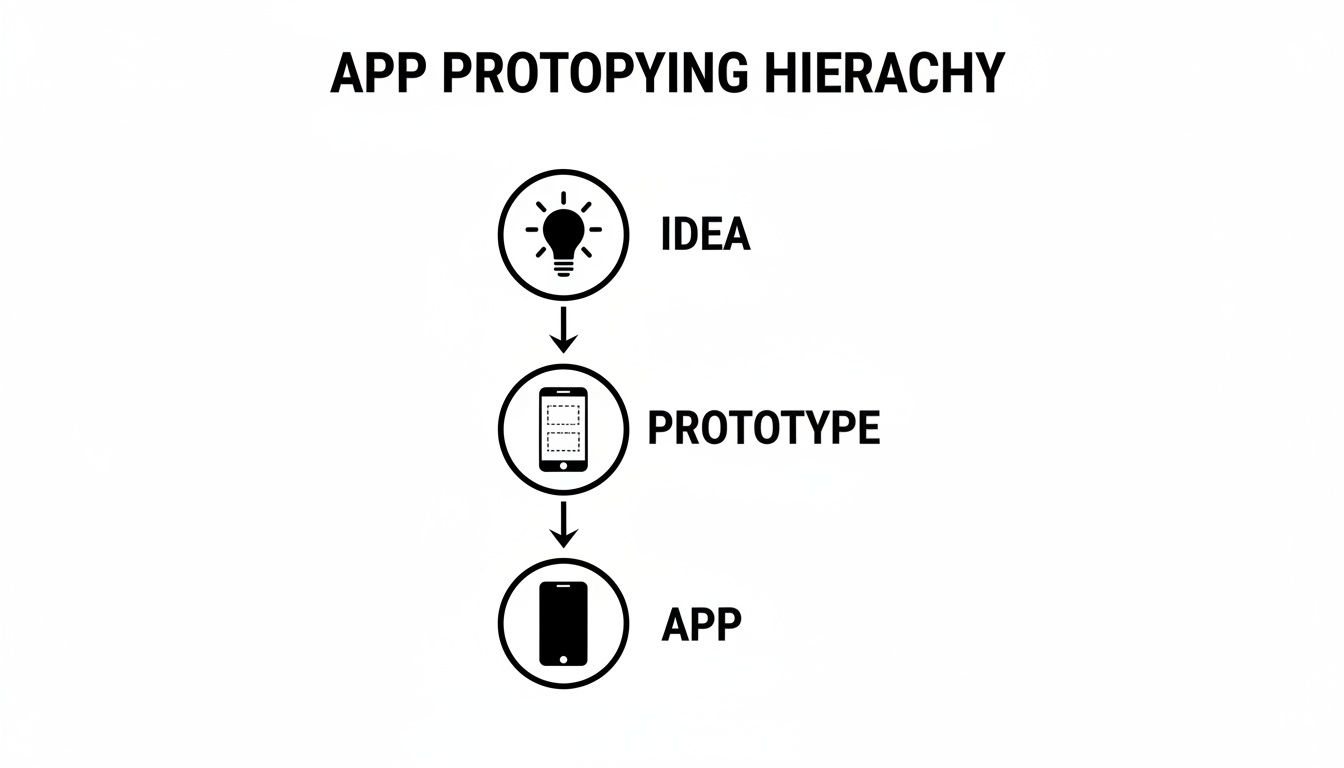
It shows that prototyping isn't some optional side quest. It's the core process that breathes life into your concept, making it real enough to test and validate before you write a single line of code.
Low-Fidelity Prototypes for Rapid Ideation
Low-fidelity (lo-fi) prototypes are the simplest, fastest way to get an app concept out of your head and into the physical world. They are intentionally rough, focusing purely on structure, layout, and the basic flow of how a user gets from point A to point B. Aesthetics don't matter here at all.
Common examples include:
Paper Sketches: Literally drawing screens on paper to map out a user's journey.
Whiteboard Flows: Sketching out how different screens connect on a whiteboard.
Basic Digital Wireframes: Using a simple tool to create blocky diagrams of your app's layout.
The goal here is quantity over quality. You can churn through dozens of ideas in an afternoon, get instant gut checks from your team, and make changes without wasting a dime or a minute.
Medium-Fidelity Prototypes for User Journeys
Once you've settled on a promising direction with your lo-fi sketches, it's time to add a bit more detail. Enter the medium-fidelity (mid-fi) prototype. These are usually digital wireframes with basic interactivity built in.
They still won't have your final brand colors or fonts, but they let users actually click through screens and experience the app's core navigation. A mid-fi prototype is perfect for answering early usability questions. Does the flow make sense? Can people find what they're looking for? It's the ideal middle ground for getting user feedback before you commit to pixel-perfect designs.
High-Fidelity Prototypes for Realistic Testing
High-fidelity (hi-fi) prototypes are the showstoppers. They are incredibly realistic models that look, feel, and behave almost identically to the finished product. We're talking detailed UI elements, your actual branding and colors, smooth animations, and complex user interactions.
These are essential for late-stage user testing, stakeholder demos, and investor pitches.
A high-fidelity prototype is your app's dress rehearsal. It’s your chance to see how the entire experience comes together and make final adjustments before the curtain goes up on development.
While they take more time and skill to build, hi-fi prototypes give you the most accurate feedback because people interact with them as if they're real. This level of detail is also crucial when you're defining the scope for a Minimum Viable Product (MVP), because it leaves no ambiguity about exactly what needs to be built.
To help you decide which fidelity level is right for your current stage, here's a quick breakdown of how they compare.
Comparison of App Prototype Fidelity Levels
Fidelity Level | Description | Best For | Tools |
|---|---|---|---|
Low-Fidelity | Rough sketches, paper mockups, or basic digital wireframes. Focuses on structure and flow, not visuals. | Brainstorming, exploring concepts, validating core ideas with the internal team. | Pen & Paper, Balsamiq, Whiteboards |
Medium-Fidelity | Digital wireframes with basic interactivity (clickable links, simple transitions). Grayscale design. | Early user testing, validating navigation and user journeys, mapping out app architecture. | |
High-Fidelity | Visually polished, interactive prototypes that closely resemble the final app. Includes colors, branding, animations. | Final user testing, stakeholder presentations, investor pitches, developer handoff. |
Ultimately, you'll likely move through all three stages. Starting with cheap and fast lo-fi concepts allows you to fail quickly and learn, while finishing with a polished hi-fi prototype ensures what you build is what users will actually love.
A Practical Guide to Creating Your First Prototype
Turning a great idea into something you can actually hold and test can feel like a massive leap. But creating your first prototype of an app isn't about perfection; it's a practical, step-by-step process. The right approach depends on your background, whether you're a founder, a designer, or a developer, but the goal is always the same: find out if your concept works, and do it fast.
Before you draw a single screen or write a line of code, the journey starts with one question: What problem are you solving, and who are you solving it for? Your answer is the foundation for everything that follows.
A Path for Non-Technical Creators
If you're a founder or an idea person without a design background, your job is to focus entirely on the user's problem and the solution's logic. Forget about aesthetics for now. Your prototype just needs to make sense.
Here’s how you can get started:
Define the Core Problem: Write one simple sentence that explains the user's pain point and how your app is the cure.
Map the User Flow: Grab a whiteboard or some sticky notes and sketch out every single step a user takes to get what they need. Think simple, like from opening the app to completing a key action.
Create Simple Screens: You don't need fancy design software. Use a tool like Miro or even Google Slides to create a basic visual for each step in your flow. Just boxes and text will do.
This low-tech approach forces you to validate the logic of your idea before you bring in designers or developers. For a deeper dive, this guide on how to create a product prototype is a fantastic resource for turning thoughts into tangible assets.
A Workflow for Designers
For UI/UX designers, this is where you live. Your mission is to take that logical user flow and transform it into an interface that feels intuitive and engaging. You'll build something that looks and feels like a real app, long before it actually is one.
A typical designer workflow looks like this:
Develop Detailed Wireframes: Using tools like Figma or Sketch, you'll create structured layouts for every screen. This is all about getting the element placement and information hierarchy just right.
Build Interactive Mockups: Now, you connect those static screens. You create a clickable, medium-fidelity prototype that lets people navigate through the app as if it were real.
Apply Visual Design: Finally, you add the magic of branding, colors, and typography to create a high-fidelity version that’s ready for final user testing.
This process ensures the app is not just usable but also a joy to interact with, catching potential friction points early.
An Approach for Developers
When a developer builds a prototype, it's less about the visuals and all about technical validation. Can this core feature actually be built? You’re creating a functional prototype to test your riskiest technical assumptions head-on.
A developer-led prototype is a technical proof-of-concept. It de-risks the entire project by confirming that the hardest parts are possible, saving you from hitting a dead end months down the line.
This usually means building a bare-bones version of a single, critical feature. Think a simple frontend connected to a test backend, just enough to see if an API call works or a complex algorithm performs as expected.
No matter your role, the core principles hold true: start with a clear goal, map the user’s journey, and focus only on what's essential.
And today, the lines between these roles are blurring. AI-native platforms like CatDoes are changing the game entirely, allowing anyone to generate a working prototype of an app from a simple text description. It's a massive shortcut that accelerates the entire journey from a simple idea to a real product.
The Best Tools for Building Your App Prototype
Picking the right tool to build your prototype of an app is a lot like choosing the right instrument for a musician. What works best really depends on your skill level, what you’re trying to create, and how complex your final piece needs to be. Thankfully, the modern toolkit has something for everyone, from the equivalent of a simple acoustic guitar to a full-blown digital orchestra.
The journey usually starts with the simplest tools you can imagine, such as pen and paper, a whiteboard, or a digital canvas like Miro. These are your go-to for low-fidelity brainstorming. The goal here is pure speed, letting you get ideas down without getting bogged down in pixels and hex codes. Their power is in their simplicity; you can map out user flows and screen layouts with a team and make changes in a heartbeat.
Digital Design and Interaction Tools
Once the basic structure is there, it’s time to add more detail and bring the experience to life. This is where specialized design software comes in. These tools are the industry standard for creating everything from medium-fidelity wireframes to stunning, high-fidelity mockups that look and feel just like the real thing. They give you the power to define your app's visual identity and test out user interactions with real precision.
Some of the heavy hitters in this space include:
Figma: The crowd favorite for a reason. It's a browser-based, collaborative powerhouse with real-time editing, a massive plugin library, and fantastic prototyping features.
Sketch: A long-standing veteran in UI design, known for its clean, intuitive interface and strong vector editing tools. It’s a rock-solid choice for anyone on a Mac.
Adobe XD: A key player in the Adobe Creative Cloud, it plays incredibly well with other Adobe apps like Photoshop and Illustrator, making it a great option for designers already in that ecosystem.
These platforms are brilliant for visualizing your app, but that’s where they stop. They create an interactive, beautiful illusion of an app, not a functional one with a real backend doing the work.
The Rise of AI Native Platforms
Now, a new class of tool is completely changing the game. AI-native platforms like CatDoes don't just help you design a visual model; they go miles further. Instead of drawing a picture of an app, you simply describe the app you want in plain English. The platform then generates a fully functional prototype, complete with both a frontend and a backend.
This approach collapses the entire development lifecycle. You're no longer just building a simulation; you're generating the actual product, which can be tested on a real device and iterated on instantly.
This is a monumental shift. It eliminates the traditional, often clunky, handoff between designers and developers, slashing the time it takes to get from a rough concept to a real, testable application. For founders, designers, and developers, these platforms offer the absolute fastest path from an idea to a production-ready prototype of an app.
Testing and Improving Your Prototype with User Feedback
Building a prototype is only half the job. The real magic happens when you get it in front of actual users. This is the moment your carefully crafted assumptions collide with reality, and you discover what actually works versus what just looked good on a screen.
The goal here isn't to defend your design choices; it's to be a quiet observer. Watch how people really interact with your app. Do they get stuck? Do they hesitate before tapping a button? Or do they smile when a feature works exactly how they hoped? Those reactions are the gold you need to build a product people will love.
In a market where users spend hours a day inside apps, this feedback loop is non-negotiable. The bar for a good user experience is incredibly high. According to research from itransition.com, the global app industry is worth hundreds of billions, and your prototype is your ticket to competing in it.
How to Conduct Effective User Testing
You don't need a fancy lab or a huge budget to get game-changing insights. Seriously. Testing with just a handful of people from your target audience can uncover 85% of the major usability problems in your design. The secret is asking the right questions and knowing when to just watch.
Here’s a simple way to structure your testing sessions:
Give them a task, not a tour. Don't walk them through the app. Give them a goal, like "Find a way to add a new contact," and see what happens. Their path will tell you everything.
Encourage them to think aloud. Ask them to narrate their thoughts as they go. You'll hear their expectations, frustrations, and moments of delight in real-time.
Ask open-ended questions. Avoid leading questions like, "That was easy, wasn't it?" Instead, try, "Tell me about that experience." You’ll get much more honest answers.
The most valuable feedback comes from watching what users do, not just listening to what they say. Their actions will always reveal the truth about your prototype's usability.
Turning Feedback into Action
Once you've collected all this feedback, the real work begins. Your job is to sort through the noise and find the signal. Not every suggestion is a must-fix. You need to separate minor cosmetic tweaks from the critical flaws that bring a user’s journey to a dead stop.
A simple feedback matrix is a great way to organize everything. Group the insights by feature or screen, then prioritize them based on how severe the issue is and how much effort it will take to fix.
This cycle of testing, learning, and refining is the engine that powers a great prototype of an app. It’s a disciplined process that ensures the final product is shaped by real human behavior, not just your initial assumptions. For more ideas, check out our guide on structuring your user testing questions to get the best possible insights.
Common Questions About App Prototyping
Even with the best plan, you’re going to have questions. Everyone does. This last section tackles the practical, real-world concerns that pop up right before you start building your prototype of an app.
Think of this as the final, practical advice you need to move from idea to interaction with confidence.
How Much Does It Cost to Create a Prototype of an App?
The cost can range from zero to thousands of dollars, and it all depends on how detailed you get and who’s doing the work. A simple paper prototype? That’s practically free, just your time and a few office supplies. It’s the best way to get started without any financial risk.
Once you go digital, you’ll run into some costs. Using a wireframing tool usually means a subscription, which can be anywhere from $15 to $50 a month. If you hire a professional designer or an agency to create a polished, high-fidelity prototype, you’re looking at a much bigger investment, anywhere from $1,000 to over $10,000, depending on how complex your app is.
But AI-native platforms are changing the game here. Many offer a free tier that lets you build a surprisingly functional prototype. This massively lowers the financial barrier, letting you create something interactive and high-quality without a huge upfront cost.
What Is the Difference Between a Prototype and an MVP?
This is one of the most common points of confusion, but the distinction is critical. A prototype and a Minimum Viable Product (MVP) serve completely different roles. Getting this right is key to your launch strategy.
A prototype is a model. Its whole job is to help you learn and validate an idea before you commit serious time and money to development. It’s for testing concepts, user flows, and designs. It might look and feel real, but it’s often just a facade with no working backend. It’s not meant for the public.
An MVP, on the other hand, is the first real, working version of your app that you release to the public. It has just enough core features to solve a problem for your first users and prove that your idea has legs in the real world.
You build a prototype to figure out what to build. You launch an MVP to see if the market wants what you built. The prototype answers design questions; the MVP answers business questions.
How Long Does It Take to Build an App Prototype?
The timeline is tied directly to the fidelity. You can sketch out a low-fidelity paper prototype in a couple of hours, which is perfect for a quick brainstorming session. A medium-fidelity clickable wireframe takes a bit more effort and might take a few days to a week to pull together in a digital tool.
A high-fidelity prototype, the kind with polished visuals and slick animations, is the most time-consuming. Perfecting one of these can take several weeks because it needs to accurately represent the final user experience for stakeholder demos or serious user testing.
Of course, modern AI platforms are completely rewriting these timelines. They can generate a functional, interactive prototype from a simple text description in just minutes or hours, compressing what used to take weeks into a single afternoon.
Do I Need Coding Skills to Create a Prototype?
Absolutely not. This is one of the biggest wins of prototyping. It gives non-technical founders, designers, and product managers a way to bring their ideas to life without writing a single line of code.
You can create low- and mid-fidelity prototypes with nothing more than pen and paper or easy-to-use, drag-and-drop tools like Figma or Miro. Even most high-fidelity tools are designed to be completely code-free. The focus is on visual design and linking screens, not programming. This makes sure the best ideas get tested, no matter who came up with them.
Ready to stop sketching and start building? With CatDoes, you can turn your app idea into a fully functional prototype using simple, natural language. Our AI agents handle the design, code, and backend setup, so you can test your concept on a real device in hours, not weeks. Build your first app for free on CatDoes today!
Nafis Amiri
Co-Founder of CatDoes


