Blog
Tutorials
Mobile Development React A Guide to Building Cross-Platform Apps
Explore mobile development react using React Native. This guide shows you how to build fast, beautiful iOS and Android apps from a single codebase.

Nafis Amiri
Co-Founder of CatDoes

When you hear about using React for mobile development, we're talking about building truly native apps for both iOS and Android from a single JavaScript codebase. This approach, powered by the React Native framework, is a massive time and resource saver. It completely gets rid of the need for separate development teams and codebases for each platform.
Why Choose React for Mobile App Development
In the hyper-competitive world of mobile apps, getting to market fast and staying efficient is everything. Businesses and developers need a way to build amazing applications that run perfectly on every user's device, but without doubling the work. This is the exact problem that mobile development with React nails so perfectly.
Instead of writing one app in Swift for Apple's iOS and a completely different one in Kotlin for Google's Android, you just write it once. React Native works like a brilliant translator, taking your familiar React components and turning them into the native building blocks of each operating system. The end result isn't some clunky web page shoved into an app shell; it's a genuine native application with the snappy performance and smooth feel users demand.
The Power of a Single Codebase
This "write once, run anywhere" approach is a total game-changer. Just think about launching a new feature. With traditional native development, you'd have to build, test, and ship it twice. With React Native, you build it once, and it's instantly available to all your users at the same time. This dramatically shrinks your time-to-market and slashes ongoing maintenance costs.
This efficiency is why it has become so dominant. In fact, React Native currently commands a massive 42% market share among cross-platform development frameworks. This isn't just a popular trend; it's backed by major success stories, with top-tier apps on both the App Store and Google Play built with this exact technology.
To give you a clearer picture, here’s a quick breakdown of how React Native stacks up against the old way of doing things.
React Native vs Native Development At a Glance
Feature | React Native | Native Development (iOS/Android) |
|---|---|---|
Codebase | Single JavaScript codebase for both platforms | Separate codebases (Swift for iOS, Kotlin for Android) |
Development Team | One team of JavaScript/React developers | Two specialized teams (iOS and Android) |
Speed to Market | Faster; build and deploy features simultaneously | Slower; requires separate development cycles for each platform |
Cost | Lower; reduced development and maintenance overhead | Higher; requires more developers and resources |
Performance | Near-native performance, excellent for most apps | Highest possible performance, optimized for the OS |
UI Components | Maps to native UI controls for a genuine feel | Uses platform-specific, first-party UI components |
While native development will always offer the absolute peak of performance for a specific OS, React Native gets you incredibly close while cutting your workload in half. For the vast majority of apps, the trade-off is a massive win.
An Accessible and Thriving Ecosystem
For web developers already working with React, jumping into mobile development is surprisingly simple. You're using the same core concepts you already know: components, state, and props. This makes the learning curve feel more like a small step than a steep climb.
This accessibility gets even better with tools like Expo, a platform that smooths out the entire development workflow. Expo takes care of all the tricky configuration and build tools, letting you concentrate on what really matters: creating an awesome app.
The real magic of React Native is its ability to deliver a native user experience using web technologies. It bridges the gap between web and mobile, letting teams move faster without ever sacrificing quality.
This powerful mix of a shared codebase, native performance, and a welcoming developer ecosystem makes mobile development with React a go-to choice. It's used by everyone from solo founders building their first MVP to huge companies like Microsoft and Shopify who power their flagship mobile apps with it.
Of course, when you're weighing your options, it’s crucial to see how it compares to other frameworks. If you're curious, we put together a deep dive in our detailed comparison of Flutter vs React Native in 2025.
Understanding The Core React Native Architecture
To really get the most out of mobile development with React, it helps to peek behind the curtain at how it all works. React Native's magic isn't actually magic. It's a clever and practical architecture designed to translate your JavaScript code into a high-performance mobile experience. It’s a system built for efficiency, letting you build for two platforms at once without ever cheaping out on the user experience.
At the heart of it all is a concept known as the “Bridge.” Think of it like this: your JavaScript code and the native parts of a phone (like the camera, GPS, or UI elements) speak completely different languages. The Bridge acts as their expert interpreter, creating a seamless, two-way conversation between them.
So, when your app needs to do something, like show a button or get the user's location, your JavaScript sends a message across this Bridge. The native side gets the message, runs the command using genuine iOS or Android code, and then sends a confirmation or data back over the Bridge. This entire round trip happens so fast that your app feels incredibly responsive and truly native.
This simple but powerful flow is what gets your code from a single file to a finished app on someone's phone.

As you can see, a single stream of JavaScript logic, once it hits React Native, branches out to create distinct, platform-specific apps for both iOS and Android.
The Key Players In The React Native Ecosystem
While the Bridge is the core mechanism, a few other essential players make up the wider ecosystem you'll be working with. Knowing who's who will make your development journey a whole lot smoother.
First up is React Native itself. This is the main framework from Meta that provides all the core building blocks and the Bridge technology. It’s the foundation everything else is built on.
Next, you've got Expo. If React Native is the car’s powerful engine, Expo is the modern dashboard and driver-assist package that makes it way easier to drive. Expo is a platform and a set of tools built on top of React Native that smooths over many of the rough edges of mobile development. It simplifies project setup, gives you easy access to native device APIs, and even makes sharing your app with testers a breeze.
Finally, there’s the massive world of community packages. The React Native community is incredibly active. Developers all over the globe have created thousands of free, open-source libraries that you can drop into your project for instant features, from slick navigation systems to complex animations. This collective effort means you almost never have to build everything from scratch.
The real power of React Native's architecture isn't just its technical brilliance. It's the mix of the core framework, user-friendly platforms like Expo, and a vibrant community that makes building amazing mobile apps more accessible than ever. You can see this combo at work in plenty of well-known React Native app examples from top companies.
This powerful setup has fueled some serious market adoption. The global React Native app development market was recently valued at USD 325 million and is projected to hit USD 499 million by 2031. This growth is all about businesses looking for smart, cost-effective ways to ship apps, often cutting development time by 30-40% compared to building two separate native apps. You can dig into more data on these React Native market trends and its impressive growth.
Essential Tools for Your Development Workflow
Moving from a high-level plan to a working app means getting your hands dirty, and for that, you need the right tools. For mobile development with React, your workflow is built around a few core pieces of software that work together to bring your ideas to life. Think of it like a well-organized workshop: you have your workbench, your power tools, and your diagnostic gear.

This isn't just about having the tools, but knowing how they fit together to create a smooth, efficient cycle. A tight workflow lets you move quickly from writing the first line of code to testing a real feature on your phone. Let's break down the must-haves.
Your Code Editor: The Digital Workbench
The first thing you need is a code editor. This is where you'll spend most of your time, writing and organizing all the files that make up your project. While there are plenty of options out there, Visual Studio Code (VS Code) has become the unofficial standard in the React and React Native communities. And for good reason.
It’s free, fast, and incredibly powerful, mostly thanks to its huge library of extensions. These are little add-ons that give you superpowers like smart code completion, automatic formatting, and direct integrations with your other tools.
ES7+ React/Redux/React-Native snippets: This one is a lifesaver. It gives you shortcuts for common code patterns, so you're not typing the same boilerplate over and over again.
Prettier - Code formatter: Keeps your code style consistent across the entire project, which is absolutely critical when you're working on a team. No more debates about tabs vs. spaces.
GitLens: This supercharges the built-in Git features, letting you see exactly who wrote each line of code and when, right inside the editor.
A well-configured editor is the first step to being productive. It’s your clean, organized space to build.
The Command Line: Your Project's Control Center
Next up is the command-line interface, or CLI. This is your project’s nerve center. It's a simple text-based interface where you issue commands to create, run, and manage your application. You'll use it for everything from spinning up a new project to installing dependencies and firing up the development server.
Think of the CLI as the bridge between you and all the complex build processes running in the background. It takes your simple commands and kicks off a bunch of automated tasks, making your life way easier.
Both React Native and Expo have their own CLIs, each tailored to their specific way of working. With Expo, for instance, a single command like npx create-expo-app MyFirstApp is all it takes to generate a complete, ready-to-run project. Learning a few key commands is non-negotiable for controlling your development environment.
Debugging Tools: Your Magnifying Glass
Let's be real: no one writes perfect code on the first try. Bugs are just a part of the job, which means having good debugging tools is non-negotiable. These tools are your magnifying glass, letting you pause your app in its tracks, inspect what’s going on under the hood, and find the exact source of a problem.
The React Native ecosystem has some great options. For years, many developers just used the Chrome DevTools. More recently, however, Flipper has become the go-to choice. It's a debugging platform built by Meta specifically for mobile apps.
Flipper offers a much more integrated experience, giving you tools to inspect not just your JavaScript logic but also:
Network Requests: See every single API call your app makes.
Device Logs: View native logs directly from both iOS and Android.
UI Layout: Inspect and even tweak your app's component hierarchy in real-time.
A solid debugger turns a frustrating bug hunt into a straightforward problem-solving session, which massively speeds up your mobile development with React. Together, your editor, CLI, and debugger form the foundation of an effective workflow, giving you the confidence to build, test, and ship great mobile apps.
Alright, theory is one thing, but you don't really get it until you build something. Confidence comes from shipping, so let's shift from concepts to creation. We're going to walk through the essential steps to build a simple mobile app using the powerful duo of React Native and Expo. The focus here is on the process, not drowning you in code.
This quick guide will prove that building a real, working app is way more accessible than you might think. We'll start with an empty folder and end with an interactive app running on your actual phone.
Setting Up Your Environment
Before you can build, you need a workspace. Luckily, Expo makes this initial setup incredibly simple. The only real prerequisite is having Node.js installed on your machine. Once that's ready, you can install the Expo CLI.
This command-line tool is basically your project manager. You’ll use it to spin up new projects, start the development server, and run your app. Think of it as a friendly assistant that handles all the complicated configuration behind the scenes, letting you focus on the creative work.
Creating Your First Project
With the Expo CLI installed, creating a new mobile app is as simple as running one command in your terminal. This single line kicks off an automated process that scaffolds a complete, ready-to-run project for you.
npx create-expo-app MyFirstApp
This command creates a new folder named MyFirstApp and fills it with all the necessary files and dependencies. When it's done, you'll have a clean, organized starting point for your app, the digital equivalent of a fresh canvas.
Inside that folder, you’ll find a few key files, but the most important one to start with is App.js. This is the main entry point for your application, where you'll begin writing code and building out your user interface.
Building a Simple Screen
Now for the fun part: let's build something you can actually see. In React Native, your UI is constructed from a set of core components that work across both iOS and Android. Instead of HTML tags like <div> or <p>, you'll use components like <View> and <Text>.
<View>: This is your most fundamental building block. Think of it as a flexible container you use to group and style other components.<Text>: Just like it sounds, this component is for displaying any and all text on the screen.
You combine these components inside your App.js file to create a visual layout. For example, you might create a main <View> to act as the screen's background and then place some styled <Text> components inside to welcome your user. It’s a declarative approach that makes your code really easy to read.
Adding Interactivity with State
A static screen is a start, but real apps need to respond to user actions. This is where React state comes into play. State is just a piece of data that your component can hold and change over time. When that data changes, React automatically re-renders the component to show the new information.
For instance, you could add a button and a counter to your screen. You'd use a state variable to hold the current count. When a user presses the button, you update that state, and React handles updating the number displayed on the screen. This simple mechanic is the foundation of all interactivity in a React Native app.
The core idea is simple but powerful: your UI is a direct function of your state. Change the state, and the UI updates automatically. Mastering this concept is the key to building dynamic, engaging mobile apps.
Running Your App Everywhere
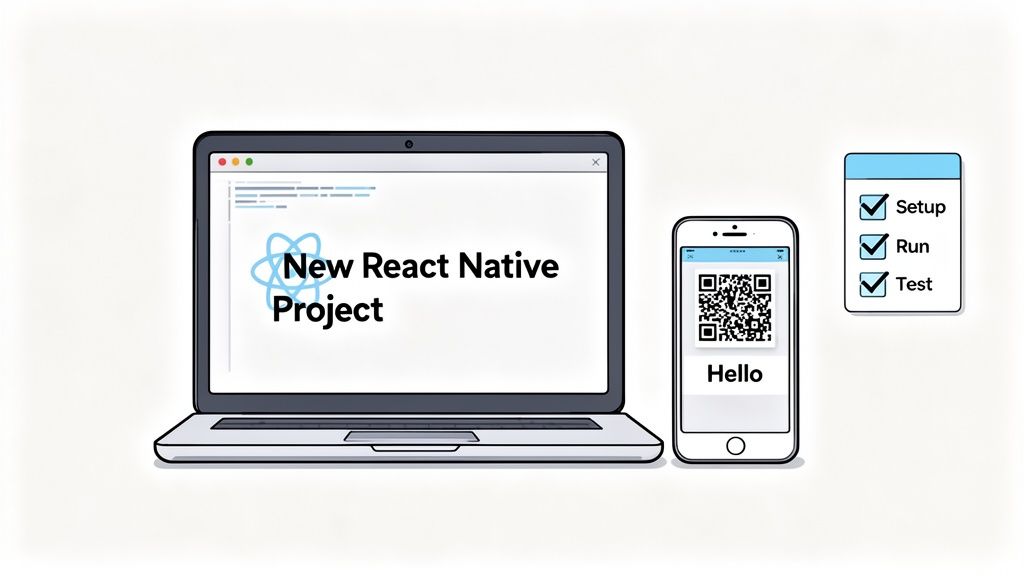
This is the most exciting part. Expo makes testing your app on different devices unbelievably easy. After you start your development server, a QR code will pop up in your terminal.
On a Simulator: You can run your app on a virtual iOS or Android device right on your computer for quick checks.
On Your Own Phone: Just download the Expo Go app from the App Store or Google Play, scan the QR code, and your app will instantly load on your physical device.
Seeing and interacting with your creation on your own phone in seconds is a truly empowering experience. It completely closes the gap between writing code and seeing a real-world result. For a more detailed walkthrough, check out our complete React Native Expo tutorial, which dives deeper into each step.
Speeding Things Up with AI-Powered Tools
Even with a great framework, the traditional development workflow is full of manual steps. But what if you could just… skip most of them? Modern AI tools are completely flipping the script on mobile development with React, turning app creation from a tedious coding exercise into a simple conversation.
Just imagine describing your app idea in plain English. Instead of you translating that vision into hundreds of lines of code, an AI system figures out what you mean, designs the UI, and writes all the necessary React Native and Expo code for you. This isn't science fiction anymore; it’s the new reality of building an app.
AI-native platforms like CatDoes manage this whole process for you. A requirements agent clarifies your vision, a designer agent creates the look and feel, and a team of software agents builds the actual, functional components. It’s an approach that makes app development available to a much wider audience than ever before.
Who Is This For?
This shift doesn't just benefit one group; it opens the doors for everyone. Non-technical founders and students can finally bring their ideas to life without hitting a steep learning curve or needing to hire an expensive dev team. The barrier to entry has been all but erased.
For seasoned developers, these tools are massive accelerators. You can build and test Minimum Viable Products (MVPs) at an incredible speed, making it possible to get feedback and iterate faster than ever. For businesses, this means slashing both time-to-market and development costs.
The core advantage is moving from writing code to directing its creation. You focus on the 'what' and 'why' of your app, and the AI handles the 'how', generating everything from live previews to store-ready builds.
The React Native ecosystem, with its massive community backing shown by 121,000 GitHub stars, gives this AI-driven approach a rock-solid foundation. That community strength means AI has a stable, feature-rich framework to build on, speeding up delivery by 30-40% while sharing 70-85% of the code between platforms. By combining React Native, Expo, and AI, conversational workflows can generate real, testable iOS and Android apps with authentication and databases already wired up. It’s a powerful stack, and you can learn more by exploring the latest cross-platform strategies for 2025.
From Idea to App Store, Without the Headaches
The entire workflow becomes a seamless, guided experience. These AI platforms really do handle everything, from the first spark of an idea to the final deployment.
Live Previews: See your app come to life in the browser, instantly, as you describe new features.
Backend Generation: The AI automatically creates the backend infrastructure you need, including databases and user authentication.
One-Click Deployment: When you’re ready, the platform generates the builds required for submission to the Apple App Store and Google Play Store.
This end-to-end automation transforms mobile development from a long, expensive project into a fast, iterative cycle. If you're looking to truly speed up your process, checking out the broader landscape of AI tools for code can unlock even more efficiencies. By automating the most painful parts of the process, these platforms let creators get back to focusing on what really matters: innovation and user value.
Polishing for Performance and App Store Submission
Getting a functional app running is a massive win, but turning it into a great app is all about the final polish. This is where you focus on performance to create a silky-smooth user experience and navigate the final hurdle: the app stores. Nail these details, and you'll separate your app from the rest in the crowded world of mobile development react.
A snappy, responsive app is a joy to use and keeps people coming back. A slow, janky one? That's a one-way ticket to the uninstall button. Performance isn't a feature you tack on at the end; it's the foundation of a good user experience.
Optimizing Your App for Peak Performance
In React Native, performance tuning usually boils down to how you manage rendering and handle your assets. A few key habits can make a night-and-day difference.
First, get serious about your images. Huge, unoptimized images are one of the most common culprits behind slow load times and memory bloat. Always resize images to the exact dimensions they’ll be displayed at, and use modern formats like WebP to slash file sizes without wrecking the quality.
Next, get a handle on component rendering. React's memo is your best friend for preventing needless re-renders of components when their props haven't changed. This is especially critical for complex lists or data-heavy screens, where wasted rendering cycles can cause noticeable lag.
A well-optimized app feels invisible to the user. It just works. The goal is to eliminate any friction between the user's intent and the app's response, making the experience feel fluid and natural.
Finally, keep your project organized. As your app grows, a clean and logical folder structure is a lifesaver for maintenance and debugging. Grouping files by feature or component helps you find what you need fast and stops the codebase from turning into a tangled mess.
Preparing for App Store Submission
Once your app is built, tested, and running like a dream, it’s time to get ready for launch. Submitting to the Apple App Store and Google Play Store involves a series of steps that can feel like a maze at first, but it's a straightforward path once you know the landmarks. It’s also where rigorous testing pays off. Using comprehensive User Acceptance Test (UAT) templates ensures your app truly meets user needs and is free of show-stopping bugs before you ship.
Here’s a quick rundown of what to expect for both platforms:
Gather Your Assets: You'll need high-quality app icons, a gallery of screenshots for various device sizes, and a compelling app description that sells your idea.
Configure App Details: This includes locking in your app’s name, picking a category, providing a privacy policy, and setting your price.
Build for Release: This isn't your typical development build. You'll create a production-ready version of your app, optimized and signed for the store.
Submit for Review: Finally, you upload your build to App Store Connect (for iOS) or the Google Play Console (for Android) and hit submit.
The review process can take anywhere from a few hours to a few days. Both Apple and Google have strict guidelines, so read them carefully to avoid getting rejected and having to start over.
Fortunately, modern platforms like CatDoes can automate many of these complex deployment chores. By connecting to your developer accounts, they can handle the build process, manage certificates, and even kick off the submission for you. It turns a multi-step headache into a simple, guided workflow, making the final hurdle of mobile development react much less daunting.
Common Questions About React for Mobile Development
As you start exploring mobile development with React, some questions always come up. Getting these sorted out early on builds a solid foundation and gives you the confidence to dive in. This section tackles the big ones we hear all the time from developers just starting their journey.
We’ll cover what "native" really means in React Native, what skills you actually need, and how key tools in the ecosystem fit together. Let's clear up any lingering confusion.
Is React Native Truly Native?
This is probably the most important question, and the answer is a confident yes, but with a key distinction. You write all your logic in JavaScript, but React Native translates your UI components into the platform's actual, genuine native building blocks. An app built with React Native isn't just a webpage stuffed into a container; it uses the exact same fundamental UI elements as an app built in Swift or Kotlin.
This means the buttons, text inputs, and lists in your app are the real deal on both iOS and Android. The final result is an application that looks, feels, and performs like a native app because, from the user's perspective, it is one.
The key takeaway is that React Native gives you the best of both worlds. You get the development speed of a single JavaScript codebase and the polished, high-quality user experience of a truly native interface.
Do I Need to Know Swift or Kotlin?
For the vast majority of apps, the answer is a clear no. The whole point of mobile development with React is to let you build complete, feature-rich apps using just JavaScript and React. The framework is specifically designed to give you access to most of a device's capabilities without ever touching a line of native code.
You'd only need to venture into Swift or Kotlin in very specific, rare scenarios. This usually happens when you need to create a highly custom, performance-critical native module that doesn't already exist in the open-source community. For almost every developer and every project, your JavaScript skills are all you'll ever need.
What Is the Difference Between React Native and Expo?
It helps to think of them as layers. React Native is the core framework itself. It provides the fundamental technology, like the bridge to the native side and the UI components, that makes everything work.
Expo, on the other hand, is a platform and a set of tools built on top of React Native. Its entire purpose is to make your life easier and your development process faster. Expo handles complex build configurations for you, offers a huge library of pre-built APIs for accessing device features like the camera or GPS, and massively simplifies sharing and testing your app. For most people, starting with Expo is the fastest way to get a React Native project off the ground.
Ready to turn your app idea into a reality without the steep learning curve? With CatDoes, you can describe your vision in plain English and let AI build, test, and deploy your production-ready mobile app. Skip the complexity and start creating today at https://catdoes.com.
Nafis Amiri
Co-Founder of CatDoes


