Blog
Tutorials
How to Create a Website App From Idea to Launch
Learn how to create a website app with this practical guide. Discover proven strategies for planning, designing, building, and launching your app successfully.

Nafis Amiri
Co-Founder of CatDoes

So, you want to build a website app. It’s a journey that starts with an idea, moves through design and development, and ends with a launch. The great news? Modern tools have completely changed the game, letting you bring your vision to life just by describing it in plain English, no coding required.
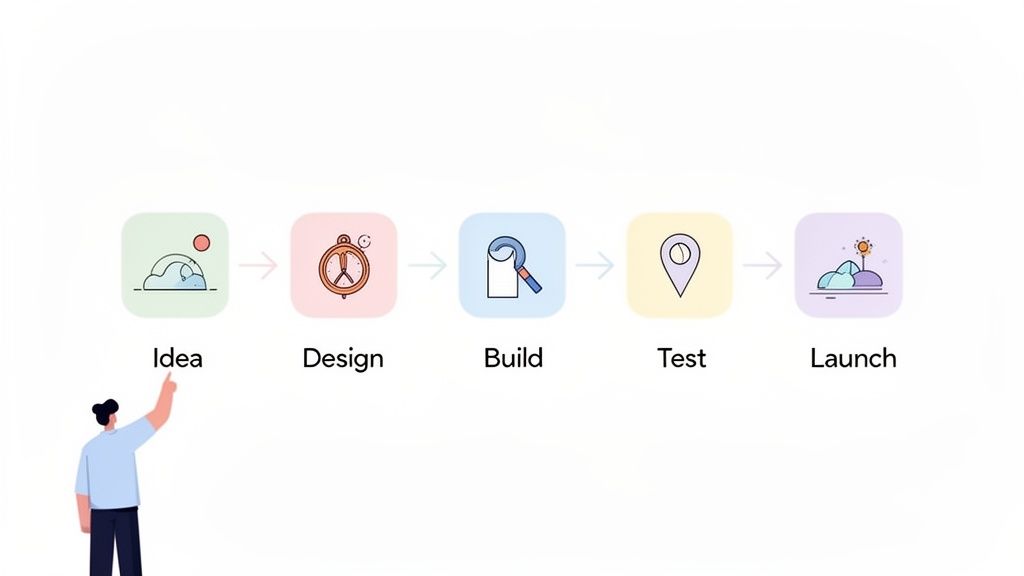
Your Practical Guide to Building a Website App
This is your complete roadmap for creating a website app from scratch. Whether you're a founder with a groundbreaking idea, a business owner looking to expand your digital footprint, or a creator ready to build something new, you're in the right place. We're going to cut through the jargon and break down the entire process into clear, manageable stages.
We'll cover everything from refining your initial concept and making sure there’s a market for it, to designing an intuitive interface, building it with modern tools, and pulling off a successful launch.
Why Website Apps Are More Relevant Than Ever
The mobile app market is absolutely exploding, and website apps are riding that wave. We're talking about a market currently valued at around $305 billion that's projected to hit a staggering $619 billion by 2031. That's a growth rate of 15.18% every single year.
This boom is fueled by a global smartphone user base expected to reach 4.69 billion by 2025, with people spending an average of 4.6 hours a day glued to their apps. You can dig into more mobile development statistics to see just how massive this trend is. For creators and businesses, this isn't just a number; it's a direct line to your audience.
Bridging the Gap Between Idea and Reality
Not long ago, building an app was a slow, painful, and ridiculously expensive process. Traditional development could easily drag on for months and set you back anywhere from $50,000 to $150,000 just to get a basic first version, or Minimum Viable Product (MVP), off the ground. That high barrier meant countless great ideas never saw the light of day.
The game-changer is the rise of AI-native platforms. These powerful tools are slashing development timelines by up to 80%, making app creation faster, cheaper, and more accessible than ever before.
Our goal here is to give you the practical know-how to build a functional and engaging app, regardless of your technical background. We'll look at the old-school coding route and also dive into modern AI-powered solutions that can take you from concept to a live application in a fraction of the time.
For instance, platforms like CatDoes let you simply describe your vision, and its AI agents handle the design, coding, and backend setup for you. This guide will arm you with the insights to choose the right path for your project and finally turn that idea into a real, tangible product.
Validating Your Website App Idea
Every great app starts long before a single line of code gets written or a design gets mocked up. The most critical work happens right at the beginning. This is the validation phase. It's where you take a raw idea and turn it into a solid concept with a real shot at success.
Trying to build without this step is like setting sail without a map. It’s risky, expensive, and you’ll probably end up somewhere you didn't intend to be.
This is all about asking the tough questions first. Who are you actually building this for? What nagging problem are you solving for them? Nailing this down ensures you're building something people will use, not just something you think is cool.
Defining Your Audience and Their Core Problem
First things first: get laser-focused on your target audience. "Everyone" is not a target audience. You need to sketch out a detailed user persona, which is basically a fictional character who represents your ideal customer. Give them a name, a job, a few goals, and most importantly, their biggest frustrations.
Once you know who you're building for, you can figure out the what. What specific, annoying problem will your app solve for this person? A great app isn't just a pile of features; it's a sharp, elegant solution to a genuine headache.
For example, instead of a vague "productivity app," you could zero in on freelance designers who hate tracking project hours and sending invoices. Suddenly, your app's mission is clear: make that specific workflow dead simple. That's a much stronger foundation to build on.
Conducting Market and Competitor Research
With a clear problem in mind, it’s time to look around. No matter how brilliant your idea feels, someone else is probably already trying to solve a similar problem. This is a good thing! It proves a market actually exists.
Your job is to identify these competitors and see what they're up to.
Who are the main players? List out 3-5 direct and indirect competitors.
What are they doing well? Take notes on their killer features, pricing, and user experience.
Where are they dropping the ball? Scour user reviews on app stores and forums. What are people constantly complaining about? Those gaps are your opportunities.
This research helps you lock down your Unique Value Proposition (UVP). What makes your app different and better? It could be one killer feature, a cleaner design, a smarter price, or a focus on a niche audience everyone else is ignoring.
A strong UVP is your core message. It tells a potential user exactly why they should choose your app over all the others. It needs to be simple, clear, and compelling.
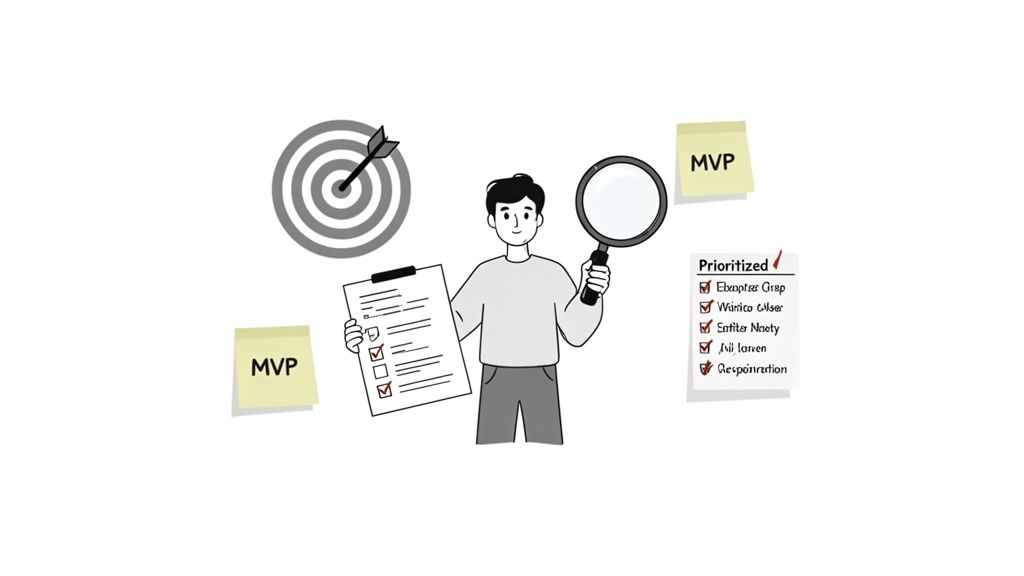
Prioritizing Features for a Minimum Viable Product
It’s tempting to dream up dozens of amazing features, but trying to build them all at once is a surefire way to fail. The smart move is to define a Minimum Viable Product (MVP). The MVP is the absolute simplest version of your app that still solves the core problem for your ideal user.
To figure out your MVP, make a list of every feature you can think of. Then, sort them into three buckets:
Must-Have: Without these, the app is broken. These are the essentials for solving the user's main problem.
Should-Have: These are important and add a ton of value, but the app can launch without them.
Nice-to-Have: These are the cool extras and bonus features that can definitely wait until later.
Your MVP is just the "Must-Have" list. That’s it. This lets you launch faster, get feedback from real people, and avoid wasting months building features nobody actually wanted. For a deeper dive, check out our guide on how to validate a business idea to really sharpen this process.
Don't underestimate the competition. The mobile application market is a battlefield, projected to explode from $330.61 billion in 2025 to a staggering $1,230 billion by 2035. With nearly 998 new apps hitting the Google Play store every single day, a sharp, validated idea isn't just a good start; it's your only chance of survival. You can explore more data on the mobile application market's rapid growth to really understand the stakes.
Designing an Intuitive User Experience
A great app isn't just about what it does; it's about how it feels. You can build the most functional tool in the world, but if it's confusing or ugly, people just won't stick around. This is where User Experience (UX) and User Interface (UI) design come in.
Think of UX as the overall feeling someone gets using your app. Is it easy, frustrating, or enjoyable? UI, on the other hand, is the specific stuff they interact with: the buttons, the text, the images. Getting both right isn't just a nice-to-have; it's a non-negotiable step before you even think about writing a single line of code.
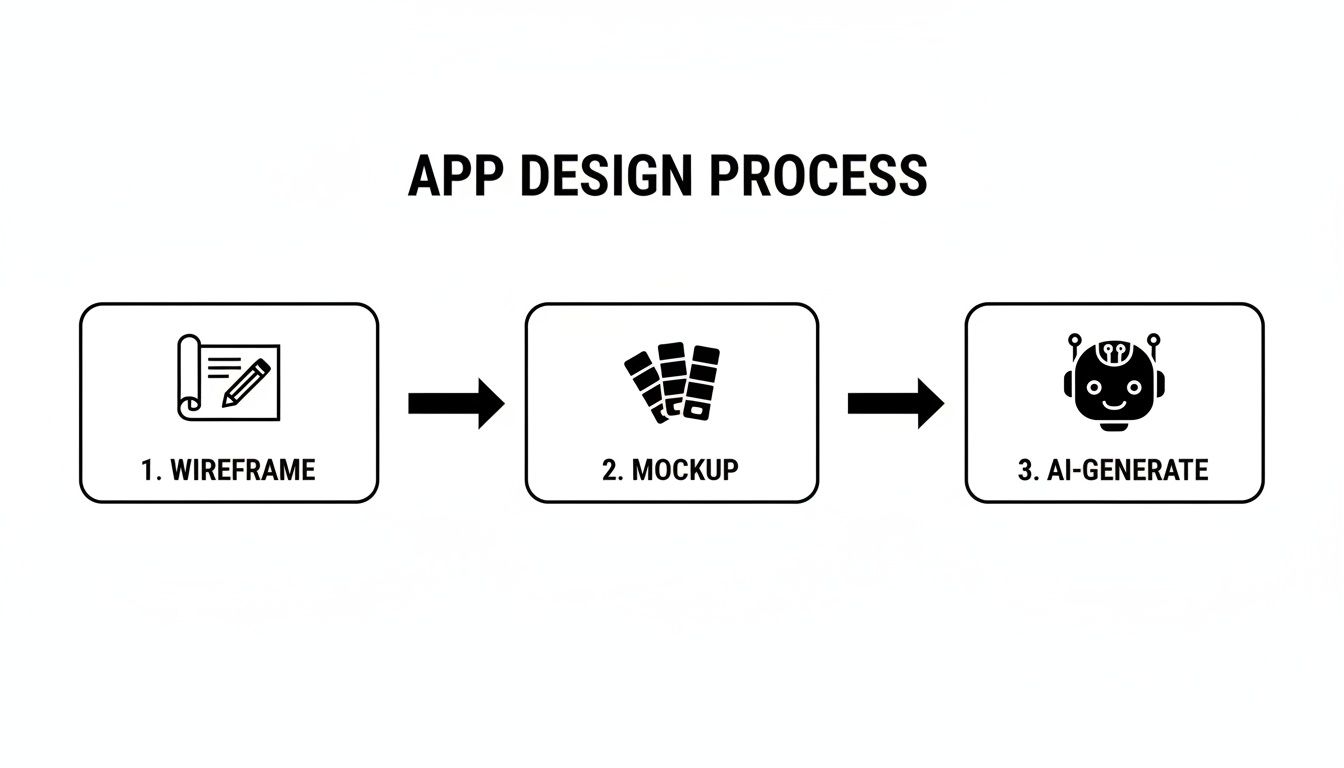
From Blueprint to Visual Design
So how do you get from a list of features to a beautiful, working screen? The journey starts with two key steps: wireframes and mockups. I like to think of them as the architectural blueprints for your app.
First, you create a wireframe. This is a super simple, black-and-white layout. Its only job is to map out the structure. You figure out where buttons, images, and text boxes will go on each screen, without getting distracted by colors or fonts. It forces you to nail down the user flow and basic functionality first.
Once that structure feels solid, you move on to the mockup. This is where things get real. It’s a high-fidelity design that pulls in your brand’s color palette, typography, and actual UI elements. For the first time, your app starts to look and feel like the finished product.
A well-crafted design process ensures you’re building an app that is not only powerful but also a pleasure to use. According to studies, a good UI can raise conversion rates by up to 200%, and a better UX design could yield conversion rates of up to 400%.
Taking the time for these design stages is critical because it helps you spot usability problems early. Trust me, it's way easier and cheaper to move a button in a wireframe than it is to rewrite code after the fact.
Choosing Your App's Visual Identity
Your app’s visual identity is its personality. It’s what makes it instantly recognizable and helps build a real connection with your users. This identity boils down to a few core pieces.
Color Palette: Colors create emotion. Pick a primary color that really speaks to your brand, then add a couple of secondary or accent colors to draw the eye to important actions, like a "Sign Up" button.
Typography: The fonts you choose have a huge impact on readability and tone. Stick to one or two font families that are easy to read on any screen size and match your brand's voice, whether that's professional, playful, or modern.
Visual Elements: This covers your logo, icons, and any images you use. The key here is consistency. Using a cohesive set of icons and high-quality images gives your app a polished, professional vibe.
If you want to go deeper into creating a design that truly connects with people, check out our detailed guide on UX design for apps. It’s packed with principles to help you build an engaging experience.
Modern Tools That Streamline the Creative Process
Not long ago, creating wireframes and mockups meant getting skilled with specialized tools like Figma or Sketch. While these platforms are incredibly powerful, they come with a learning curve and, more importantly, they don't automatically turn your design into a working app. That's a whole separate step.
This is where AI-driven platforms are completely changing the game. With a tool like CatDoes, you can pretty much sidestep the manual design work. Instead of drawing boxes and picking hex codes, you just describe the look and feel you want in plain English. Its Designer agent can generate professional themes and complete user interfaces for you.
This new approach closes the gap between design and development, turning a visual idea into a functional screen almost instantly. Let’s look at how the two paths stack up.
Website App Design Approaches Compared
Choosing how to design your app's interface is a big decision. The traditional route involves a designer and a developer working in sequence, while modern AI platforms combine these roles into a single, faster workflow.
Feature | Traditional Design (e.g., Figma + Developer) | AI-Powered Platform (e.g., CatDoes) |
|---|---|---|
Speed | Slow; requires manual design and then separate development. | Fast; generates designs and functional UI simultaneously. |
Skills Needed | Requires expertise in design tools and often coding. | No design or coding skills needed; works with natural language. |
Iteration | Changes can be time-consuming, requiring updates from both a designer and a developer. | Instant; describe a change, and the AI rebuilds the interface. |
Cost | High; involves paying for design software and professional designers/developers. | Low; often based on an affordable subscription model. |
Ultimately, the goal is the same: create a polished, user-friendly design. Whether you go the traditional route or use an AI-powered platform, putting an intuitive user experience first is the secret to building an app people will actually love and come back to.
Choosing Your Development Path and Building the App
Alright, this is where the rubber meets the road. Your idea is solid, the designs are ready, and it's time to turn that vision into a real, working product. The big question now is how you're going to build it. The path you take here will shape your project's timeline, budget, and overall complexity in a big way.Whether you’re a seasoned developer or have never written a line of code, there’s a route that fits. Let's dig into the main options on the table in 2026.
The Traditional Coding Path
The classic approach is to write the code from the ground up. This gives you absolute control and endless customization, but it demands serious technical skills. To go this route, you’ll need to put together a "tech stack", the set of technologies that power your app.
A popular and incredibly powerful combo for modern website apps looks something like this:
Frontend (What Users See): React is still the king for building snappy, interactive user interfaces. Its component-based structure is a lifesaver for managing complex UIs that need to be updated on the fly.
Backend (The Engine Room): Supabase has become a go-to open-source alternative to Firebase. It bundles together a Postgres database, user authentication, file storage, and more, handling a ton of the backend grunt work so developers can focus on building features.
While this path offers total freedom, it's also the most demanding in terms of time and money. You either need to be a developer yourself or hire one, which is a significant investment right out of the gate.
The AI-Native Development Path
There's a much newer, more accessible way to build: using AI-native platforms. Instead of writing code, you describe your app's features and logic in plain English, and a team of AI agents does the heavy lifting. This approach completely changes the game, making app creation possible for everyone.
This infographic shows just how much AI can speed things up, taking you from a rough sketch to a fully generated app interface.
The key takeaway here is how AI automates the most tedious parts of the design-to-build process, cutting down development time from months to days.
Platforms like CatDoes use a multi-agent system to make this happen. You literally have a conversation with the platform, just like you would with a human project manager, and it builds the app for you.
The real superpower of AI-native development is speed. A project that would traditionally take months of coding can now be built in days, sometimes even hours. This means you can get your app into users' hands faster and start learning from their feedback almost immediately.
A Practical Walkthrough with an AI-Native Platform
Let's say you're building a simple task management app. Here's a glimpse of what that process looks like on an AI-native platform like CatDoes:
Instruct the Requirements Agent: You start by talking to the Requirements agent. You might say something like, "Create a simple to-do list app. I want users to be able to sign up, log in, add tasks, mark them as complete, and delete them."
Watch the Software Agents Build: The system's Software agents get to work, translating your instructions into business logic. They understand that "user sign up" means setting up an authentication system and a database to store user info.
Configure the Backend Automatically: The AI agents spin up the necessary backend using a managed service like CatDoes Cloud. This includes creating a user table in the database, setting up login endpoints, and even handling file storage if your app needs it.
This conversational workflow completely bypasses the need for manual coding and server setup. You just describe the "what," and the AI handles the "how." If you're looking to graduate from basic no-code tools, there are great resources that dive deeper into the power of modern no-code application development.
No matter which path you choose, understanding how different services connect is crucial. A key part of building any custom app is using a developer API to integrate features and pull in data from other platforms. Even on AI-native platforms, robust APIs are working behind the scenes to connect everything from user logins to third-party services. A little knowledge here goes a long way in helping you understand how all the pieces fit together to create a great user experience.
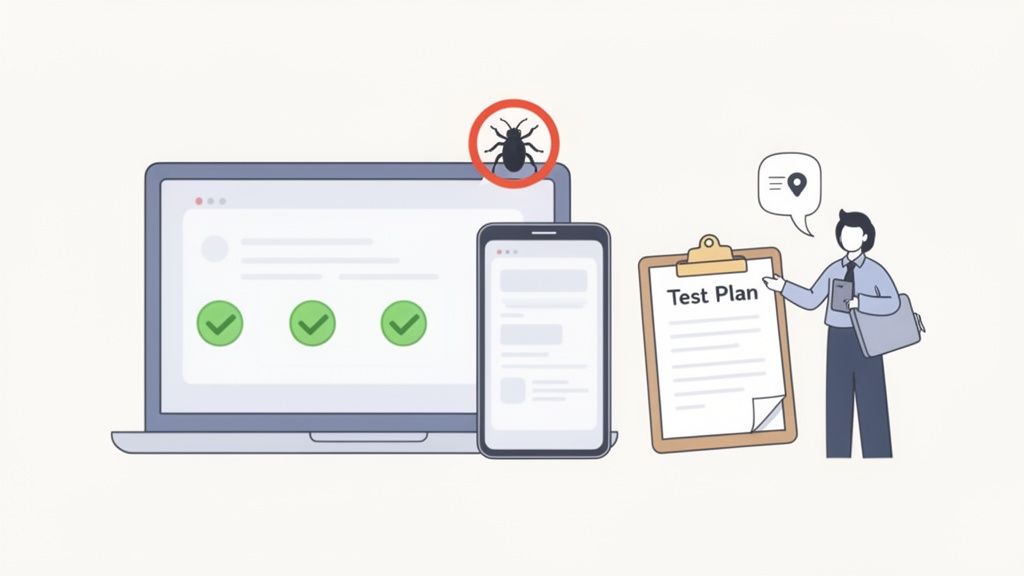
Testing Your App for a Flawless Launch
Before your app goes live, it needs to survive a gauntlet of testing. This isn't just about catching a few obvious glitches; it’s about making sure the entire experience is smooth, intuitive, and solid for every single user. Skipping this step is like launching a ship with holes just below the waterline. You're setting yourself up for a painful, public failure.
Putting your app through its paces is your best defense against bad reviews, frustrated users, and expensive fixes after you’ve already launched. The stakes are high. Studies show that a single bad experience is enough to stop 88% of users from ever coming back. Think of this phase as a critical investment in your app’s future.
Core Testing Strategies to Master
To really cover your bases, you'll want to attack the testing process from a few different angles. Each strategy looks at your app through a unique lens, helping you catch a much wider range of potential problems. It’s like a multi-point inspection before you hand over the keys.
Here are the essential types of testing you shouldn't skip:
Functional Testing: This is the most direct approach. Does every button, form, and link do what it's supposed to do? You'll need to click through every screen, trying every possible action a user might take to make sure the logic holds up.
Compatibility Testing: Your app won’t just be used on your machine. This is where you check it on different devices and browsers, like Chrome on a desktop, Safari on an iPhone, and Firefox on an Android tablet. The goal is to ensure a consistent, reliable experience for everyone, no matter their setup.
User Acceptance Testing (UAT): Time to bring in real people. Find a small group from your target audience, give them the app, and watch them use it. Ask them to complete specific tasks and give you brutally honest feedback. This is how you find out what’s not just broken, but what’s just plain confusing.
This mix of automated and human-led testing is what separates a professional launch from a hobby project.
Streamlining Testing with Modern Tools
Let’s be honest, the testing phase can be a major bottleneck, especially if you're a solo founder or part of a small team. Luckily, modern tools can make this process way faster and more efficient.
Platforms like CatDoes, for instance, simplify testing dramatically. As its AI agents build your app, you can instantly preview it live right in your browser. This means you can do real-time functional checks on the fly without any complicated deployment steps.
The real game-changer for mobile testing is the QR code generator. You just scan it with your phone, and the app instantly loads on your actual device. This completely closes the gap between what you see on your development screen and how the app will actually feel in a user's hands.
This immediate feedback loop is priceless. You can spot a layout issue on your phone, describe the fix to the AI, and test the updated version moments later.
Your Final Pre-Launch Checklist
After all the bugs have been squashed and your app has passed its tests, it's time for one last look. Running through a final checklist ensures you haven't overlooked any small but critical details before hitting the launch button.
Here’s a simple list to guide you:
Final Feature Review: Does the app deliver on all the "Must-Have" features you defined in your initial MVP plan?
Basic SEO Setup: Did you set a title tag and meta description for your app's main page? This helps search engines understand what your app is all about.
Performance Check: How fast does the app load? Slow load times are a notorious user-killer.
Feedback Channels: Is there an easy way for your first users to report bugs or suggest ideas once the app is live?
Deployment Environment Ready: Is your hosting or deployment service configured? If you're using an automated tool, this might just be a final confirmation click.
Ticking off these boxes gives you the confidence that you’re not just shipping a product, but launching something that’s truly ready for users and prepared for growth. This systematic approach is a key part of learning how to create a website app that's built to last.
Deploying and Launching Your Website App
This is it, the final stage. After all the hard work of planning, designing, building, and testing, it’s finally time to push your website app out into the world. The word "deployment" can sound intimidating, but modern tools have made this part of the process more straightforward than ever.
Putting your app live simply means getting its code onto a server connected to the internet, a process we call web hosting. This is what makes it accessible to anyone with a browser. Getting this right is the crucial last step in learning how to create a website app.
Choosing the Right Hosting Option
Not all hosting is created equal. Your choice will really depend on your app's complexity, how much traffic you expect, and your own comfort level with technical details. For most modern web apps, the options boil down to a few categories.
Static Hosting Services: Platforms like Vercel or Netlify are perfect for apps built with frameworks like React. They are incredibly user-friendly, often have generous free tiers, and are fine-tuned for blazing-fast performance.
Cloud Platforms: Services from the big players like AWS, Google Cloud, and Azure offer immense power and scalability. They’re more complex to manage, but they can handle pretty much any workload you throw at them, making them the go-to for large-scale applications.
The goal here is to pick a service that fits your needs today but has room to grow with you as your user base expands.
Simplifying Deployment with Automation
The deployment process is more than just dragging and dropping files. It involves building your code into an optimized package, configuring servers, and pushing the final version live. This is another area where AI-native platforms give you a massive advantage.
For instance, a tool like CatDoes comes with an automated build and release agent that handles the entire technical process for you. When you’re ready to launch, the agent compiles your project, prepares it for release, and deploys it without you ever needing to touch a server.
This level of automation is a huge time-saver. What used to be a multi-step, error-prone headache for developers is now reduced to a few clicks, making deployment accessible even for non-technical founders.
Version Control and Collaboration with GitHub
As your app grows and you start making changes, keeping track of everything becomes essential. Integrating your project with a GitHub repository is the industry standard for version control. Think of it as a detailed history book for your code. It lets you track every single change, roll back to a previous version if something breaks, and collaborate effectively with a team.
Platforms like CatDoes offer optional GitHub integration, which means every change you make using the AI agents can be automatically synced to your repository. This gives you the best of both worlds: the speed of AI-driven development and the safety net of professional-grade version control.
Life After Launch: Monitoring and Growth
Going live isn't the finish line; it's the starting line. The real work of growing your app begins now. Success after launch comes down to a continuous cycle of monitoring, learning, and improving.
Your focus should shift to a few key activities:
Monitor Performance: Keep a close eye on your app's load times and stability. A slow or buggy app is a quick way to lose users.
Gather User Analytics: Use tools to see how people are actually using your app. Which features are the most popular? Where are they getting stuck or dropping off?
Plan Future Updates: Use that performance data and user feedback to build a roadmap for new features and improvements. This keeps your audience engaged and shows them that your app is actively evolving.
Common Questions, Answered
What’s the difference between a website app and a native mobile app?
Think of it this way: a website app runs in a browser, like Chrome or Safari. You get to it by typing in a URL. They're built with the same stuff that powers the web, which includes HTML, CSS, and JavaScript. They're often called Progressive Web Apps (PWAs).
A native mobile app, on the other hand, is built specifically for a phone's operating system, like iOS or Android. You download these from the App Store or Google Play. Traditionally, this meant using languages like Swift for Apple devices or Kotlin for Android.
But modern tools like CatDoes have changed the game. Using frameworks like React Native Expo, we can now build from a single codebase that works everywhere, as a website app and a true native mobile app. You get the best of both worlds without building everything twice.
How much does it really cost to build a website app?
The cost can be all over the map. If you go the traditional route with a custom development agency, you could be looking at anywhere from $20,000 to $150,000 or even more. The final price tag really depends on how complex your app idea is.
AI-native platforms completely upend this model. By automating the heavy lifting of design and development, they slash the costs. Most work on a subscription basis, often with free tiers to get you started and affordable plans for when you need more power. This makes bringing an app idea to life possible for just about anyone.
Do I actually need to know how to code?
Not anymore. While coding was once the only way, today's AI-native and no-code platforms have opened the doors for non-technical creators to build seriously powerful apps.
You can now describe what you want in plain English, and the platform’s AI agents will handle the rest. That includes everything from designing the user interface and setting up the backend to deploying the final product, all without you ever touching a line of code.
Ready to turn your app idea into a real, working product without writing any code? CatDoes uses specialized AI agents to build a production-ready website app directly from your descriptions. Get started for free on CatDoes.com.
Nafis Amiri
Co-Founder of CatDoes


