Blog
Tutorials
Build a Prototype From Your Idea to an Interactive App
Learn how to build a prototype for your app with this practical guide. From validating your idea to user testing with AI, we cover the essential steps.

Nafis Amiri
Co-Founder of CatDoes

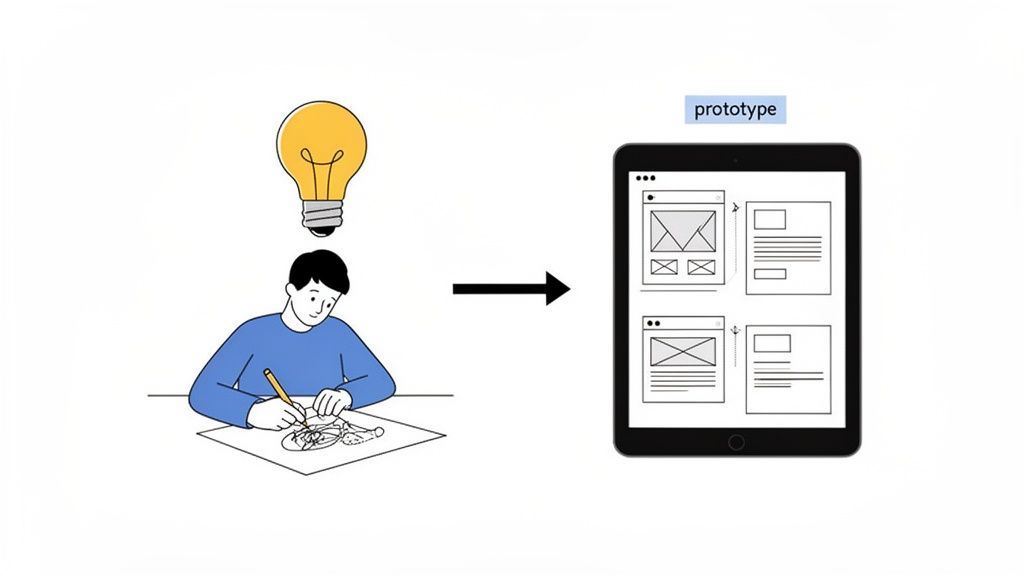
Every great app starts as a simple idea. But the magic happens when you turn that vision into something tangible, something a real person can touch and interact with. That’s where prototyping comes in, and it's the most critical first investment any founder or creator can make.
This guide will show you exactly how to build a prototype. Forget the old, slow, and expensive ways. A well-crafted prototype saves you time, money, and countless headaches by letting you test your core concept before sinking resources into full-scale development.
Modern AI tools have completely changed the game, empowering even non-technical founders to create functional prototypes that look and feel like the final product. We’ll walk through a practical workflow that takes your vision and turns it into an interactive model you can test, share, and build upon.
Why Prototyping Is Non-Negotiable
A prototype is a reality check for your idea. It pulls your concept out of a slide deck and puts it into a concrete form that users can actually interact with. This is your first and best chance to spot flaws in your user flow, gauge the appeal of your core features, and get honest feedback when it's still cheap and easy to make changes.
By failing to prepare, you are preparing to fail. This classic saying is especially true in app development. A prototype is your preparation, ensuring your big idea has a solid foundation before you invest heavily in it.
The infographic below nails the three core benefits: validating your concept, saving precious resources, and getting to launch day faster.

Ultimately, these three pillars work together to ensure you build something people actually want and need. That alone dramatically increases your odds of success in a very crowded market.
The global app development market is absolutely exploding. Valued at USD 305.18 billion in 2026, it's projected to nearly double to USD 618.65 billion by 2031, growing at a massive 15.18% CAGR. You can read more about these app development market trends. For startups and small businesses, this means speed is everything. Prototyping an MVP with AI agents for design, code, and cloud setup gets you to market faster than ever before.
Prototyping Approaches Compared
To really grasp the shift, it helps to see the old way next to the new. Traditional prototyping was often a slow, costly bottleneck. Today, AI-native tools have made it fast, affordable, and accessible to anyone with a great idea.
Factor | Traditional Prototyping | AI-Native Prototyping (with CatDoes) |
|---|---|---|
Speed to First Version | Weeks to months. Manual wireframing, UI design, and coding are slow. | Hours to days. Describe your idea; AI generates a working model. |
Initial Cost | High. Requires skilled designers and developers, often costing thousands. | Low. Accessible via affordable monthly subscriptions. |
Technical Skills Needed | Significant. Deep knowledge of design tools and coding is essential. | None. All you need is your idea, explained in plain English. |
Iteration & Feedback | Slow & Expensive. Changes require going back to designers and coders. | Instant & Free. Refine your description and see changes in real-time. |
The takeaway is simple: AI-native prototyping removes the traditional barriers of time, cost, and technical skill, letting you focus entirely on building the best possible product based on real user feedback.
Defining Your App's Core Purpose
Before you even think about building, you need to get brutally clear on your app’s one true purpose. I’ve seen countless projects get bogged down because the founder jumped straight into designing features without first nailing down the why. An exciting idea is a great start, but it's not a blueprint. Without a focused mission, you'll end up with feature creep, wasted effort, and an app that doesn't really solve a problem for anyone.
Your first job is to distill that big vision into a single, sharp problem statement. What is the one core issue your app will solve? This isn't just an academic exercise; it's your north star. Every single decision you make from here on out will be measured against it.
This step is so critical that it’s often a core part of learning how to write a business plan, a process that forces you to formalize your mission and the value you're offering. That clarity stops you from getting distracted by cool-sounding features that don’t actually serve your main goal.
From Problem to MVP Requirements
Once you have that core problem locked in, you can start mapping out the absolute bare essentials for a Minimum Viable Product (MVP). And let's be clear: an MVP isn't just a watered-down version of your dream app. It's the leanest, simplest version that successfully solves that one core problem. Anything else is just noise at this stage.
Let’s imagine we’re building a simple task management app. The core problem might be: "Busy professionals struggle to track and prioritize daily tasks across multiple projects."
From that single sentence, we can pull out the must-have functions:
User Authentication: People need a secure way to sign up and log in to manage their own tasks.
Task Creation: The absolute core function is adding a new task with a title and maybe a due date.
Task Viewing: A simple list to see what needs to be done.
Task Completion: A way to mark a task "done" and get it out of the way.
That’s it. Seriously. Things like team collaboration, calendar sync, or custom tags can all wait. Your first prototype only needs to prove it can do these four things well.
Documenting The Core User Journey
Now, let’s translate those features into a user journey. This is where you outline the exact steps someone will take inside your app to solve their problem. It’s a game-changer because it forces you to think through the flow from the user's point of view, screen by screen, before a single pixel is designed.
A documented user journey isn't just a list of steps. It's the story of how your app creates value. It forces you to think from the user's perspective, ensuring your prototype is intuitive and goal-oriented from the very first click.
For our task app, that core journey would look something like this:
Onboarding: The user signs up with an email and password.
Dashboard: After logging in, they land on a clean list of their current tasks.
Action: They tap a big "+" button to create a new task.
Input: A simple form pops up to enter the task title and pick a due date.
Confirmation: The new task immediately appears on their dashboard.
Resolution: They tap a checkbox next to an item, and it gets marked as complete.
This simple, documented flow is the perfect blueprint for your prototype. It clearly defines the "what" and the "how," ensuring your first build is focused, purposeful, and ready to get real, meaningful feedback.
Choosing the Right Prototype Fidelity
Once you have a clear blueprint, the next big question is: how will you bring it to life? Not all prototypes are the same. Fidelity is just a fancy word for how closely your prototype looks and feels like the final, polished app. Picking the right level of detail at the right time is one of those small decisions that can save you a massive amount of rework down the line.
Getting this wrong can be a quiet killer for a project. A staggering 80% of apps reportedly fail because they weren't properly validated, a problem that smart prototyping is designed to solve. It’s a common misconception that you need a perfect, pixel-for-pixel model from day one. In reality, some of the most successful apps started as rough sketches. Twitter's 2006 prototype was little more than a tool to validate the core idea of "status updates." It proves you don't need a masterpiece to get powerful insights.
Low-Fidelity Wireframes
Think of low-fidelity (lo-fi) prototypes as the architectural sketches for your app. They're simple, often just black-and-white layouts made with basic shapes and placeholder text. Their only job is to map out the structure, user flow, and where key elements will go.
The real beauty of lo-fi is its speed. You can sketch out multiple user journeys in just a few minutes, focusing entirely on how it works without getting bogged down by colors, fonts, or branding. This is the perfect stage for pure brainstorming and exploring different layouts for your core features.
High-Fidelity Mockups
When the basic structure feels solid, you can start adding the paint. High-fidelity (hi-fi) mockups are detailed, static images that look just like the finished product. This is where you bring in your actual color scheme, typography, icons, and branding.
Hi-fi mockups are crucial for nailing down the visual identity and getting specific feedback on the user interface (UI). While they aren't clickable yet, they give stakeholders and potential users a truly realistic preview of the app’s look and feel. This is where you finalize the visual design before making it interactive. Our guide on prototyping and testing dives deeper into how to get the most out of this phase.
Interactive Prototypes
This is where it all comes together. An interactive prototype is a hi-fi mockup brought to life. Users can tap buttons, navigate between screens, and interact with UI elements just like they would in a real app. It’s the closest you can get to the finished product without writing a single line of production code.
An interactive prototype isn't just a demo; it's a full simulation of the user experience. It lets you test the usability and flow with real people, uncovering friction points that a static image could never reveal.
Historically, building one of these required specialized design tools and a good bit of technical skill. But modern AI platforms have completely changed the game. Now, you can take your documented requirements and have AI generate a fully interactive, high-fidelity prototype automatically. This approach dramatically shortens the path from a static design to a testable product that feels completely real.
Turning Your Idea Into an Interactive App with AI
This is where the rubber meets the road. It's time to take your requirements, sketches, and mockups and breathe life into them, transforming static ideas into a real, clickable app. In the past, this was the point where you'd hand things over to a team of engineers and wait. Not anymore.
With modern AI-native platforms, you can build a functional prototype yourself using simple, conversational language.
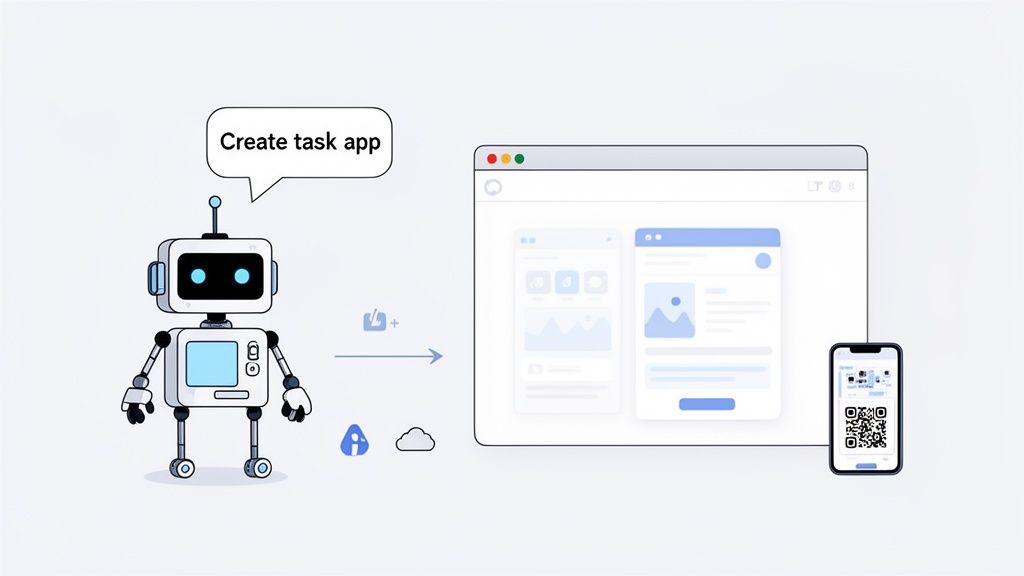
You start by describing your app to an AI agent, almost exactly like you’d brief a human developer. For our task management app, you’d lay out that core user journey we defined. You’d talk about the need for user sign-up, a main screen to see all tasks, a button to add new ones, and a simple way to check them off as complete. The more details you provide upfront, the closer the first version will be to your vision.
Based on that conversation, the AI instantly generates a complete UI theme, builds out the necessary screens, and writes all the underlying code. This isn’t just a series of pictures; it's a live, working application you can interact with right away.
Instant Feedback and Real-Time Previews
One of the most powerful parts of building with AI is the immediate feedback loop. The moment the AI generates the first build, you can click around and test it directly in your web browser. You can go through the sign-up flow, add a new task, and see it pop up on your list.
If something doesn’t feel quite right, you just tell the AI. For instance, you might say, "Change the main button color to a bright blue," or "I need to add a due date field when creating a new task." The AI makes these adjustments in real-time, letting you iterate incredibly fast without touching a single line of code.
This immediacy carries over to mobile testing, too. With a platform like CatDoes, a QR code is generated for your build. Just scan it with your phone, and the prototype loads instantly. This gives you a true feel for how the app will handle in a user's hand, which is crucial for getting the experience right.
The ability to go from a simple text prompt to a testable app on your actual phone in a matter of minutes is a total game-changer. It compresses the long, drawn-out cycle of design, development, and deployment into a single, seamless conversation.
Adding a Functional Backend in Minutes
A great prototype often needs more than just a slick interface to feel real. To simulate a genuine app experience, it needs a working backend to manage user accounts and save data. This used to be a massive hurdle that required specialized backend engineers.
Today, AI-native platforms can automate this piece of the puzzle as well. You can instruct the AI agent to set up everything you need:
User Authentication: Let users sign up, log in, and manage their own accounts securely.
Database Storage: Create a database to store all the user-generated content, like the tasks in our to-do app.
File Storage: Give users the ability to upload files, like attaching a document to a task.
The table below summarizes some of the key features in CatDoes that make this rapid process possible.
Key Prototyping Features in CatDoes
Feature | Benefit for Prototyping | Best For |
|---|---|---|
Natural Language Input | Describe your app in plain English instead of writing code or using a visual editor. | Founders and creators who want to build without a technical background. |
Real-Time Preview | See changes instantly as you refine your instructions with the AI agent. | Rapidly iterating on UI/UX and getting the feel of the app just right. |
Instant Mobile Testing | Scan a QR code to load the working prototype directly onto your iOS or Android device. | Getting an authentic sense of the mobile experience and testing on the go. |
Automated Backend Setup | Set up user authentication, a database, and file storage with simple commands. | Creating high-fidelity prototypes that feel like real, production-ready apps. |
By connecting a backend, your prototype suddenly gains a whole new level of realism. It can remember who your users are between sessions and persist their data, which makes user testing sessions infinitely more valuable.
This powerful combination of front-end generation and automated backend setup, all driven by conversation, empowers anyone to build a prototype that feels just like the final product. To dive deeper into this, our guide on using an AI app builder offers even more practical insights.
Gathering Real User Feedback That Matters
An interactive prototype is a fantastic start, but its real power isn't unlocked until you put it in front of actual people. This is the moment of truth, where all your carefully laid plans and assumptions either hold up or fall apart.
User testing isn’t about stroking your ego or proving you were right. It's about finding the flaws in your design before they become expensive, time-consuming mistakes baked into the final product. Your goal here is to get raw, unfiltered feedback that you can turn into meaningful improvements, bridging the gap between a cool idea and a genuinely great product.
Finding Your First Testers
Good news: you don't need a fancy, expensive lab to get actionable feedback. Especially in the early stages, the focus is on getting quick insights from people who actually represent your target user.
Finding them is often easier than you'd think:
Social and Community Groups: Where do your ideal users hang out online? If you're building a fitness app, a subreddit or Facebook group dedicated to home workouts is a goldmine.
Friends and Family (with a big caveat): This is convenient, but be careful. Ask them to be brutally honest. Prioritize those who actually fit your target demographic, not just your biggest cheerleaders who will tell you what you want to hear.
Professional Networks: If your app is aimed at a professional audience, a quick search on LinkedIn can connect you with people in specific roles or industries.
The sweet spot is usually 5 to 7 people. This is often enough to uncover the most glaring usability problems without getting bogged down by a ton of conflicting opinions.
Running an Effective Feedback Session
Once you've lined up your testers, how you run the session is everything. Your job is to observe, not to guide. One of the simplest and most powerful methods for this is the think-aloud protocol.
Just ask the user to speak their thoughts out loud as they move through the prototype. Encourage them to explain what they're trying to do, what they expect to see next, and where they feel confused or stuck. You'll get an incredible window into their mental model. To get started, check out our guide on preparing the right user testing questions.
During a user test, your most important job is to listen, not to talk. Resist the urge to explain or defend your design. Every moment of silence or sign of confusion is a piece of valuable data.
Keep an eye out for patterns. Make a note of where users hesitate, tap the wrong button, or seem surprised by what happens. Don't forget to also capture the moments of delight when a feature works exactly as they hoped. These are the actionable insights that will fuel your next iteration, getting you one step closer to a product that people will love.
Considering that smartphone users spend an average of 4.6 hours daily in apps, creating a validated, intuitive experience is absolutely essential to grab and keep their attention.
Your Prototyping Questions, Answered
Taking the first step to build a prototype always brings up a few practical questions. Getting straight answers can help you dodge common pitfalls and move forward with confidence.
Here, we'll tackle the most common things people ask, from how much it costs and what skills you need, to the real difference between a prototype and an MVP. The goal is to give you the essential info you need to get your project started on the right foot.
How Much Does It Cost to Build a Prototype?
The cost to build a prototype used to be a huge hurdle. With traditional development, even a simple interactive model could set you back thousands of dollars, depending on complexity and developer rates. For many aspiring founders, that initial price tag was a complete non-starter.
Thankfully, modern AI-native platforms have totally flipped the script. You can now build your first interactive prototype for free or with a low-cost subscription. Since AI handles the heavy lifting of design and code, that massive financial barrier is almost gone.
This new accessibility is a game-changer. It empowers everyone, from students with a great idea to startup founders on a shoestring budget, to validate their concepts without a huge financial gamble. It truly levels the playing field for innovation.
Do I Need Technical Skills to Build a Prototype?
Not anymore. It used to be that building a prototype required a good grasp of design tools like Figma and maybe even some coding skills in JavaScript. Today, that's no longer the case. The most important skill you need is the ability to clearly describe your app idea in plain English.
With a tool like CatDoes, you just explain your vision, and its AI agents take care of the technical side. That includes everything from UI design and code generation to setting up a working backend. This empowers business owners, product managers, and creative thinkers to build functional prototypes entirely on their own.
If you have more general questions about the platforms or tools you might use, Amino's Frequently Asked Questions is another helpful resource.
What Is the Difference Between a Prototype and an MVP?
It's really important to know the difference between a prototype and a Minimum Viable Product (MVP). They look similar but serve totally different purposes.
A prototype is a model built to test an idea, validate a user flow, or fine-tune a design concept. It’s mostly for an internal audience, and its whole purpose is learning.
An MVP is the very first, functional version of your app that you release to real customers. It has just enough features to solve one core problem and gather real-world data.
The goal of a prototype is to learn and iterate fast. The goal of an MVP is to learn from actual market behavior. With today’s platforms, the line between them is getting blurry, as a high-fidelity prototype can often evolve directly into a deployable MVP with very little extra work.
How Long Does It Take to Build a Prototype?
The timeline for building a prototype has been compressed from weeks or even months down to just hours or days. Following a traditional workflow, creating wireframes, designing mockups, then coding a simple interactive model, was a slow process that required a lot of coordination between different specialists.
In stark contrast, an AI-native platform can generate an interactive prototype almost instantly once you provide your idea. This incredible speed allows for rapid, continuous iteration. You can test out multiple ideas or design approaches in a single afternoon, dramatically accelerating your path to a product that people will actually love to use.
Ready to stop wondering and start building? With CatDoes, you can turn your app idea into a fully interactive prototype in minutes, not months. Describe your vision in plain English and let our AI agents handle the design, code, and backend setup. Start building your prototype for free.
Nafis Amiri
Co-Founder of CatDoes


