Blog
Tutorials
How to Build an App Without Code in 2026
Learn how to build an app without code using AI. This practical guide covers planning, building the backend, testing, and launching to the app stores.

Nafis Amiri
Co-Founder of CatDoes

You can build an app without code today — no development team, no six-figure budget, no writing a single line of code. Describe your idea in plain English and modern AI-powered platforms generate the whole application for you, from the user interface right down to the backend.
This guide walks you through the entire journey, from a rough concept to a live app on the App Store, Google Play, or the web.
TL;DR: Planning your idea, describing it to an AI builder, wiring up the backend, testing on a real device, and launching to the app stores no longer requires an engineer. Here is the short version before we dig in:
Plan first: Define your app's purpose, list only your must-have features, and sketch the user flow.
Describe, don't drag: AI-native platforms build your app from a plain-English conversation, not clunky editors.
The backend is handled: Databases, logins, and file storage are configured automatically.
Launch anywhere: Ship to the App Store, Google Play, or the web — often from a single project.
Table of Contents
From Idea to App: The New No-Code Reality
How to Plan Your App for Success
Bringing Your App to Life With AI
Configuring Your App's Backend and Data
Testing and Improving Your New App
How to Launch Your App to the World
Common Questions About Building an App Without Code
From Idea to App: The New No-Code Reality
For years, turning a great idea into a real app was a privilege. You either needed to be a skilled developer or have enough cash to hire a team of them. The whole process was slow, expensive, and frankly, a huge barrier for entrepreneurs, small business owners, and anyone with a vision but no coding background.
Today, that barrier is completely gone.
The rise of no-code development has totally flipped the script. We've moved away from those long, painful development cycles and into a world where anyone can build.
A New Way to Build
Imagine explaining your app concept to a colleague over coffee. That’s pretty much the core of the modern no-code experience. Platforms like CatDoes use specialized AI agents to translate your natural language descriptions into a working application.
Here’s how simple the process has become:
You bring the idea: Just explain the app's purpose, what features it needs, and who it's for.
AI handles the design: An AI designer gets to work creating the user interface (UI) and user experience (UX).
AI writes the code: Behind the scenes, software agents generate the actual native code for iOS, Android, and the web.
AI sets up the backend: Even the tricky server-side stuff like databases and user authentication is handled automatically.
This conversational approach means you can stay focused on your vision instead of getting bogged down in technical details.
Traditional Development Vs No-Code App Building
To really see the difference, a quick comparison helps. The old way of building apps feels worlds away from what's possible now.
Aspect | Traditional Development | No-Code Development (with CatDoes) |
|---|---|---|
Required Skills | Expert coding, design, project management | Your business idea, plain English |
Timeline | 6-12+ months | Days to weeks |
Initial Cost | $50,000 - $250,000+ | Low monthly subscription |
Iteration Speed | Slow; changes require new development cycles | Fast; changes are made with new descriptions |
Financial Risk | High; significant upfront investment | Low; validate your idea before scaling up |
This shift makes it clear why no-code isn't just a trend; it's a fundamental change in how software gets made.
Why No-Code Is Taking Over
This movement is a direct response to the massive demand for digital tools. Businesses need to launch applications faster than ever, and no-code is the answer. The growth has been staggering. As of 2025, an estimated 70% of all new business applications are built using no-code or low-code technologies — a huge leap from less than 25% back in 2020.
This isn't just for startups. It empowers people in marketing, sales, and operations to build the exact tools they need without waiting in line for the engineering department.
The real power of no-code is that it democratizes creation. It gives anyone with a good idea the tools to build, test, and launch a real product, slashing the time and money it takes to bring a vision to life.
This guide is your roadmap. We'll give you practical, step-by-step instructions to get from a simple concept to a fully launched app. You don’t have to be a developer to be a creator anymore.
How to Plan Your App for Success
Jumping straight into building an app without a solid plan is like starting a road trip without a map. You might get somewhere eventually, but it’ll be a longer, more frustrating journey. A well-defined plan is the single most important first step to build an app without code, making sure your vision translates perfectly into a functional product.
This planning phase isn't about writing complicated technical documents. It’s about answering a few fundamental questions that will guide the entire process, especially when you're describing your needs to an AI-driven platform like CatDoes. A clear plan cuts through the ambiguity and sets a strong foundation for success.
But before you even start planning features, you need to validate your business idea to ensure you're building something people actually want. Once you have that confirmation, you can move forward with real confidence.

Define Your App’s Core Purpose
Before you think about features or design, you have to nail down the "why" behind your app. What specific problem does it solve, and for whom? Getting this right is everything. A business tool for managing inventory serves a completely different purpose than a consumer app for finding local hiking trails.
Start by getting specific about your target audience. Are they busy professionals? Students? Parents? Hobbyists? Understanding their needs, pain points, and daily behaviors will help you define what makes your app valuable.
For example, if you're building a project management tool for small marketing teams, the core problem might be that disorganized communication leads to missed deadlines. Your app's purpose is to centralize tasks, files, and conversations to make the team more efficient. Simple as that.
Outline Your Key Features
Once you have a clear purpose, you can start listing the features your app needs. It's incredibly easy to get carried away here, dreaming up every possible function. The most effective approach, however, is to start small and focus only on what truly matters for your first launch. This is where the concept of a Minimum Viable Product (MVP) becomes essential.
An MVP isn't a half-baked app; it's a version with just enough features to be usable by early customers, who can then give you feedback for future development.
An MVP lets you test your core idea in the real world, fast. It helps you avoid spending months building features nobody wants, saving you a ton of time and money.
To define your MVP, make a list of all the features you've brainstormed and then sort them into three buckets:
Must-Have: These are the non-negotiable features your app can't function without. For our project management tool, this would be user login, creating tasks, and assigning deadlines.
Should-Have: Important features that add a lot of value but aren't critical for day one. This could be a file upload feature or calendar integration.
Nice-to-Have: Cool features that would be great down the line but can definitely wait. Think advanced reporting or custom themes.
Focus entirely on the "Must-Have" list for your initial build. We have more practical advice on this in our article about what a Minimum Viable Product really is.
Map the User Journey
Finally, visualize how someone will actually use your app. This is called mapping the user flow, and it’s just a simple sketch of the path a user takes from opening the app to accomplishing their goal. You don't need fancy software because a pen and paper or a simple flowchart tool works perfectly.
Let's stick with our project management app example. A basic user flow might look like this:
User opens the app and sees a login screen.
After logging in, they land on a dashboard showing their assigned tasks.
They tap a "New Task" button.
They fill out a form with the task title, description, and due date.
They tap "Save," and the new task appears on their dashboard.
This simple exercise instantly clarifies the screens you need and how they all connect. It gives the AI a clear, logical set of instructions, ensuring the final product feels intuitive and easy to use.
Bringing Your App to Life With AI
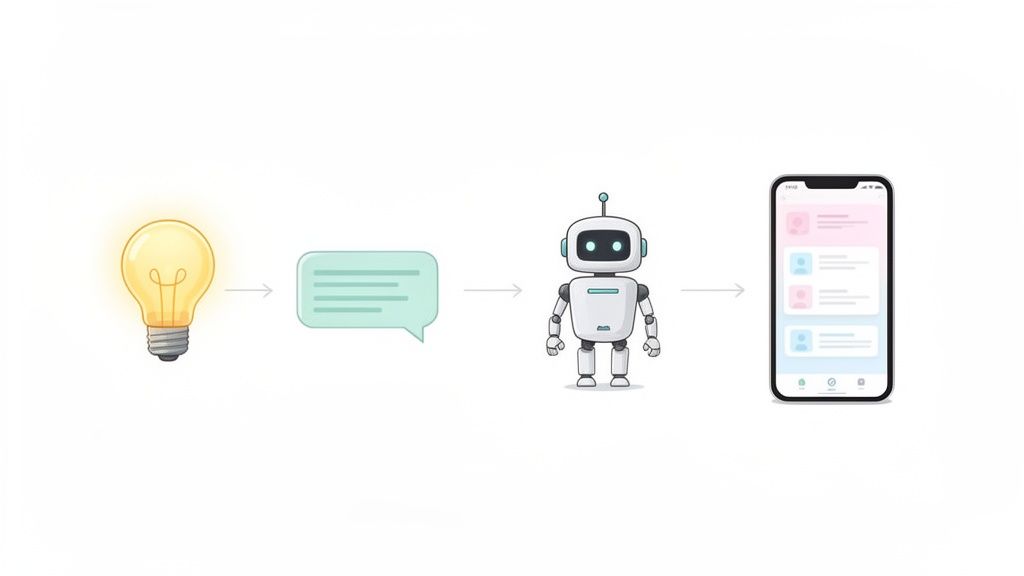
Once you have a solid plan, it's time for the best part: turning that idea into a real, working application. This is where AI-native platforms like CatDoes really come into their own. Forget clunky drag-and-drop editors or confusing dashboards. You can build an app without code just by having a conversation.
You literally just talk to the AI, and it builds the app for you.
Think of it as briefing a super-efficient development team that gets to work instantly. The platform uses a multi-agent system, where different AI specialists tackle specific parts of the process. This ensures every piece of your vision is captured and built correctly, from the user interface to the backend logic.
The Conversational Workflow in Action
The whole thing kicks off with a simple prompt where you describe your app in natural language. This first chat is handled by an AI Requirements agent. Its only job is to understand and clarify what you want to build, asking smart questions to make sure nothing gets missed.
From there, a Designer agent takes your descriptions of style and branding to generate the entire UI and UX. It designs the screen layouts, picks the color palette, and sets up all the interactive elements. While that's happening, Software agents are busy in the background, writing the clean, production-ready code that makes your app work.
This diagram shows how you can structure your thinking before the AI takes over.
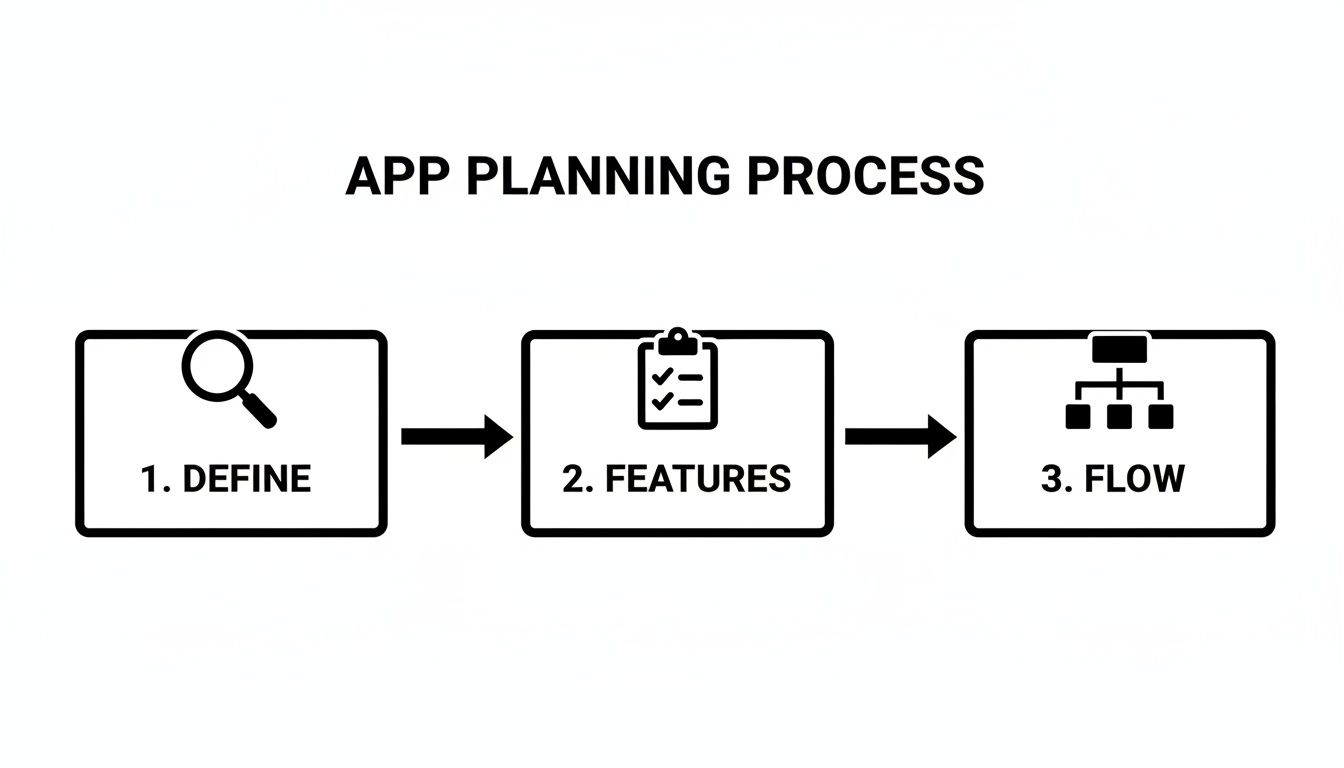
This structured approach makes sure your big idea is broken down into its core pieces before the AI starts building.
How to Give the AI Clear Instructions
The quality of the app you get back is a direct reflection of the instructions you provide. If you're vague, you'll get a generic app. The secret to getting a great result is to be specific and leave no room for guesswork.
Here are a few practical tips for writing prompts the AI can actually work with:
Be Specific About User Roles: Don't just say "users can post articles." Instead, spell it out: "An 'admin' user can approve and publish articles, but a 'writer' user can only submit drafts." This kind of detail is crucial.
Define How Data Connects: Explain the relationships between different pieces of information. For example: "A customer can have multiple orders, and each order can contain multiple products." This helps the AI build the right database structure from the start.
Outline the User Journey: Describe how a user moves from one screen to another. For instance, "After a user successfully logs in, they should land on the main dashboard screen," or "Tapping a product in the list should navigate to a product detail screen."
Being precise with your language is key. The AI isn't guessing; it's interpreting your instructions literally. The more detailed you are, the closer the first version of your app will be to your final vision.
Practical Examples of Effective Prompts
Let's walk through a real-world scenario. Imagine you're building a simple task management app.
A weak, unhelpful prompt would be: "I need an app to manage tasks." It’s just too general.
Now, here’s a strong, actionable prompt that will get you a much better result:
"Build a task management app with two user roles: 'Team Lead' and 'Team Member'. Team Leads can create projects, assign tasks to Team Members, and set deadlines. Team Members can only view and update the status of tasks assigned to them. The main screen should be a dashboard showing overdue tasks at the top, followed by tasks due today. Include a button to add a new task, which opens a form with fields for title, description, assignee, and due date. Use a clean, minimalist design with a blue and white color scheme."
This level of detail gives the AI agents everything they need to generate a functional, well-designed first version of your app. It's all about turning your detailed vision into a real product through a simple conversation. You can learn more about this approach in our complete guide on how to build an app with AI.
Configuring Your App's Backend and Data
Every great app, no matter how simple it looks on the surface, has a powerful engine running under the hood. This is the backend, and it's responsible for managing all the critical information that makes your app work. This includes user accounts, product details, uploaded images, and anything else you can name.
Not long ago, setting this up was a complex, expensive task reserved for specialized developers. But that's all changed. You no longer need to be a backend expert to create a scalable and secure foundation for your application, especially when you build an app without code. Integrated solutions now handle all the heavy lifting.

What Is a Backend and Why Do You Need One?
Think of your app's frontend as the part your users see and interact with, including the buttons, menus, and images. The backend is everything happening behind the scenes. It’s the brain of your operation, and it typically handles three core functions:
Database Management: This is where all your app's data is stored. For an e-commerce app, this would include product lists, customer orders, and inventory numbers.
User Authentication: The system that manages user logins, sign-ups, and password resets. It’s what ensures users can securely access their own accounts and keeps their data private.
File Storage: When users upload photos, videos, or documents, this is where those files are kept. It needs to be secure, reliable, and able to handle files of all sizes.
Without a backend, your app would just be a static screen, unable to save information or create a personalized experience for your users.
Defining Your Data Structure the Easy Way
One of the first steps in setting up a backend is defining your data structure. This sounds technical, but it’s really just about organizing your information logically. For example, if you're building a social media app, you’d probably need a "Users" table and a "Posts" table.
With a platform like CatDoes, you don't have to manually wrestle with database tables. Instead, you just describe what you need to the AI agent in plain English.
You could say something like, "Create a system where a 'user' can create many 'posts'. Each post needs a title, content, and an image." The AI understands this relationship and automatically sets up the necessary database tables and connections in the background using a powerful solution like Supabase.
This conversational approach removes a huge technical barrier. You get to focus on what your app needs to do, and the AI handles the implementation details. It's a much more intuitive way to build. For a deeper dive, check out our guide on what Backend-as-a-Service is and how it simplifies development.
Setting Up Secure User Logins Without Code
Making sure your users can sign up and log in securely is non-negotiable for almost any app. Traditionally, building a secure authentication system was a headache, requiring careful coding to handle password hashing, session management, and protection against common security threats.
When you build an app without code using an integrated system, this all becomes incredibly simple. The AI can configure a complete authentication system based on a simple request.
For instance, you might ask the AI to:
Create a login screen with email and password fields. The AI generates the UI and connects it to the backend authentication service.
Add a 'Sign Up' button so new users can create an account. It automatically sets up the entire registration workflow.
Include a 'Forgot Password' link. The AI implements a secure password reset flow that sends a unique reset link to the user's email.
The AI agents handle all the underlying security protocols, ensuring your user data is protected from day one. This automated setup not only saves a massive amount of time but also gives you peace of mind, knowing your app’s authentication is built on industry-best practices, without you ever touching a line of server code.
Testing and Improving Your New App
That initial rush of seeing your app idea come to life is amazing. But the real work starts now, shifting from creator to refiner. This is where you hunt for bugs, smooth out the user experience, and make sure your app is truly ready for an audience. When you build an app without code, this whole loop of testing and improving is incredibly fast.
Modern no-code platforms are built for this kind of rapid feedback. You can see your changes instantly in a live preview right inside your browser. This is perfect for quick tweaks to the layout, colors, or text without any lag.
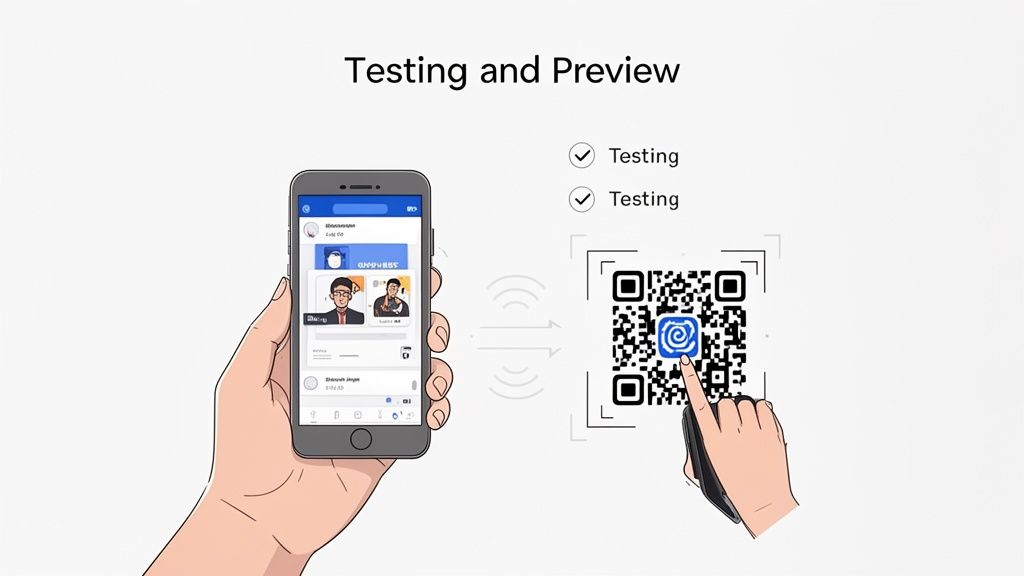
But a browser preview only tells half the story. To really get a feel for how your app performs, you need it on an actual device. Getting it there is surprisingly simple. Platforms like CatDoes generate a QR code; just scan it with your phone, and a testable version of your app loads right up on your iOS or Android device.
A Practical Checklist for User Testing
Once the app is on your phone, it’s time to get methodical. Don't just tap around randomly. A structured approach, often called User Acceptance Testing (UAT), helps you spot real issues and confirm the app actually solves the problem you intended it to.
Here’s a simple checklist to guide your first run-through:
Core Functionality: Does every button, link, and form do what it's supposed to? Try to complete the main task from start to finish. For a task management app, that means creating a task, assigning it, and marking it complete without a hitch.
Usability and Navigation: Is the app easy to get around? Can you find what you're looking for without getting stuck? This is the perfect time to hand your phone to a friend who’s never seen the app. Their fresh eyes are gold for finding confusing layouts.
Design and Consistency: Do the colors, fonts, and spacing look right on your device? Check every screen for visual glitches or elements that feel out of place.
Data Handling: Does the app correctly save new data and pull up existing info? Test the signup and login flows, and try creating new content to make sure the backend is connected properly.
The point of early testing isn't perfection. It's about finding problems. Embrace this feedback loop. Every bug you squash now is one less headache for your future users.
Giving Feedback to the AI for Fast Iterations
Now for the magic of using an AI-native platform. You don't implement changes by digging into an editor and tweaking settings. Instead, you just continue the conversation with the AI.
It’s an incredibly efficient way to work. You can treat the AI like your personal developer, giving it a list of changes in plain English, just like you would in an email or a project management tool.
For instance, you could provide feedback like this:
For UI Changes: "Change the main call-to-action button on the homepage to a bright green."
For Feature Additions: "Add a search bar to the top of the product list screen."
For Workflow Adjustments: "After a user submits the contact form, show them a confirmation message that says 'Thank you for your message!' instead of redirecting them."
The AI gets to work, parsing these instructions and applying the changes to your app's design and logic automatically. You can then scan the QR code again and see the updated version on your device in minutes. This tight feedback cycle lets you polish your app with remarkable speed, moving from a rough draft to a finished product way faster than you ever could with traditional methods.
How to Launch Your App to the World
This is it. After all the brainstorming, building, and tweaking, you're finally ready to get your app into the hands of real users.
For a long time, this was the most dreaded part of the journey. It was a technical minefield of complex requirements, confusing certificates, and a high risk of rejection from the app stores. Thankfully, when you build an app without code using an AI-native platform, this final hurdle feels less like a mountain and more like a speed bump.
Instead of you having to manually prep build files and navigate store listings, a smart, automated build-and-release agent does the heavy lifting. Think of it as an AI assistant that knows exactly how to package your app for both the Apple App Store and the Google Play Store, making sure it ticks all their specific boxes.
This automation strips away so much of the usual time and stress. The agent prepares everything behind the scenes and then gives you a simple, step-by-step guide for submission. It makes a notoriously difficult task feel completely manageable, even if you’ve never launched an app before.

Submitting to Mobile App Stores
That automated release process is your direct bridge to the world's two biggest mobile ecosystems. The build agent takes the clean, native code generated by the software agents and compiles it into the exact formats required for both iOS and Android.
Here’s what that looks like in practice:
Automated Packaging: The agent bundles all your app's code, images, and settings into the right file types. This means an
.ipafor iOS and an.aabfor Android. No command lines, no compiling.Guided Submission: It walks you through a clear checklist of what each store requires, like your app's description, screenshots, and privacy policy details.
Compliance Checks: The system runs checks to ensure your app meets the core technical guidelines, which dramatically increases your odds of a smooth and fast approval.
This approach takes all the guesswork out of the equation. You get to focus on crafting a great launch announcement instead of getting lost in developer portals.
Launching is no longer a bottleneck. With automated tools, you can confidently navigate the app store submission process, knowing that the technical complexities are being handled for you.
Deploying as a Web App
What if you want to reach users beyond the app stores? You can also launch your project as a Progressive Web App (PWA). This gives your app the incredible reach of the web, making it instantly accessible to anyone with a browser on any device, desktops included.

Deploying as a PWA is often just a one-click process. It’s a fantastic way to get your app in front of an audience immediately, without waiting for app store review cycles. Users just visit a URL, and modern PWAs deliver an experience that feels nearly identical to a native app. They can even "install" it to their home screen.
Gaining More Control With GitHub
For founders who want to mix the sheer speed of no-code with the control of traditional development, many platforms now offer an optional GitHub integration. This feature is a game-changer, letting you sync your entire project to a private GitHub repository.
Once connected, you get:
Full Code Access: You can see, download, and even modify the production-grade source code that the AI generated.
Version Control: This gives you a complete, unchangeable history of every single change made to your app. If a new feature doesn't work out, you can roll back to a previous version in seconds.
Developer Collaboration: If you bring on a technical team later, they can work with the codebase using the exact tools and workflows they already know and love.
This integration acts as both a safety net and a powerful upgrade path. It ensures your project can grow and adapt as your needs get more complex, giving you the perfect blend of no-code speed and full-code power.
Common Questions About Building an App Without Code
Diving into no-code app development for the first time? It’s natural to have a few questions. Let's clear up some of the most common ones that come up as people start to build an app without code.
Do You Own the App You Build?
Yes. When you create an app on a no-code platform, you own the intellectual property. That includes all your content and user data. The platform is the tool, but the creation is entirely yours.
Can No-Code Apps Scale?
Scalability is another huge consideration, and rightfully so. Modern no-code platforms are built on serious cloud infrastructure, like Supabase, which is designed from the ground up to handle massive growth.
Your app can absolutely start small and scale to support thousands, or even millions, of users. You don’t have to worry about managing servers or outgrowing your tech stack. It’s one of the biggest advantages because you can launch an MVP confidently and grow your user base without hitting a technical ceiling.
A common misconception is that no-code means "no power." In reality, today's platforms can build complex, data-driven applications that are just as capable as many traditionally coded apps. The primary difference is the development method, not the end result's potential.
What Are the Limitations?
Of course, it's just as important to understand the limitations. While these platforms are incredibly versatile, they aren't the right fit for everything. You probably wouldn't build a complex 3D game or an app that requires deep, custom hardware integration this way.
Here are a few trade-offs to keep in mind:
Customization: You're working within the platform's framework. While many offer extensive customization, you can't just write any code you want.
Niche Features: If you need a very specific feature that isn't supported, you might hit a wall.
Platform Dependence: Your app relies on the platform provider, so choosing a reliable service with a strong track record is critical.
Even with these points, no-code provides a powerful and incredibly efficient path to launch for the vast majority of business and consumer app ideas out there.
Ready to turn your vision into a reality? With CatDoes, you can describe your app idea in plain English and let our AI agents handle the rest. Start building for free and launch your app in a fraction of the time. Get started with CatDoes today.
Nafis Amiri
Co-Founder of CatDoes


