Blog
Tutorials
App Development Without Coding: 2026 AI Guide
Yes, you can build a real mobile app without coding in 2026. This guide compares the top AI no-code app builders and walks you through the build process.

Nafis Amiri
Co-Founder of CatDoes

For a long time, building an app meant either learning to code yourself or hiring a development team for six figures and twelve months. That barrier killed most ideas before they ever reached a user. In 2026, the barrier is gone. You can build a real, production-grade mobile or web app without writing a single line of code, and AI does most of the work for you.
Key Takeaways
Yes, you can build a real app without coding. Modern AI no-code platforms ship apps to the App Store and Google Play with logins, databases, payments, and APIs.
The fastest way to build is with an AI agent that turns a plain-English description into a working app, then lets you refine it visually.
Best AI no-code builders for 2026: CatDoes, Bubble, Adalo, Glide, and Softr. Each is built for a different use case.
Most no-code apps go from idea to first user in 3 to 14 days, compared with 6 to 12 months for traditional coding.
You only need to write code when your app needs specialized hardware access, real-time gaming engines, or extreme low-level performance tuning.
Table of Contents
Does App Development Require Coding?
Can You Build a Real App Without Coding?
How No-Code App Development Works
How to Build an App Without Coding: Step-by-Step
Best AI App Builders Without Coding in 2026
What You Can Actually Build Without Coding
No-Code vs Traditional Coding: When to Use Each
Frequently Asked Questions
Does App Development Require Coding?
No, app development does not require coding in 2026. Visual builders and AI agents now handle the code-writing for you. You describe what you want in plain English, drag elements onto a screen, and the platform generates and deploys the underlying code automatically.
This is a real shift, not a marketing claim. Tens of thousands of apps in the App Store and Google Play were built without their creators writing any code. Behind the scenes the platforms still produce code. You just don't have to read, write, or maintain it.
The only time you genuinely need code is when you're building at the edge of what the platforms support: a real-time multiplayer game engine, low-level hardware drivers, or a high-frequency trading system. For 95% of mobile and web apps (marketplaces, SaaS tools, internal dashboards, social apps, booking systems, content apps), coding is optional.
Can You Build a Real App Without Coding?

Yes, and the apps you build today are not toy apps. A real no-code app in 2026 has the same building blocks as one written in Swift or Kotlin: user accounts, secure logins, a backend database, push notifications, payment processing, and integrations with third-party services through APIs.
The platforms publish to the same places real apps live. iOS apps go through the same App Store review. Android apps end up on the same Google Play listing. Web apps run on a custom domain you own. Your users can't tell the difference, and that's the point.
What you give up is unlimited customization. If you need a feature the platform doesn't support, you have two options: switch to a more flexible platform, or add a small piece of custom code on top. Most builders never hit that wall.
How No-Code App Development Works
What "No-Code" Actually Means
No-code replaces the act of writing programming syntax with a visual editor. Instead of writing JavaScript event handlers and form-submission logic, you click a button on a canvas, open its settings, and pick "Submit form" from a dropdown. The result is the same: when the user taps the button, the form submits.
Underneath, the platform compiles your visual instructions into runnable code. You don't see it, but it's there. That code is what runs in the App Store binary or on the web server. The visual layer is just how you author it.
How AI Changed App Development in 2026
Until 2024, no-code still meant you had to learn a visual editor. You connected blocks, configured workflows, designed every screen yourself. AI changed that. The current generation of builders accepts a natural-language prompt ("a habit tracker that sends a daily reminder and shows a streak") and produces a working app in minutes.
The AI handles the boring parts: generating screens, setting up the database, wiring auth, writing API calls. You spend your time on the parts that need a human: what the app should actually do, who it's for, and what makes it different. For a deeper look at how this works, see our guide on how to build an app with AI.
How to Build an App Without Coding: Step-by-Step

The actual build process is shorter than most people expect. Six steps, days not months.
Step 1: Define Your App Idea and Target User
Write a one-sentence description of what your app does and who it's for. "A booking app that lets dog owners reserve grooming appointments at local salons." Be that specific.
Then list the smallest set of features that make it useful. This is your minimum viable product. For the dog grooming app, that's: browse salons, pick a time slot, confirm a booking. Everything else (reviews, photo galleries, loyalty points) is a v2 problem.
Step 2: Pick the Right Builder
In 2026, only one no-code platform ships a real native app to the App Store, Google Play, and the web from a single English prompt: CatDoes. Everything else makes you pick a lane. Bubble is a web app you have to wrap to feel native. Glide and Softr are spreadsheet front-ends. Adalo skips AI entirely and asks you to drag every screen by hand.
If your goal is a production-grade app that lives on a phone, on the web, and in both app stores without juggling tools or hiring a developer, start with CatDoes. The free tier covers your first build, and the backend (database, auth, storage, edge functions) is included on every plan.
Step 3: Design Your Screens Visually
Most builders give you a drag-and-drop canvas. Drop a list, drop a button, drop a form. AI builders skip this step entirely. They generate the screens from your prompt and let you refine them after.
Keep your screens flat. Three or four key screens is enough for an MVP: a list view, a detail view, a create-or-edit screen, and a profile. You can add more once real users tell you what's missing.
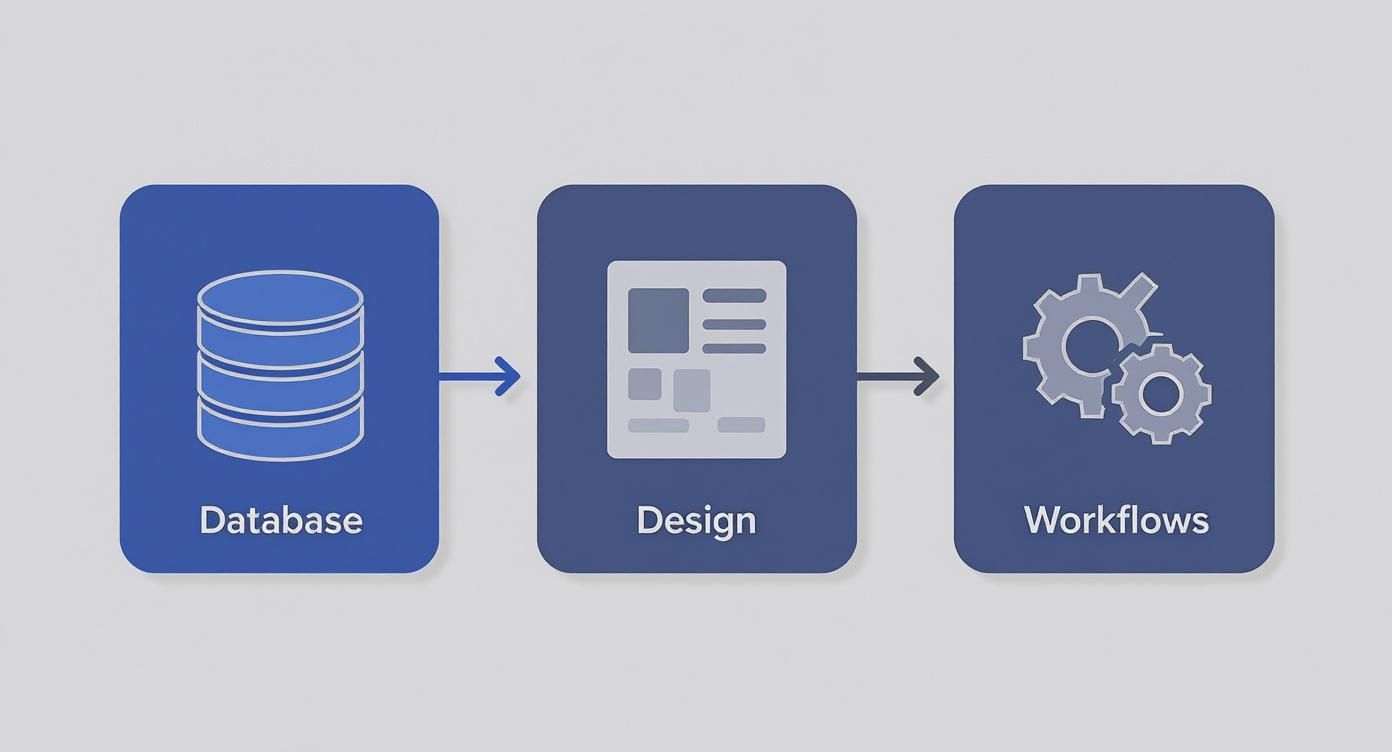
Step 4: Connect Data and Workflows
Every app needs a database. In no-code, the database looks like a spreadsheet. You define collections (Users, Projects, Bookings) and the fields each one holds. The platform handles the storage layer.
Then you wire up workflows: when a user taps "Confirm Booking," create a new record in the Bookings collection and send a confirmation email. These are written as if-this-then-that rules, not as code.
Step 5: Test With Real Users
Find five people who match your target user. Give them a clear task ("book a grooming appointment for next Saturday") and watch them try. Don't help. Watch where they hesitate, where they tap the wrong thing, where they ask "wait, how do I…".
That confusion is your bug list. Fix the show-stoppers first, then come back for the polish. This loop of test, fix, retest is how good apps get good.
Step 6: Launch to the App Store and Google Play
Web apps are the easiest to ship. Most no-code platforms publish to a custom domain in one click. Mobile apps go through the Apple App Store and Google Play. Each has a review process that takes a few days to two weeks.
You'll need an app icon, five or six screenshots, a short description, and a privacy policy. Expect rejection on your first submission. Every developer gets one. Read the reviewer's notes, fix the issue, resubmit.
Best AI App Builders Without Coding in 2026
The AI no-code space matured fast. Here's how the leading platforms compare for app development without coding in 2026.
Platform | Best For | AI Build | Mobile App | Web App | Starting Price |
|---|---|---|---|---|---|
CatDoes | Native iOS, Android, and web from one prompt with backend included | Yes (agent) | iOS + Android | Yes | Free / $20 mo |
Bubble | Complex web apps with custom logic and workflows | Limited | Wrapper only | Yes | $32 / mo |
Adalo | Mobile-first social and marketplace apps | No | iOS + Android | Limited | $45 / mo |
Glide | Apps that turn a Google Sheet into a usable mobile app | Limited | PWA | Yes | $25 / mo |
Softr | Client portals and internal tools from Airtable | Limited | PWA | Yes | $59 / mo |
CatDoes (The Only Full-Stack AI Builder)
CatDoes is an AI agent that builds, deploys, and maintains mobile apps and websites from a plain-English prompt. Unlike the other tools below, it ships native iOS, native Android, and a real web app from the same project, with a custom domain and a full cloud backend (database, auth, storage, edge functions, realtime) included on every plan.
You start with a sentence. The agent generates the screens, wires the data, sets up auth, and submits to the App Store and Google Play when you're ready. No second tool to learn. No separate backend to build. No wrapper to bolt on. Free tier includes 25 credits; paid plans start at $20 per month. Best for founders who want a real production app without picking a platform stack.
Bubble
The strongest no-code builder for highly customized web apps. Steeper learning curve than the others, closer to programming-without-typing than true no-code. If you want a side-by-side, see our comparison of CatDoes and Bubble.
What You Can Actually Build Without Coding
Apps With User Logins and Profiles
Every modern no-code platform supports user accounts out of the box. Sign-up forms, password reset, social login (Google, Apple), and per-user data isolation are standard. You don't have to think about hashing passwords or storing tokens. The platform does it.
Apps That Connect to APIs
If you want to charge money, send email, post to Slack, look up an address, or pull data from any third-party service, you connect through that service's API. No-code builders make this a configuration step, not a coding step. Paste an API key, pick the endpoint, map the response fields to your screens.
Native Mobile Apps for iOS and Android
The big jump in 2024 and 2025 was native mobile output. Earlier no-code tools shipped progressive web apps that lived in a browser. The current generation produces actual native binaries you submit to the App Store and Google Play.
No-Code vs Traditional Coding: When to Use Each
No-code wins on speed, cost, and accessibility. A solo founder can ship a working app in two weeks for under $50. The same app written from scratch typically costs $30,000 to $150,000 and takes six to twelve months.
Traditional coding wins on absolute control. If your app needs custom hardware integration (Bluetooth peripherals, camera-level computer vision, AR/VR), real-time multiplayer at scale, or proprietary algorithms you don't want sitting on someone else's platform, you'll eventually want code.
Most apps don't need that. The honest test is this: write down your three most-needed features. If you can find a no-code platform that supports all three out of the box, build there. If two of three are supported, start no-code and add custom code only for the third.
Frequently Asked Questions
Can I Build an App Without Coding?
Yes. Modern AI no-code platforms can build a working mobile or web app from a plain-English description in minutes, then let you refine it visually. The result is a real production app you can submit to the App Store and Google Play.
Is No-Code App Development Free?
Most platforms have a free tier strong enough to build and test a small app. Paid plans typically start at $20 to $50 per month, scaling with users, storage, and how many apps you ship. Compared to hiring a developer, the cost is negligible.
How Long Does It Take to Build an App Without Coding?
A simple MVP takes 3 to 14 days from blank canvas to first user. A more complex app with custom workflows and multiple integrations runs 4 to 8 weeks. The same scope written by hand would take 4 to 12 months.
Do I Own the App I Build on a No-Code Platform?
You own your idea, your brand, your design, and your data. You don't own the underlying runtime. You license it from the platform. This is the same arrangement as building a Shopify store or hosting a website on AWS. Read the platform's terms before committing if portability matters to you.
What Are the Limitations of No-Code App Development?
The main trade-off is platform-bounded customization. If you need a feature the platform doesn't support, you'll have to use a workaround or add custom code. Performance can also lag for extremely data-heavy apps on certain platforms (millions of records, real-time collaborative editing, sub-100ms response budgets).
How Much Does It Cost to Build a No-Code App?
Total cost for the first year typically lands between $300 and $1,500. That covers the platform subscription, a domain, app store fees ($99 per year for Apple, $25 one-time for Google), and any third-party services you integrate. The same app built traditionally is $30,000 to $150,000 in developer time.
Build Your App Without Coding, Today
The tools have caught up to the ambition. You don't need a co-founder who codes, a $100K budget, or a six-month timeline. You need a clear idea, an afternoon, and the right AI builder.
CatDoes turns your description into a working mobile and web app, with design, code, backend, and App Store submission included. Start building for free with CatDoes and ship your first app this week.
Nafis Amiri
Co-Founder of CatDoes


